1. Welcome to Tacoma World!

    You are currently viewing as a guest! To get full-access, you need to register for a FREE account.

    As a registered member, you’ll be able to:
    • Participate in all Tacoma discussion topics
    • Communicate privately with other Tacoma owners from around the world
    • Post your own photos in our Members Gallery
    • Access all special features of the site

The ultimate headlight upgrade H4 (not LED or HID)

Discussion in '2nd Gen. Tacomas (2005-2015)' started by crashnburn80, Oct 27, 2015.

  1. Mar 20, 2021 at 9:30 AM
    #3661
    Too Stroked

    Too Stroked Well-Known Member

    Joined:
    Jan 24, 2017
    Member:
    #208501
    Messages:
    3,724
    Gender:
    Male
    First Name:
    Tom
    South shore of Lake Ontario
    Vehicle:
    2021 4Runner SR5 Premium
    We can talk you through it. There's no heavy lifting. Just some 10mm bolts that have to come out to move the washer fluid reservoir, then a fiddly part about getting the bulbs out. I've done it waaay too many times.
     
  2. Mar 20, 2021 at 10:47 AM
    #3662
    FastEddy59

    FastEddy59 TTC #0061

    Joined:
    Jan 20, 2017
    Member:
    #208155
    Messages:
    24,499
    Gender:
    Male
    First Name:
    Eddie
    Smack, Dab in the middle of Winnipeg
    Vehicle:
    '13 Barc. Red Tacoma SR5 4X4
    Rigid 23004 Radiance light bar Cheap 3K 18W LED Fogs General AT-2's Pioneer AVH4200NEX w/ iDatalink JL XD5003V2 Focal 165KRX2's JL 10TW3 Arcticstart 803
    Gotta try that. Would kinda give a whole new meanin’ to the term “Well lit”. :bananadead:
     
  3. Mar 20, 2021 at 11:29 AM
    #3663
    wdb

    wdb intolerance intolerant

    Joined:
    Jun 11, 2014
    Member:
    #131735
    Messages:
    4,618
    Gender:
    Male
    First Name:
    Dave
    the perimeter
    Vehicle:
    plain jane
    Hella 4000 eurobeams, Amp Bed Step, IamMrYo mirror riser, Wet Okoles, HomerTaco satoshi, retrofit intermittent wipers & backup camera
    Which is why I mentioned better lighting being even more important. As for the contortion part, I gave up on our station wagon and dropped the inner fender liner to get at the darn thing! I did bulbs on the Taco too but it was a few years ago and I don't remember how wonderful it was. One of the better aspects of getting older -- forgetting the miserable jobs. ;)
     
    Crow Horse and CraigF like this.
  4. Mar 20, 2021 at 3:13 PM
    #3664
    ARoman83

    ARoman83 Well-Known Member

    Joined:
    Jun 10, 2017
    Member:
    #221193
    Messages:
    534
    Gender:
    Male
    First Name:
    Alex
    Wisco
    Vehicle:
    '15 TRD OR DCSB PreRunner
    Only legal stuff
    So I did a retro fit on some after market headlights with all the "fancy" stuff. The lights look awesome, output is WAY better than stock, however, I can not get them to align right and they FLICKER! It drives me crazy, passengers can't seem to notice it, but I do, I actually find myself looking for it every time I'm driving on rough roads. So, I decided to refurbish my OME stock housing and add this awesome mod!


    20210320_170830.jpg
     
  5. Mar 20, 2021 at 3:14 PM
    #3665
    ARoman83

    ARoman83 Well-Known Member

    Joined:
    Jun 10, 2017
    Member:
    #221193
    Messages:
    534
    Gender:
    Male
    First Name:
    Alex
    Wisco
    Vehicle:
    '15 TRD OR DCSB PreRunner
    Only legal stuff
    Does anyone have a link to a thread or YouTube link on applying the 2k clearcoat?!
     
  6. Mar 20, 2021 at 4:19 PM
    #3666
    Toy_Runner

    Toy_Runner Well-Known Member

    Joined:
    Nov 19, 2019
    Member:
    #311172
    Messages:
    794
    Gender:
    Male
    Vehicle:
    99 4Runner SR5
    3" OME lift, heavy coils f/r 3/16" steel skids Modified Coastal Offroad diy bumper 5spd swap ('98 donor)
    You're going to want a well ventilated area to spray it. And a (preferably) a full-face respirator with organic chem vapor cartridge filters. At least a half face and eye goggles.

    As far as the flickering goes, what ballast did you have, and did you try to change to a different ballast at any point?

    What projectors did you end up going with for that mod?
     
    ARoman83[QUOTED] likes this.
  7. Mar 20, 2021 at 4:32 PM
    #3667
    ARoman83

    ARoman83 Well-Known Member

    Joined:
    Jun 10, 2017
    Member:
    #221193
    Messages:
    534
    Gender:
    Male
    First Name:
    Alex
    Wisco
    Vehicle:
    '15 TRD OR DCSB PreRunner
    Only legal stuff
    I have an appropriate respirator for the task! I have the Morimoto D2S projectors with the 35w ballast. I never tried the 55w ballast.
     
  8. Mar 20, 2021 at 9:00 PM
    #3668
    Toy_Runner

    Toy_Runner Well-Known Member

    Joined:
    Nov 19, 2019
    Member:
    #311172
    Messages:
    794
    Gender:
    Male
    Vehicle:
    99 4Runner SR5
    3" OME lift, heavy coils f/r 3/16" steel skids Modified Coastal Offroad diy bumper 5spd swap ('98 donor)
    I wouldn't necessarily suggest a 55w ballast, just try different (preferably some sort of OEM) ballast. It may be the result of a bad batch of electronics from morimotos suppliers.
     
    ARoman83[QUOTED] likes this.
  9. Mar 21, 2021 at 2:37 AM
    #3669
    ARoman83

    ARoman83 Well-Known Member

    Joined:
    Jun 10, 2017
    Member:
    #221193
    Messages:
    534
    Gender:
    Male
    First Name:
    Alex
    Wisco
    Vehicle:
    '15 TRD OR DCSB PreRunner
    Only legal stuff
    I think I'll rework my retro's once I get my Stock lights back on. Sanding and coating the lens looks super easy, watched a couple videos!
     
  10. Mar 21, 2021 at 11:34 PM
    #3670
    crashnburn80

    crashnburn80 [OP] Vehicle Design Engineer

    Joined:
    Jun 6, 2015
    Member:
    #156893
    Messages:
    14,593
    Gender:
    Male
    Kirkland, WA
    Vehicle:
    2003 DCSB TRD OR
    Go Hawks!
    Let us know what you think after getting this installed. There is something to be said for the KISS principle, using legitimate high quality OEM grade components vs knock off grade China ballasts and bulbs.
     
    ARoman83[QUOTED] likes this.
  11. Mar 22, 2021 at 4:40 AM
    #3671
    ARoman83

    ARoman83 Well-Known Member

    Joined:
    Jun 10, 2017
    Member:
    #221193
    Messages:
    534
    Gender:
    Male
    First Name:
    Alex
    Wisco
    Vehicle:
    '15 TRD OR DCSB PreRunner
    Only legal stuff
    Will do!
     
  12. Mar 22, 2021 at 8:42 AM
    #3672
    TacoFergie

    TacoFergie Well-Known Member

    Joined:
    Dec 21, 2015
    Member:
    #172832
    Messages:
    1,301
    Gender:
    Male
    First Name:
    Chris
    Iowa
    What brand and model projectors, ballasts and bulbs did you use? This can make a big difference.

    Aligning them can be a pain, especially if it's your first time and height adjusters can be sub-par on aftermarket headlight assemblies.

    As for restoring your OEM lens. Here are the steps and how I have done it many time. Like others have said about the 2K clear, do it outside if possible or with a strong exhaust fan in a garage. Do not attempt inside a house.

    - Supplies
    - Spray bottle with water and 1-2 DROPS of dawn dish soap, not more than 2 drops!
    - Soft sanding pad to ensure you are using equal pressure, not needed but helpful. Many auto stores have these or something similar https://www.amazon.com/Motor-Guard-...ords=soft+sanding+block&qid=1616424655&sr=8-2
    - 340, 600, 800, 1500, 2500 sand paper. Preferably an Automotive body grade, but doesn't have to be. If you have a 3M 3" Trizac discs or something similar, that works much better but is expensive if this is the only project its being used on, use lighter pressure than by hand and don't let the disc sit in one spot...keep it moving slowly.
    - 3" (or larger if you already have it) foam buffing pad that can go on a drill or DA polisher. Something like this https://www.amazon.com/Kshineni-Buf...id=1616424874&sprefix=3"+poli,aps,217&sr=8-16
    - 91% Isopropyl Alcohol or Autobody Wax/Grease remover. This is for prep and I haven't noticed any different outcome.
    - Polishing compound of your choice. I prefer Meguiars M105 and M205.
    - Spraymax 2K Clear Glamour (which you obviously already have)
    - Lint free cloth
    - Painters tape, I like 3M blue. Don't care for the green stuff.

    - Process
    - Remove headlights from truck (obviously yours already are).
    - Dry sand with 340 until ALL factory clear coat is gone. You'll be able to tell after wiping with your prep chemical as there will be no glossy surface left over.
    - Wet sand with 340, just a few sprays of the water/dawn mixture on the lens before sanding. Doesn't need to be soaking wet. Wipe dry and inspect.
    - Wet sand with 600. Wipe dry and inspect that all of the 340 sanding marks are gone.
    - Wet sand with 800. Same as above, wipe dry and inspect that all 600 sanding marks are gone.
    - Wipe with your Alcohol or Wax/Grease remover
    - Tape around the edge of the lens and housing. Not really necessary, but it looks more professional.
    - Setup your painting area
    - Transport your headlights to the painting area and lay them down. I prefer to have them laying on the back with all bulbs in so no overspray get inside. Not likely that will happen..but I like to make sure it won't.
    - Wipe again with your Alcohol or Wax/Grease remover.
    - READ INSTRUCTIONS ON THE 2K CLEAR GLAMOUR AND FOLLOW THEM!!! I know, we are men and we know better than the instructions....but not this time! haha
    - Mix your 2K Clear at this time.
    - Spray a light tack coat on the headlight while walking around making sure you get a nice even coat all around, it won't be clear yet...don't worry.
    - Spray another coat and it will get almost crystal clear.
    - Re-spray with following coats according to the cans instructions until you've used as much of the can as possible, once you get towards the end it may starts to splatter. You can stop now. It will likely be 4-6 coats total by my experience. After about 15-20 min your final coat, remove the masking tape carefully. Don't wait till its dry, way too hard.
    - Let dry per instructions on can.
    - Stop here and continue at the next bold print if you don't have any runs, drips or orange peel/texture.
    - Don't worry about any runs or orange peel like texture, this is wha the 1500/2500 and polish is for.
    - IF you had any runs or orange peel use your water/dawn and wet sand with 1500 with light pressure. As long as you use your soft sanding pad you won't go through the clear as 1500 doesn't remove much material when wet sanding. Dry it off and inspect for high and low spots. What you're looking for is the whole thing to be equally hazy, low spots will still be glossy. You will have quite a bit of clear coat thickness as you did many coats. Spraymax claims 2 coats after flash is .04-.06mm, so assuming 4-6 coats you'll have as much as .18mm of thickness which is a lot for clear coats.
    - Wet sand with 2500 like above and inspect like above after drying.
    - Time to polish!
    - Polish with M105 Cutting compound assuming this is what you have) to clear up the sanding. Wipe with your Alcohol or Wax/Grease Remover. You may have to do this twice to get it nicely poished.
    - Polish with M205 Finishing polish to really make it crystal clear!!
    - Re-install your headlights, ensure adjustment is good and drive on without having to worry about your headlights for 10+ years!!!!

    I know this looks like a tedious lengthy process but it's not bad. The sanding and prep process takes an hour or less and applying the 2K clear takes as long as however many coats it takes.
     
    ARoman83[QUOTED] likes this.
  13. Mar 22, 2021 at 12:23 PM
    #3673
    rphillips

    rphillips Well-Known Member

    Joined:
    Sep 14, 2016
    Member:
    #197271
    Messages:
    1,068
    Gender:
    Male
    First Name:
    Rick
    Norene TN.
    Vehicle:
    2013 Reg. cab 4x4
    none
    You asked, "What brand & model projectors, ballast, & bulbs did you use". Are we switching this thread away from the orig. (Not LED or HID) title? I was thinking the projectors use LED & HID & reflectors were to use halogen bulbs. The more I read the more confused I get.
     
  14. Mar 22, 2021 at 1:10 PM
    #3674
    TacoFergie

    TacoFergie Well-Known Member

    Joined:
    Dec 21, 2015
    Member:
    #172832
    Messages:
    1,301
    Gender:
    Male
    First Name:
    Chris
    Iowa
    This thread is about Halogen replacement bulbs, yes. I know it is off-topic. But he an issue with his projector retrofit, so I thought I would try and help if he still wanted to use his retrofit.

    Brand is very important when it comes to retrofitting as well as what model projector. They can be either LED or HID. If they are HID it is extremely crucial to use a quality bulb and ballast, similar to how brand and model is important to halogen. With HID's it highly recommended not to use a 50w ballast as you will simply be replacing the bulb and the projector more often. An HID bulb emits UV rays unlike a halogen. The higher wattage the ballast, the more UV rays a bulb puts out. If you have an HID bulb with no UV coating (like Amazon/ebay/ddm/etc) it will start to diminish your light output even faster. When a projector bowl "burns" it is due to the UV rays, not heat like many think.

    We can return to our regular halogen program now.
     
    This site contains affiliate links for which the site may be compensated.
    Toy_Runner likes this.
  15. Mar 22, 2021 at 5:23 PM
    #3675
    ARoman83

    ARoman83 Well-Known Member

    Joined:
    Jun 10, 2017
    Member:
    #221193
    Messages:
    534
    Gender:
    Male
    First Name:
    Alex
    Wisco
    Vehicle:
    '15 TRD OR DCSB PreRunner
    Only legal stuff
    It is a little bit off topic, not much as we are still talking headlights.
     
  16. Mar 22, 2021 at 5:27 PM
    #3676
    ARoman83

    ARoman83 Well-Known Member

    Joined:
    Jun 10, 2017
    Member:
    #221193
    Messages:
    534
    Gender:
    Male
    First Name:
    Alex
    Wisco
    Vehicle:
    '15 TRD OR DCSB PreRunner
    Only legal stuff
    Thanks for this detailed information! I will be doing this this weekend, I'm excited to see the outcome. As far as my retro's it was all from the retro source, not cheap lol But I am more about functionality over looks! I believe this mod will be what I'm looking for.
     
    TacoFergie[QUOTED] likes this.
  17. Mar 22, 2021 at 5:55 PM
    #3677
    TacoFergie

    TacoFergie Well-Known Member

    Joined:
    Dec 21, 2015
    Member:
    #172832
    Messages:
    1,301
    Gender:
    Male
    First Name:
    Chris
    Iowa
    I've posted this process a handful times on TW, which is fine since I like teaching people useful stuff. The next time I do a set of headlights I'm going to do a DIY post for it. The question comes up frequently and it is nerve racking the first time you do it. But once you do it you catch on really quick and see what works for you.
     
    daveeasa likes this.
  18. Mar 22, 2021 at 6:38 PM
    #3678
    rphillips

    rphillips Well-Known Member

    Joined:
    Sep 14, 2016
    Member:
    #197271
    Messages:
    1,068
    Gender:
    Male
    First Name:
    Rick
    Norene TN.
    Vehicle:
    2013 Reg. cab 4x4
    none
    Still even more confused, I thought xenon lights were HID but now I find evidently some xenons are are HID & some are halogen. So if it doesn't say HID nor LED on the package I presume they are OK for my reflectors. I've found some 75/70w H4's I may just plug in to see what happens. Hopefully not enough more amp draw to overload the orig. harness.
     
  19. Mar 22, 2021 at 7:01 PM
    #3679
    Norton

    Norton Senior Member

    Joined:
    Mar 10, 2011
    Member:
    #52729
    Messages:
    4,585
    Gender:
    Male
    First Name:
    Steve
    Colorado Springs, CO
    Vehicle:
    2013 Access Cab 4x4 V6 6MT, TRD OR & Tow Packages
    Magnuson S/C w/12TRDTacoma's Qwikchange Hub & 2.5" RIP-Modded Pulley, Roostfactor's Pulley Wrap Mod; FPR Mod; JustDSM Tune via HPT MPVI2; mightytacoman Intercooler Tank; aFe POWER Magnum FLOW Pro DRY S Air Filter; OME Suspension Lift (885 Coils, Dakar Leafs, NitroCharger Sports); TRD Quickshifter w/TRD 6-Spd Knob; TRD Exhaust; NSB-AGM27F Battery w/HKB Adjustable Voltage Booster & Coupe's TRD Battery Hold Down; Goodridge SS Brake Lines; Trident904's MT ADM; BFG All-Terrain T/A KO2s on FJ SE Anthracite Rims; N-Fab 6-Step Nerf Bars; BPF TRD Skid, Tow Hook, & Cooling Panel; jsi's Locker Anytime, Up2NoGood's 2Lo Module; ramonortiz55's Always on Power Outlet Relay, ND4's Fog Light Anytime, & Crom's Speed Bleeder Mods; crashnburn80's Ultimate Headlight & Fog Light Upgrades; ThreatLevelMidnight's Wireless Charger; 4Runner 4X4 & FJ Fog Light Switches; redtaco2007-inspired LED License Plate Lights; AudioControl LC2i LOC, JL Audio XD200/2v2 Amp, Focal PS165V1 Spkrs, Sound Ordnance B-8PTD Sub, Hushmat & Noico Sound Insulation; loginfailed-inspired Speedhut Boost & AFR Gauges in a Lotek Pillar Pod; Ltd Auto-Dim/Compass/Temp/Backup Camera/Homelink mirror on ImMrYo's Mirror Lift Bracket; TacomaBeast Glove Box & Console Organizers; Husky Floor Liners; UltraGauge EM; mesojdm's Ultimate LED Dome & Map Lights & GASSHOLE; Redline Tuning QuickLIFT Elite; Mobtown Offroad Locking Bed Storage Doors; Toyota Bed Mat; Cali Raised Led Bed Stiffeners; Pop & Lock Power Tailgate Lock w/TacomaTruckParts Support Bracket; ARE Z-Series Cap, SolarGard Tint; BlendMounted & MirrorTapped Uniden R3; CravenSpeed Stubby Antenna; Amsoil Lubricants; Adam's Detailing Supplies
    Whether you're committed to staying on your stock harness or upgrading it, make it easy on yourself - don't worry about 183 pages of this thread. Post #1 contains what you need to know. Based on your implied desire to stay on the stock harness, here's what you need to know...
     
    BenMara likes this.
  20. Mar 22, 2021 at 7:18 PM
    #3680
    TacoFergie

    TacoFergie Well-Known Member

    Joined:
    Dec 21, 2015
    Member:
    #172832
    Messages:
    1,301
    Gender:
    Male
    First Name:
    Chris
    Iowa
    So HID and xenon are the same. HID's are always going to be long/skinny, has a small glass capsule inside, has a small wire is outside the bulb that runs from the base of the bulb to the tip and require a ballast. Some Halogen manufactures label them with "xenon" filled gas or "xenon" white. Which is mostly an advertising ploy and rarely adds anything OR they advertise it as xenon because of the color of the coating, so it's xenon colored. LED's are pretty self explanatory and you quickly know what they are because the advertising is outrageous and sometimes hilarious.

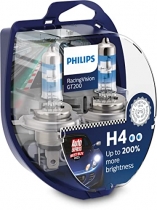
    The only stock wattage bulbs I would run are Philips Racing Vision. https://www.powerbulbs.com/us/product/philips-racingvision-gt200-h4-twin

    [​IMG]

    If you want higher wattage, then you'll want to follow the first page. I haven't followed the higher wattage much since the best bulb is no longer available.

    Here is an HID bulb. Notice the strange design like I explained earlier? If it is advertised as an H4 HID then they look very strange and have a shield around it to attempt to maintain a beam pattern and provide a high beam. More to that if you're interested.

    [​IMG]

    This is what is advertised as a "Xenon white" bulb by Hella. They advertise it as such since it is more of a blue light like HID's. Notice how crappy it looks? Very much out of proper alignment. Pretty sad if you ask me.

    [​IMG]
     

Products Discussed in

To Top