

-
Welcome to Tacoma World!
You are currently viewing as a guest! To get full-access, you need to register for a FREE account.
As a registered member, you’ll be able to:- Participate in all Tacoma discussion topics
- Communicate privately with other Tacoma owners from around the world
- Post your own photos in our Members Gallery
- Access all special features of the site
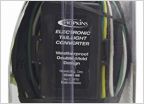 Adding a trailor- how to hook up lights
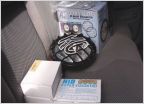 KC HiLiTES 801 Rally or Hella Rally 4000
 What do you guys think of this LED light bar?
 Stealth Light Bar Project
 Headlight led questions/brands of lights.
 Switch-Pros 9100/RCR-FORCE 12 mounting solution for 2023 Tacoma
Meso Customs BD4 Third Brake Light Install - A Layman's Guide
Discussion in 'Lighting' started by Pantone2718, Aug 12, 2021.


