1. Welcome to Tacoma World!

    You are currently viewing as a guest! To get full-access, you need to register for a FREE account.

    As a registered member, you’ll be able to:
    • Participate in all Tacoma discussion topics
    • Communicate privately with other Tacoma owners from around the world
    • Post your own photos in our Members Gallery
    • Access all special features of the site

Airkewled's 2006 DCSB

Discussion in '2nd Gen. Builds (2005-2015)' started by airkewled, Jul 27, 2017.

  1. May 27, 2021 at 5:25 PM
    #21
    airkewled

    airkewled [OP] Well-Known Member

    Joined:
    Jan 25, 2016
    Member:
    #176025
    Messages:
    165
    Gender:
    Male
    First Name:
    Kevin
    Moab
    Vehicle:
    2006 Tacoma DCSB
    Installed the door hold open fix thing from @plasticauto on ebay. If you recall I'd tried to fix this exact part by plastic welding in more material which worked but eventually wore down as well. This kit replaces the plastic pieces that interface with the composite sliding rod thing. Works great even though my detents on the sliding rod are worn down some.

    The kit contents
    [​IMG]

    The force required before
    [​IMG]

    The part you have to take apart
    [​IMG]

    The pieces that wear down and you replace with this kit
    [​IMG]

    The force required to start closing after
    [​IMG]
     
    This site contains affiliate links for which the site may be compensated.
    #21
  2. May 27, 2021 at 5:34 PM
    #22
    airkewled

    airkewled [OP] Well-Known Member

    Joined:
    Jan 25, 2016
    Member:
    #176025
    Messages:
    165
    Gender:
    Male
    First Name:
    Kevin
    Moab
    Vehicle:
    2006 Tacoma DCSB
    Installed on board air (OBA for the cool kids) using Expedition Essentials behind the bed mount which worked out nice and slick.
    Ran big wire off of a circuit breaker from the engine bay, along the frame rail and to a distribution box that I fitted in the place of one of the bed cubbies.

    The dual takes about 2 minutes from 10psi to 30 on 32" tires.
    [​IMG]

    Distribution box. Figured I might want to add on other things back here so fuse box too
    [​IMG]

    With a tinted cover it blends in nice
    [​IMG]

    I guess I didn't take any of the compressor installed. Um it looks like the cubby thats on the driver side. Door fits great, I grinded the trim ring on the door so I didn't use a spacer at all. No drama. It's wired up so the compressor can only be turned on when the ignition is on.
     
    T.Barn likes this.
  3. May 27, 2021 at 5:41 PM
    #23
    airkewled

    airkewled [OP] Well-Known Member

    Joined:
    Jan 25, 2016
    Member:
    #176025
    Messages:
    165
    Gender:
    Male
    First Name:
    Kevin
    Moab
    Vehicle:
    2006 Tacoma DCSB
    Uh yeah, put in new U-Joints. All 5 of them. I only wanted to replace the center carrier bearing but well you know how that goes.
    Spicer everywhere. Make sure for the rear to get the spicers with the zerks on the end caps.. pn 5-1330-1x if you're lazy and the ball/u-joint tool that you can get on loan from the autoparts store is the tits for doing this. No banging, no tryna wrestle with it in the vise.

    [​IMG]

    New and pretty. Put a coat of enamel on it too cause, shiny?
    [​IMG]

    The rear has zerks on the end cap, not out the middle spider thing. Also.. for you OCD type :cough: line up all the zerks so they're in the same clock position.
    [​IMG]
     
  4. May 27, 2021 at 5:46 PM
    #24
    airkewled

    airkewled [OP] Well-Known Member

    Joined:
    Jan 25, 2016
    Member:
    #176025
    Messages:
    165
    Gender:
    Male
    First Name:
    Kevin
    Moab
    Vehicle:
    2006 Tacoma DCSB
    Replaced the spark plugs with denso K20HR-U11. Ran fine but old ones seem a bit worn out. I hadn't done them since I had the truck ~50-60k so who knows. Gap was about 2x what it should have been with the electrode and center ground worn quite a bit. All were about even though so I take that as a good sign. While there, did the air filter, which I do semi regularly. ( a fella could put this on a calendar or something but aint got time for that. I can barely update the internets with all the cool mods afterall )

    This guide is good for this job. https://www.tacomaworld.com/threads/how-to-spark-plug-change-1-gr-fe.30479/

    Old plugs. Kinda gunked in on the treads. Dunno if someone used grease to put these in with and that's cooked grease or what the heck.
    [​IMG]

    Old vs new. So far after 2 tanks, old plugs and old filter got 2mpg more. Eh. 19.4 vs 17.7
    [​IMG]
     
  5. Aug 3, 2021 at 5:21 PM
    #25
    airkewled

    airkewled [OP] Well-Known Member

    Joined:
    Jan 25, 2016
    Member:
    #176025
    Messages:
    165
    Gender:
    Male
    First Name:
    Kevin
    Moab
    Vehicle:
    2006 Tacoma DCSB
    Started my 2.0 to 2.5 front end swap

    Got a good deal on these scratched up OEM headlights

    [​IMG]

    So I sanded them down (cycle enthusiasts might get the "sandra" bucket joke)
    [​IMG]

    After sanding to 1200
    [​IMG]

    Built a paint booth in the garage
    [​IMG]

    Turned out pretty good... the second time. First time I had contaminates that gave me little fisheyes I think they're called so I sanded back down and re-did it.
    [​IMG]

    [​IMG]

    I'm doing the painting myself and I'm a total noob... er I mean I'm 100% pro since I watch The Gunman on YT. To practice, I decided to paint the 2.0 hood. It was badly sun damaged but otherwise in good shape.

    Took it down to bare
    [​IMG]

    etched and primed
    [​IMG]

    Base and clear
    [​IMG]

    2000 grit and polish. Honestly I'm not sure if that made much of a difference. Looked good before and good after. Eh. I needed the spa time at 100 degrees inside the paint tent working the polisher.
    [​IMG]

    Started the swap
    [​IMG]

    [​IMG]

    Parts labeled what's what. It gets a little confusing at least for simpletons like me who were trying to have every part required before starting this project
    [​IMG]

    *** distraction ***
    With the bumper off, I spy a good spot to mount my winch controller. I put the relays in a waterproof box and made an extension cable for the controller plug. This was a bit of a sub-project... Before you go an say... dang I wish I had the tools to do this... um, i was cross legged on the garage floor stick welding this.. so nothing fancy here.

    [​IMG]

    [​IMG]

    *** end distraction ***

    I should say during this facelift process I ended up deadlifting this friggin Pelfrey Built bumper about 1000 times. (accurate number, I'm much sure about)

    [​IMG]

    And getting closer
    [​IMG]

    Time for another sub-project. Er, scratch that, it's not a sub of the facelift at all. Totally unrelated.

    Torn CV boot. So time to reboot them. Ordered the OE reboot kits.
    [​IMG]

    And "while I'm there already" *freak* myswell do the needle bearing to bushing thing.
    [​IMG]

    [​IMG]

    Really not that bad of a mess all things considering. I've had CV messes be FAR worse.
    [​IMG]

    Now I need to figure a way to attach the lower part of the new grill. Got some idea from forum members here on how it attached when running OE bumper so that's a good start.

    Then I need to paint the fillers that go below the headlights. They're plastic so I had to get different primer and now it's monsoon season and I'm without an air dryer so I'm waiting on painting more.

    I think I'll wait till after all the pieces are painted and it's mostly back together... but I need to decide if the bumper is going to take more customizing to fit/flow with the 2.5 front end. It's a Pelfrey bumper and IIRC the 2.5 bumpers had little triangle flip up bits whereas the 2.0 versions are just flat all the way across.

    So far all I've done to make it fit, was trim about 1" off the backside of the main flat surface part since the 2.5 stuff sticks out forward of the truck just a little bit more than the 2.0
     
  6. Aug 11, 2021 at 9:18 AM
    #26
    airkewled

    airkewled [OP] Well-Known Member

    Joined:
    Jan 25, 2016
    Member:
    #176025
    Messages:
    165
    Gender:
    Male
    First Name:
    Kevin
    Moab
    Vehicle:
    2006 Tacoma DCSB
    Painted the headlight fillers and the Meso 3rd brake light housing.

    [​IMG]

    [​IMG]

    [​IMG]
     
  7. Aug 11, 2021 at 9:26 AM
    #27
    airkewled

    airkewled [OP] Well-Known Member

    Joined:
    Jan 25, 2016
    Member:
    #176025
    Messages:
    165
    Gender:
    Male
    First Name:
    Kevin
    Moab
    Vehicle:
    2006 Tacoma DCSB
    Put spiker engineering hood struts on the new 2.5 gen hood. The ribs that the strut mount attaches to on the hood is less vertical on the 2.5 gen hoods so I put a small bend in the mount plate before bolting them in. Else no issues. Using the rivnuts made switching them over a breeze

    [​IMG]

    [​IMG]

    [​IMG]
     
    SpikerEng and davidstacoma like this.
  8. Aug 12, 2021 at 10:06 AM
    #28
    airkewled

    airkewled [OP] Well-Known Member

    Joined:
    Jan 25, 2016
    Member:
    #176025
    Messages:
    165
    Gender:
    Male
    First Name:
    Kevin
    Moab
    Vehicle:
    2006 Tacoma DCSB
    Blacked out the KC lights with Krylon and wiped the LEDs clean with acetone, thanks @MESO for that tip, and clocked the lenses so the logos are all at 12 o-clock.
    [​IMG]

    [​IMG]

    [​IMG]

    [​IMG]

    This lil brake light flasher came in the mail too.
    Pretty pumped to use this. Made in USA even. It will allow me to set a flash pattern for the 3rd brake light. There are cheaper and more expensive options but this was what I found that allowed me to get my desired pattern. I'll try and hide a pushbutton in place of one of the KC light mounting screws for the setting the modes.

    [​IMG]
     
    MESO likes this.
  9. Aug 18, 2021 at 8:52 PM
    #29
    airkewled

    airkewled [OP] Well-Known Member

    Joined:
    Jan 25, 2016
    Member:
    #176025
    Messages:
    165
    Gender:
    Male
    First Name:
    Kevin
    Moab
    Vehicle:
    2006 Tacoma DCSB
    Small "squirrel" incident here.

    So I have a new aftermarket radio to install, but, it comes with a black surround and well that would clash with silver climate controls. I thought I was unique and clever in noticing that the climate controls from the 2015 that I bought my hood from were black and looked about the same size but nope, someone of course has already figured this out. In any case I had purchased the 2015 climate controls and the pigtail and even tried to source the connectors before I found the thread on TW where this has already been done.

    I ordered the connectors from easternbeaver which came actually pretty quickly and made up an adapter harness today. I bought enough components to build up 2 extra so I'll post those up for sale if anybody wants. The only odd thing I noticed is that some of the directions on that thread showed pin 16 being used on the 2012+ climate control and that is not accurate from my research in wiring diagrams and from comparing the OEM pigtail.

    First, updated the from---to pinout guide after validating it against wiring diagrams
    [​IMG]

    Sanity check with the OEM 2015 plug. If you're ??? it's reversed. The paper is showing looking from the front of the connector. So looking at the picture, pin 16 on the connector is bottom left, while on the paper is bottom right.
    [​IMG]

    All the kit prepped.
    [​IMG]

    Lucked out I had a molex crimper that worked pretty darn good. If you're thinking, "oh I can just make due with pliers or solder it" for-get-about-it. On the 2012+ side these are pretty small pins and you can't d*ck them up or they won't fit into the connector
    [​IMG]

    All the wires set. There's no assembly instructions for these sumitomo connectors but after staring at them long enough I arrived that the larger pins for the gen 2.0 clip in only one way and the gen 2.5 tiny pins have a small wing on one corner of the square pin that mates with a grove in the connector.
    [​IMG]

    Trial run. All good. All the things come on, fan speeds work, vent control work. Hate to say it "worked first try". Jinx
    [​IMG]

    So taped it up with that fancy cloth wire tape stuff
    [​IMG]

    Tucked in the OE connector and both connections are about equal length then
    [​IMG]

    And... old
    [​IMG]

    New... which will obviously look more in home once the rest of the plastics in that general area are black as well.
    [​IMG]
     
    caffiend likes this.
  10. Aug 19, 2021 at 2:52 PM
    #30
    airkewled

    airkewled [OP] Well-Known Member

    Joined:
    Jan 25, 2016
    Member:
    #176025
    Messages:
    165
    Gender:
    Male
    First Name:
    Kevin
    Moab
    Vehicle:
    2006 Tacoma DCSB
    Made up brackets for the lower grill to attach to. 16ga steel bent and slotted so the grill tabs slide and clip in. Feels more solid now.

    No grill
    [​IMG]

    From the front
    [​IMG]

    From the rear facing forward
    [​IMG]
     
  11. Sep 4, 2021 at 4:49 PM
    #31
    airkewled

    airkewled [OP] Well-Known Member

    Joined:
    Jan 25, 2016
    Member:
    #176025
    Messages:
    165
    Gender:
    Male
    First Name:
    Kevin
    Moab
    Vehicle:
    2006 Tacoma DCSB
    Getting back to my 2.5 gen black HVAC panel. I found that my hot and cold were reversed. So when the dial was in the cold position, hot air was coming out, and when rotated to the hot position cold air was coming out. At first I thought I messed up my wiring so I double, triple and quadruple checked it. Next I measured the ohm reading between pin 6 and 9 on my adapter harness, which is between ground and AMSW. On my 2006 dial the cold position was highest ohm ~9.3k going and dropping to ~4.7k at full hot however on the 2015 panel, this was reversed, with cold being ~4.7k and at hot being ~9.5k. Hmm.

    Learned my lesson before, so did a quick google and tacomaworld confirmed my suspicions and I found @db2 great post here 24 .

    I followed these directions and tested and sure enough that fixed it. If your intimidated by this, I wouldn't worry too much. Cutting the traces and flip-flopping these two is way easier than making the adapter cable with those tiny pins and the A33 connector.

    Instead of doing the trace criss cross you may also be able to swap in the 2006 potentiometer to the gen 2.5 PCB as @fbconvert notes in their post here

    If you're taking the HVAC panel apart, you gotta take off the fan speed backing to access a hidden screw
    [​IMG]

    With fat trace up
    [​IMG]

    Cut the traces and test that it's fully severed. I used a dremel with a small bit to cut through the trace
    [​IMG]

    Severed and scraped clean
    [​IMG]

    Fluxed and tinned with solder. Tinning just means putting a little solder in place first, before you attach the wire. It makes it much easier to attach the wire when it comes time and reduces the amount of time you have to hold the solder pencil to the part
    [​IMG]

    Did the old criss cross here.
    [​IMG]

    Closer up
    [​IMG]

    And after testing, re-taped my adapter cable. It was fine the whole time but hey, super duper sure now :thumbsup:
    [​IMG]
     
    Last edited: Sep 4, 2021
  12. Sep 28, 2021 at 6:57 PM
    #32
    airkewled

    airkewled [OP] Well-Known Member

    Joined:
    Jan 25, 2016
    Member:
    #176025
    Messages:
    165
    Gender:
    Male
    First Name:
    Kevin
    Moab
    Vehicle:
    2006 Tacoma DCSB
    Fixed a critical flaw in the dash area thanks to @rcbs204
    Check out this thread to fix your flaw too! https://www.tacomaworld.com/threads/rcbs204-4x4-illuminated-switch.68173/

    Course I had to change out the amber for red LEDs. No prob, I got hooked up with the right ones to order and soldered those lil bìtches right on.
    [​IMG]
    [​IMG]

    While in the dash, I found this mofo. WTF peeps? When you remove an alarm sys, would you kindly take your crāp with you?
    [​IMG]

    Anywhooooo, to tap into the illumination wires... the harness from the switch doesn't point in the right direction so my OCD had me follow the loom up to the main loom on the dash bar, and over to the instrument cluster. Curiously G and G-W are not the correct wires at that connector, there you need G and B-W. No problem. Got that all sorted
    [​IMG]

    And here's the onoff porn you all came here for. (don't pretend not to know what i'm talking about)

    Before
    [​IMG]
    After
    [​IMG]
     
    rcbs204 likes this.
  13. Sep 30, 2021 at 11:55 AM
    #33
    airkewled

    airkewled [OP] Well-Known Member

    Joined:
    Jan 25, 2016
    Member:
    #176025
    Messages:
    165
    Gender:
    Male
    First Name:
    Kevin
    Moab
    Vehicle:
    2006 Tacoma DCSB
    Painted my 2015 hood.

    [​IMG]

    [​IMG]

    [​IMG]

    [​IMG]

    [​IMG]

    [​IMG]

    I'll skip the part where I think I didn't wait long enough after base before spraying clear and the paint boiled on me and I had to resand it all down and start over.... :mad:


    So I guess that's it for the front end conversion.

    Before
    [​IMG]

    After
    [​IMG]
     
    hinmo24t and Road_House like this.
  14. Sep 30, 2021 at 5:59 PM
    #34
    rcbs204

    rcbs204 Well-Known Member Vendor

    Joined:
    Oct 2, 2009
    Member:
    #23681
    Messages:
    3,955
    Gender:
    Male
    Looking good Kevin!
     
    airkewled[OP] likes this.
  15. Oct 27, 2021 at 7:04 PM
    #35
    caffiend

    caffiend Well-Known Member

    Joined:
    Jun 22, 2020
    Member:
    #332247
    Messages:
    144
    Vehicle:
    2007 TRD Sport
    Man I need one of these harnesses!
     
  16. Oct 28, 2021 at 9:01 AM
    #36
    airkewled

    airkewled [OP] Well-Known Member

    Joined:
    Jan 25, 2016
    Member:
    #176025
    Messages:
    165
    Gender:
    Male
    First Name:
    Kevin
    Moab
    Vehicle:
    2006 Tacoma DCSB
    @caffiend if you're serious about that LMK.
     
    caffiend likes this.
  17. Mar 30, 2022 at 3:57 PM
    #37
    airkewled

    airkewled [OP] Well-Known Member

    Joined:
    Jan 25, 2016
    Member:
    #176025
    Messages:
    165
    Gender:
    Male
    First Name:
    Kevin
    Moab
    Vehicle:
    2006 Tacoma DCSB
    PS pump was whining again so flushed it out real good and she's happy again.
    Also due for a 60k A/T fluid change so got on that. First drain and fill was looking a bit dark so went ahead and did it two more times and did a filter change too while I was there.

    [​IMG]

    [​IMG]

    [​IMG]

    [​IMG]


    Noticed my serpentine belt was looking a little crusty so replaced that too. No drama. Do it from the bottom and save yourself cursing.
    [​IMG]


    Oh, and RCV and Marlin showed up on the same day. Nice Nice.
    [​IMG]
     
  18. Apr 11, 2022 at 2:42 PM
    #38
    airkewled

    airkewled [OP] Well-Known Member

    Joined:
    Jan 25, 2016
    Member:
    #176025
    Messages:
    165
    Gender:
    Male
    First Name:
    Kevin
    Moab
    Vehicle:
    2006 Tacoma DCSB
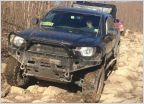
    It's not all work. Went out exploring Goldbar to Golden Spike just past the crack and back. Armor was used but did pretty great for being stock.

    [​IMG]

    [​IMG]

    [​IMG]
     
  19. Jul 27, 2022 at 4:16 PM
    #39
    airkewled

    airkewled [OP] Well-Known Member

    Joined:
    Jan 25, 2016
    Member:
    #176025
    Messages:
    165
    Gender:
    Male
    First Name:
    Kevin
    Moab
    Vehicle:
    2006 Tacoma DCSB
    Installed some sound deadening material. I used Noico Red 150mil foam and Noico 80mil butyl. Focused on the rear of the cab, the roof and the outer skin of the doors. I used a little over a box of each material.

    [​IMG]

    [​IMG]

    [​IMG]

    [​IMG]

    [​IMG]

    [​IMG]
     
  20. Sep 17, 2022 at 5:22 PM
    #40
    airkewled

    airkewled [OP] Well-Known Member

    Joined:
    Jan 25, 2016
    Member:
    #176025
    Messages:
    165
    Gender:
    Male
    First Name:
    Kevin
    Moab
    Vehicle:
    2006 Tacoma DCSB
    HVAC fan started working only on high again. Already milked this thing along for a number of years now, futzing with the fan motor, wiring, connectors, ebay/Amazon fan resistor so just went ahead and got a new OEM fan motor, resistor and resistor pigtail. New connector is different with different colored wires so found this post pretty helpful showing the wire diagrams from old and new. Pretty straight forward from there.

    Still tested it before committing to crimps
    [​IMG]

    Crimped and shrunk

    [​IMG]

    This was the ebay/amazon resistor that lasted oh a year or two?
    [​IMG]

    re-wrapped with cloth loom tape and back installed. Purrs in all speeds now.
    [​IMG]
     
    This site contains affiliate links for which the site may be compensated.
    #40

Products Discussed in

To Top