

-
Welcome to Tacoma World!
You are currently viewing as a guest! To get full-access, you need to register for a FREE account.
As a registered member, you’ll be able to:- Participate in all Tacoma discussion topics
- Communicate privately with other Tacoma owners from around the world
- Post your own photos in our Members Gallery
- Access all special features of the site
 Tweeter wiring colors on my 2nd gen
 Atf bottle pump recommendations?
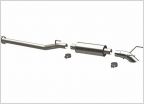 Buyer beware: Magnaflow 17115
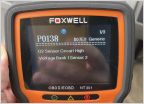 Throwing multiple codes
 Nfab nerfbars, 2 mounting brackets or 3
 Manual transmission fill plug sort of stripped
Droopy sun visors
Discussion in '2nd Gen. Tacomas (2005-2015)' started by gusher, Dec 22, 2009.
Page 5 of 6
Page 5 of 6
Products Discussed in


