1. Welcome to Tacoma World!

    You are currently viewing as a guest! To get full-access, you need to register for a FREE account.

    As a registered member, you’ll be able to:
    • Participate in all Tacoma discussion topics
    • Communicate privately with other Tacoma owners from around the world
    • Post your own photos in our Members Gallery
    • Access all special features of the site

Installing a permanent after market 12V outside temperature gauge

Discussion in '2nd Gen. Tacomas (2005-2015)' started by Oldboatcrap, Feb 13, 2011.

  1. Feb 20, 2011 at 3:44 AM
    #21
    95SLE

    95SLE Starting to get cold outside

    Joined:
    Aug 5, 2009
    Member:
    #20718
    Messages:
    12,207
    Gender:
    Male
    First Name:
    Tom
    Maryland
    Vehicle:
    09 RWD Access Cab
    Custom XM Install, Window Tint, Intermittant Wiper Install, AVS Bug Deflector, Bed Mat, TRS FX-R retrofits, CIBIE fog and spot lamps, PIAA 510 lamps, Acess LE cover, Weathertech Digital floorr mats, LED interior lighting, Pioneer AVH-2300BT HU, Boston Acoustics speakers, JL Audio Amp, shorty antenna, leather wrap steering wheel cover, Viper security system.
     
  2. Feb 21, 2011 at 10:33 AM
    #22
    Oldboatcrap

    Oldboatcrap [OP] Member

    Joined:
    Feb 13, 2011
    Member:
    #51118
    Messages:
    18
    Gender:
    Male
    Massachusetts
    Vehicle:
    SR5 4X4 DOUBLE CAB
     
  3. Feb 21, 2011 at 3:56 PM
    #23
    95SLE

    95SLE Starting to get cold outside

    Joined:
    Aug 5, 2009
    Member:
    #20718
    Messages:
    12,207
    Gender:
    Male
    First Name:
    Tom
    Maryland
    Vehicle:
    09 RWD Access Cab
    Custom XM Install, Window Tint, Intermittant Wiper Install, AVS Bug Deflector, Bed Mat, TRS FX-R retrofits, CIBIE fog and spot lamps, PIAA 510 lamps, Acess LE cover, Weathertech Digital floorr mats, LED interior lighting, Pioneer AVH-2300BT HU, Boston Acoustics speakers, JL Audio Amp, shorty antenna, leather wrap steering wheel cover, Viper security system.
    Very nice use of the space.
     
  4. Feb 21, 2011 at 5:37 PM
    #24
    Oldboatcrap

    Oldboatcrap [OP] Member

    Joined:
    Feb 13, 2011
    Member:
    #51118
    Messages:
    18
    Gender:
    Male
    Massachusetts
    Vehicle:
    SR5 4X4 DOUBLE CAB
    Here was the process. There is some repetition from my earlier comments, but this follows sequence of pictures. Removed battery cable. Removed middle console by lifting the cup holder out, took out 4 10mm bolts and a screw. Next I unscrewed the gear shifter and lifted the whole thing out. After that I pried the blank button out so the wires are not exposed. I fished the wired through the blank button hole. The sensor went through the wire bunch on the left side of the drivers side and out behind. the left fog night. The rubber gasket was tight, so I had monkey with it a while. The other side goes out the blank hole into the gauge. It resembles on old school land line telephone connector. For the electric wiring I fished the wires again through the same blank hole and spliced a regular red wire from the gauge to the fuse panel with a Bussman add a fuse spacifically to the radio 7.5 fuse. I used another fuse because low profile factory does not work on these things, just regular mini fuses. I then used a 2 fuse for the the top slot to run the gauge and plugged it. I then put two tiny screws to secure the mount and a tad of industrial velcro just for extra grip. The velcro is not needed, just makes everything tight. I was able to use the guage ground on a screw that is connected to metal about 8 inches inder the cig lighter. As you can see the velcro and screws are hidden. I did it this way so if I wanted everything back to normal I could simply unhook the gauge, pull the wires out, disconnect and put the false button back in. You would never know anything was there. Of course after all this I can't imagine doing that nor would I want to. In addition you can use the cig lighter, aux plug and other 12V plug with the guage installed...and use that bin (for what I don't know). Finally I zip tied all the wires secure and put everything back together. The pics are pretty much in sequence. The mound is a very basic n shaped housing with two screw holes on top. As stated before it was a 3 hour project and most of the time was getting the wires through that tight space where the cig lighter is and the sensor through the firewall. As far as potential for using blank buttons for something else, I still have two on the left side of the steering wheel. So far the gauge works great and updated more frequently then my Corollas OEM. For a test I put my hand around the sensor and noticed the temp increase. As you can see it is very cold here in Boston..but a great place none the less.

    Tacomaguage 005.jpg
    Tacomaguage 006.jpg
    Tacomaguage 007.jpg
    Tacomaguage 009.jpg
    Tacomaguage 010.jpg
    Tacomaguage 014.jpg
    Tacomaguage 016.jpg
     
  5. Feb 21, 2011 at 5:43 PM
    #25
    Oldboatcrap

    Oldboatcrap [OP] Member

    Joined:
    Feb 13, 2011
    Member:
    #51118
    Messages:
    18
    Gender:
    Male
    Massachusetts
    Vehicle:
    SR5 4X4 DOUBLE CAB
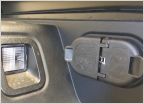
    Sensor is located behind this fog light. Buss fuse and another install picture

    Tacomaguage 008.jpg
    Tacomaguage 011.jpg
    Tacomaguage 012.jpg
     
  6. May 18, 2014 at 2:31 PM
    #26
    spetro

    spetro Active Member

    Joined:
    Apr 7, 2012
    Member:
    #76430
    Messages:
    26
    Gender:
    Male
    North GA
    Vehicle:
    2018 off road
    I installed a La Crosse Technology WS-9002U-CAMO Wireless Camouflage Thermometer. Place the sensor as close to the front grille. Keep it out of direct rain and forced water. No wires...works great. Measures both inside cab and outside temps...with no wires at all!!!! Love it under $20.00 bucks. Unit handles south Florida heat inside the cab well.
     
  7. Nov 4, 2014 at 7:53 PM
    #27
    ICEDOGG

    ICEDOGG Member

    Joined:
    Oct 13, 2014
    Member:
    #140229
    Messages:
    16
    Gender:
    Male
    First Name:
    JR
    Thunder Bay ON, Canada
    Vehicle:
    2015 tacoma Trd sport
    Has anyone done a similar mod like this on a 2014 Trd ? Or any ideas ? I was thinking maybe trying to put something next to the hazard button where the clock used to be
     
  8. Jun 9, 2015 at 1:27 PM
    #28
    ICEDOGG

    ICEDOGG Member

    Joined:
    Oct 13, 2014
    Member:
    #140229
    Messages:
    16
    Gender:
    Male
    First Name:
    JR
    Thunder Bay ON, Canada
    Vehicle:
    2015 tacoma Trd sport
    anything ?
     
    ClammyPeach likes this.
  9. Apr 26, 2017 at 8:34 PM
    #29
    dapetik

    dapetik Well-Known Member

    Joined:
    Apr 3, 2008
    Member:
    #5724
    Messages:
    1,178
    Gender:
    Male
    First Name:
    David
    Barboursville, Va
    Vehicle:
    2015 TRD Sport
    Magic bedcover, sweet ass floormats, rocket boosters, warp drive
    I'm looking into the same thing.... Any luck?
     
  10. Nov 8, 2018 at 12:24 AM
    #30
    Jason B

    Jason B Member

    Joined:
    Mar 10, 2010
    Member:
    #32980
    Messages:
    18
    Gender:
    Male
    I did in my 4runner

    temp_721.jpg
     
    TegoTaco likes this.
  11. Nov 8, 2018 at 8:33 AM
    #31
    TegoTaco

    TegoTaco Well-Known Member

    Joined:
    Sep 29, 2016
    Member:
    #198555
    Messages:
    6,503
    Gender:
    Male
    Ontario, Canada
    Vehicle:
    2013 Super White Tacoma DCLB TRD SPORT
    Still have your 3rd Gen 4Runner? Been in love with it since I was 14 years old.
     
  12. Nov 8, 2018 at 8:57 AM
    #32
    Jason B

    Jason B Member

    Joined:
    Mar 10, 2010
    Member:
    #32980
    Messages:
    18
    Gender:
    Male
    Yes I do! Wait, my 4runner or 3rd gens in general??

    311343d1536633192-instructions-hood-scoo_6bc67481bef23d193c99c3df404c3cbaf77919d1.jpg
     

Products Discussed in

To Top