

-
Welcome to Tacoma World!
You are currently viewing as a guest! To get full-access, you need to register for a FREE account.
As a registered member, you’ll be able to:- Participate in all Tacoma discussion topics
- Communicate privately with other Tacoma owners from around the world
- Post your own photos in our Members Gallery
- Access all special features of the site
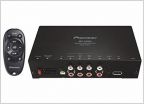 Green parking brake wire for Pioneer
 Dayton Audio DSP408 /miniDSP 6x8
 Lost sound from front
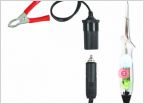 Double din and amp/wires question
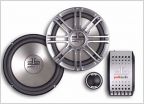 Need some sound deadener advice
 Looking for non-LCD double din: Alpine W235BT or Clarion CX501
Kicker CXA660.5 Amplifier and 46TL7T82 Loaded Subwoofer
Discussion in 'Audio & Video' started by SmileyGuy, Nov 5, 2022.


