1. Welcome to Tacoma World!

    You are currently viewing as a guest! To get full-access, you need to register for a FREE account.

    As a registered member, you’ll be able to:
    • Participate in all Tacoma discussion topics
    • Communicate privately with other Tacoma owners from around the world
    • Post your own photos in our Members Gallery
    • Access all special features of the site

Prinsu Access Cab Install

Discussion in 'PrInSu Design Studio' started by GHOST SHIP, Mar 16, 2016.

  1. Jan 22, 2021 at 8:52 PM
    #301
    BraskaTaco

    BraskaTaco Well-Known Member

    Joined:
    Jan 11, 2016
    Member:
    #174711
    Messages:
    2,069
    Gender:
    Male
    Midwest
    Vehicle:
    2013 Tacoma TRD OR
  2. Feb 5, 2021 at 7:33 AM
    #302
    ClutchCityTaco

    ClutchCityTaco Active Member

    Joined:
    Mar 5, 2015
    Member:
    #150177
    Messages:
    32
    Gender:
    Male
    Houston, Tx
    Vehicle:
    08 Prerunner
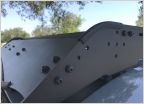
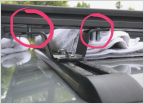
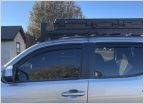
    Knocked mine out a few weeks ago! Slowly getting my build back on track, excuse the lean need to get my AAL tossed in. Need to get my new faring ordered for my light install. I will say dropping the headliner was a must!
    IMG_0330.jpgIMG_0366.jpg
     

    Attached Files:

  3. Feb 20, 2021 at 12:35 PM
    #303
    ocloninger

    ocloninger Active Member

    Joined:
    Mar 23, 2011
    Member:
    #53592
    Messages:
    31
    Gender:
    Male
    First Name:
    Orin
    Texas
    Vehicle:
    11 Tacoma Off Road
    What has everyone done for their weather stripping? I would like to cut a whole and just overlay it on the spacers if possible. If you've done it, I would be interested in how.

    Thanks,
    Orin
     
    fonzi42 likes this.
  4. Feb 23, 2021 at 8:53 PM
    #304
    DrRoboto

    DrRoboto Well-Known Member

    Joined:
    Mar 31, 2016
    Member:
    #182959
    Messages:
    166
    Gender:
    Male
    First Name:
    David
    Salt Lake City, UT
    Vehicle:
    <s>2017 AC Off-Road</s>
    GoFastCamper. OME 886. Medium Dakars. SSO slimline bumper + Warn VR10-S. OGE dual battery system. Mobtown skids.
    Your truck is the only 3rd gen I have seen in this thread. How close were your holes to air bags? I'd like to know what issues I might run into when I go to install on my 2017.
     
  5. Mar 31, 2021 at 7:34 PM
    #305
    Gamester

    Gamester Well-Known Member

    Joined:
    Oct 23, 2015
    Member:
    #167508
    Messages:
    50
    Gender:
    Male
    British Columbia
    Vehicle:
    2021 Offroad Access Cab mt
    I recently installed the Prinsu on my 2021 3rd gen Access cab.
    A couple notes:
    - I place my front hole 7-1/8” back from the weatherstripping on the windshield.
    - I dropped and removed the headliner from the truck. (I added Noico sound dampening after the Prinsu install)
    - 6 out of 10 of the supplied bolts were not long enough to reach the threads of the supplied rivnuts thru the sheet metal. I purchased 1/4” longer stainless steel bolts from Home Depot - problem solved.
    - I used a lot of drill bits! Many folks have recommended using stepped drill bits. I found that they are too long and will make contact with the airbag if used to the diameter needed to install the rivnut.
    - I didn’t count on making so many metal shavings. Save yourself lots of cleanup and use a drop sheet in the cab to catch them.
    - I locked a pair of vise grips to each rivnut to prevent them spinning until they seated themselves.
    - It took me most of a weekend including sound dampening.

    Really liking the rack. I’m glad that the install is behind me though.
     
    jgr81 and Canadian Joe like this.
  6. May 13, 2021 at 6:19 PM
    #306
    TomTomBikes

    TomTomBikes Does Things "On Purpose"

    Joined:
    Apr 19, 2018
    Member:
    #251045
    Messages:
    753
    Gender:
    Male
    ColoRADo
    Vehicle:
    2015 MGM AC V6 4x4
    none
    Currently have open holes in my roof and am finding I'm two riv-nuts and two spacers short. Storms are coming, no one local sells. Anyone know the exact size so I can order online and hope I don't have an open roof all weekend?
     
  7. May 13, 2021 at 6:28 PM
    #307
    WestCoastBestCoast

    WestCoastBestCoast Well-Known Member

    Joined:
    Jul 12, 2018
    Member:
    #259158
    Messages:
    676
    Gender:
    Male
    First Name:
    Wyn
    Portland, OR
    Vehicle:
    2005 SWB TRD 6MT 4x4
    52C4114F-2714-4EAD-8B3F-C9401CF6ED18.jpg
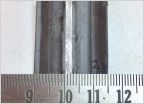
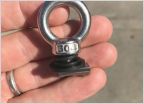
    No clue what Prinsu sends you, but these are the ones I bought from McMaster since I got my rack second hand.
    And sorry I don’t know the spacer, maybe just measure one and make sure it is 1/4” diameter?
     
  8. May 13, 2021 at 7:05 PM
    #308
    GHOST SHIP

    GHOST SHIP [OP] hates you.

    Joined:
    Mar 9, 2015
    Member:
    #150537
    Messages:
    22,295
    First Name:
    GHOST
    The rivnuts are up to you. I believe prinsu used to supply m6 rivnuts and bolts, but that was before the cbi purchase so I’m not sure what they’re supplying now. You can honestly use any rivnut you want as long as you use the corresponding hardware. Your OCD may or may not bother you knowing that you have mismatched hardware but it will function and can be considered a permanent install. The spacers are a dofferent story. In my experience, they’re harder to find locally but I believe they’re 1” thick.
     
  9. Mar 21, 2022 at 6:56 PM
    #309
    NJTacomaOffRoad

    NJTacomaOffRoad Well-Known Member

    Joined:
    Dec 18, 2018
    Member:
    #276249
    Messages:
    122
    Gender:
    Male
    First Name:
    Franco
    Vehicle:
    2015 Tacoma Access Off Road Pyrite Mica
    Working On It
    What a pain in the ass. The drilling and mounting of the roof rack was the easiest part. Just measure, measure, measure again, and measure one last time. The horrible part was dropping the headliner and airbags, then putting it back up. Definitely drop the headliner, the airbags are so close, you’ll hit them even if you’re careful. Like stated by other people, start with a punch, then a small drill bit and go up a couple of sizes, then go up a couple more, then a couple of more, the final size should be 3/8. Going up in sizes did give more control then going from small drill bit to 3/8. I didn’t go through many drill bits. I did use quality drill bits so that helped. I also used Seam Sealer instead of silicon. Figured it would hold up better, we’ll see. This took me about 6-7hrs. I did add the Cali 42inch bar, that took a little less than a hour. I did the light bar the next day bc I was so tired. Overall it looks great, again a pain in the ass. I was cursing Toyota the entire time that they didn’t put mounts in the Access Cab. I’ll post photos soon.
     
    Woodland Taco, TartanEagle and cfayne like this.
  10. Mar 22, 2022 at 11:13 AM
    #310
    bagleboy

    bagleboy Well-Known Member

    Joined:
    Aug 5, 2017
    Member:
    #226018
    Messages:
    6,861
    Gender:
    Male
    First Name:
    Scott
    Norcal, Santa Rosa
    Vehicle:
    2014 5-lug AC 2.7L VVTI
    Snug top Rebel, Thule tracks, ditch tracks, Bagged rear suspension, F/R anytime camera, intermittent wiper switch...
    Keep some 1” gorilla tape on hand so if the job gets interrupted you won’t have to worry. Basically high quality duct tape. Since I dropped the headliner anyway I used SS washers and nylocs along with sealant.
     
  11. Mar 31, 2022 at 4:04 PM
    #311
    spadoodle

    spadoodle Well-Known Member

    Joined:
    Jan 2, 2022
    Member:
    #386107
    Messages:
    62
    Vehicle:
    '17 AC SR 4x4
    looking forward to this when I add a rack...! But still glad you did it yourself?
     
  12. Jan 4, 2023 at 8:01 PM
    #312
    fonzi42

    fonzi42 Well-Known Member

    Joined:
    Nov 2, 2022
    Member:
    #409698
    Messages:
    85
    Gender:
    Male
    LA area
    Vehicle:
    2001 Jade Tacoma 5 spd
    Well I’m in Southern California and just bought a 23. It’s safe to say I’m not the most mechanically inclined. Are your services still available?
     
To Top