

-
Welcome to Tacoma World!
You are currently viewing as a guest! To get full-access, you need to register for a FREE account.
As a registered member, you’ll be able to:- Participate in all Tacoma discussion topics
- Communicate privately with other Tacoma owners from around the world
- Post your own photos in our Members Gallery
- Access all special features of the site
Quick Links: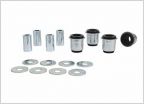 LCA Bushing time
 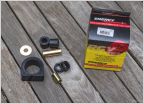 How-To: Steering Rack Bushing Replacement on a 1st Gen Tacoma
 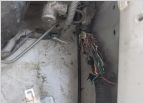 Squirrel Wrecked My Baby. Seeking Wire Harness Knowledge and Help.
  Wolfbox Mount
 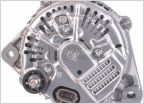 Retrofit DENSO 210-0421 it's a 120 AMP Alternator
 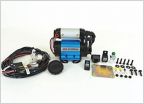 Anybody interested in 4.56 gears and f/r arb lockers and compressor brand new never installed
Help with getting Coolant Level Right
Discussion in '1st Gen. Tacomas (1995-2004)' started by ztwatson, Jan 13, 2023.
Page 2 of 2
Page 2 of 2
Products Discussed in


