1. Welcome to Tacoma World!

    You are currently viewing as a guest! To get full-access, you need to register for a FREE account.

    As a registered member, you’ll be able to:
    • Participate in all Tacoma discussion topics
    • Communicate privately with other Tacoma owners from around the world
    • Post your own photos in our Members Gallery
    • Access all special features of the site

Shirlee the Pickup build and adventures

Discussion in 'Other Builds' started by generalee2010, Jan 7, 2024.

  1. Jan 7, 2024 at 6:09 PM
    #1
    generalee2010

    generalee2010 [OP] Member

    Joined:
    Jan 5, 2024
    Member:
    #441032
    Messages:
    22
    Gender:
    Male
    First Name:
    Trip
    Reno/Tahoe
    Vehicle:
    91 4x4 5MT Pickup, 7MGE swap coming
    295/75r16 tires, nothing else
    New forum, older build thread, but I'm hoping y'all enjoy the truncated journey up to now(here is the actual full-length build thread if you care). This is my '91 pickup I got in 2017 and have maintained and built over the last 7 years, with some big stuff brewing.


    Now on to the truck!


    This is Shirlee. She's a 91 Toyota Pickup. I've done a ton of maintenance and interior upgrades, and it's almost time for powertrain and drivetrain upgrades.
    circa Jan '24:
    [​IMG]

    Day 1. Pretty much stock except for a sub and head unit the PO installed, as of July 2017.

    [​IMG]


    Single cab short bed DLX
    4 wheel drive
    22re
    5 speed
    locking hubs
    125000 miles at time of purchase, 128, 5xx now (3/1/18)

    And now a couple more pictures.

    [​IMG]

    [​IMG]

    [​IMG]

    [​IMG]

    The crispy clean interior on this truck was a huge reason I bought it.

    [​IMG]

    All these were taken just a few days after I bought it and brought it home on the fourth of July.

    My goal for this truck is to eventually build a capable rig that can handle trails, some crawling, and some desert bombing that's built for limited or lightweight overland/expo outings. I also want it to have enough road manners, power, reliability, comfort, economy, and novel modularity to be a potential daily when needed.

    I want to use this project to gain new skills (in the garage and behind the wheel) and test out engineering and product ideas and concepts.


    This will take some real time to get through and build it like I want. I don't cut corners and I do my best to do things right the first time.

    I have a rough outline of how I want it to go, in phases.

    Phase 1: Road worthy
    - reinstall smog stuff
    - NV plates and whatnot
    - new battery, big 3 or 4 upgrade
    - finish fluids replacement, all redline stuff
    - basic tune up stuff (plugs, wires, belts, rotor and cap, filters, etc.)
    - shocks
    - pads and rotors, shoes and drums if needed
    - brake and clutch bleeds
    - new 22re sticker
    - wheels and tires
    - shift bushings
    - diff and t-case breathers
    - paint bed/clear bedliner
    - lots of odds and ends

    Phase 1.5: comfy/less slowly but still Shirlee
    - sound system upgrade from "just a little bump" to delicious sound quality
    - bed storage and organization system
    - in-cab organization
    - softtopper or something similar, or custom
    - new seats
    - bearings, bushings, engine and cab mounts
    - any retroactive replacement/upgrade opportunities
    - performance upgrades for the motor, but small stuff (cleaned out injectors, headers and exhaust, intake side swap, etc.)
    - new side graphics and tailgate logo
    - headlights, side markers, etc. in a slightly different configuration

    Phase 2: trail rated
    - I'll have to flesh this out later
    - includes RTT, suspension upgrades, rear discs and upgrades all around, lockers, bumpers, winch, armor, etc.
    - lots of fun ideas for this one

    Phase 3: go faster
    - diesel swap (edit: no diesel swaps in Reno or Vegas apparently :( )
    - looks like a 3.4, or a 7mgte swap instead - that's ok. I'll get fun spool-y and wastegate flutter sounds either way


    ----Slowly but surely it will get there and get me there----
     
    Last edited: Jan 7, 2024
    Road_Warrior likes this.
  2. Jan 7, 2024 at 6:10 PM
    #2
    Road_Warrior

    Road_Warrior There is nothing on my horizon except everything

    Joined:
    Aug 22, 2021
    Member:
    #374919
    Messages:
    5,269
    Gender:
    Male
    Vehicle:
    2021 Black SR5 4x4
    Now that is an awesome truck.

    I absolutely love that color….never seen anything like it.
     
    generalee2010[OP] likes this.
  3. Jan 7, 2024 at 6:13 PM
    #3
    generalee2010

    generalee2010 [OP] Member

    Joined:
    Jan 5, 2024
    Member:
    #441032
    Messages:
    22
    Gender:
    Male
    First Name:
    Trip
    Reno/Tahoe
    Vehicle:
    91 4x4 5MT Pickup, 7MGE swap coming
    295/75r16 tires, nothing else
    Glacier Blue Metallic is my favorite and I'll never fully change it(though honda does have a sick new grey blue with metal flake that would be an awesome combo). It'll get a respray one day.
     
  4. Jan 7, 2024 at 6:18 PM
    #4
    Road_Warrior

    Road_Warrior There is nothing on my horizon except everything

    Joined:
    Aug 22, 2021
    Member:
    #374919
    Messages:
    5,269
    Gender:
    Male
    Vehicle:
    2021 Black SR5 4x4
    Interesting, maybe it’s my phone screen or the lighting but it looked like a purplish-blue color.
     
  5. Jan 7, 2024 at 6:22 PM
    #5
    generalee2010

    generalee2010 [OP] Member

    Joined:
    Jan 5, 2024
    Member:
    #441032
    Messages:
    22
    Gender:
    Male
    First Name:
    Trip
    Reno/Tahoe
    Vehicle:
    91 4x4 5MT Pickup, 7MGE swap coming
    295/75r16 tires, nothing else
    from 1/6/18

    here is the finish of the TC kit install. Overall I'm pleased with the quality and service from Engbldr.


    Finished up late late in the evening. Got the coolant system burped, truck ran great. No complaints.


    To get the crank fixing bolt off, I was able to do the starter bump method using an impact socket and a breaker bar. The previous tenant of our house also left a bunch of stuff and I stumbled upon a long, very thick gauge pipe that I used as a "torque multiplier" on the breaker bar.


    Here are a few pics of during:


    During teardown

    [​IMG]

    Really bad pic of the contents of the kit

    [​IMG]

    I've never re-checked anything more than checking to make sure I had the chain on the right teeth.
    I had a hell of a time getting the chain drive gear off the crankshaft. I didn't have any gear pullers or anything so I ended up just kind of walking it off with a board and a hammer. I felt bad for my roommates. I normally do this kind of stuff pretty late in the evening. turns out the drive gear was cracked anyway. Could've been caused by me, who knows though.

    Gears, chain, and cover reinstalled.

    [​IMG]


    I was able to drop the front crossmember and the diff and remove the oil pan from under the truck. It was full of plastic chunks and baked-on oil. Yum.
    Tried to clean this surface as best I could. The top of the oil pan was covered in RTV. WHAT A PAIN.
    It took forever to remove enough of it where I was satisfied with the result. Then I cleaned out all the crap from the pan and got it ready to reinstall.


    [​IMG]

    Nice and clean. Just before I installed the hidden bolt to begin the full reassembly process.

    [​IMG]

    [​IMG]


    Dropping the front crossmember and diff was a challenge with no air or power tools. Holding the nuts in place to bolt the diff back in was also very tough.

    Buttoned everything up, double check torque and tightness everywhere as I went along.
    Used the breaker bar and rolled the truck to tighten down the crank pulley fixing bolt. Made sure valves were adjusted.
    I'd forgotten to mark the position of the distributor when I removed it. I thought i was gonna fight this issue for a couple of days. Seems I got lucky.
    Filled all fluids, using new oil and filter and filtering the used (but relatively recently replaced, ~500miles) coolant, then rolled it out to the end of the driveway to start it and burp the coolant system. Started up like a champ. Played with the timing some until it sounded close to right for a cold start, then let it warm up and burped the collant system. I checked my timing with a light I borrowed from my boss. I was at about 7* just by ear. Set it to 5* and took it for a little drive.

    It was so quiet!! No chain slap on engine braking, no valve noise, it was great!


    Lessons learned from the whole process:
    • watch your knuckles
    • don't use a gasket on the oil pan
    • don't settle for ok alignment on the gasket for the TC cover
    • PB Blaster more than 20 minutes beforehand
    • take more pictures of brackets and locations of parts

    So I'm now having a few small issues after completing this repair.
    First and foremost, I have a pretty major oil leak from around the oil pan. I decided I would use a cork gasket for it instead of a mountain of RTV. Mistakes were made.
    Part of it can be attributed to the fact that the TC cover gaster sticks out kinda funny on one side (I tried to account for that with RTV; seems it didn't work), but the other areas of the oil pan leak, I have no idea why they leak, other than it's because of the gasket.
    Second, I now get idle-drop every once in a while at a light while the truck is still warming up. It's like there's a bubble in the coolant system, like how the idle surges and drops when it's getting burped. It goes away once the truck is warm. It's strange and I can't figure out whats going on. I've burped the system as well as I know how multiple times...
    Third, I have a slow coolant leak from where the water pump seals against the TC on the passenger side. So I guess that means I get to pull the oil pan and water pump and fix those issues. Joy.

    I HATE having a leaky truck.
     
  6. Jan 7, 2024 at 6:25 PM
    #6
    generalee2010

    generalee2010 [OP] Member

    Joined:
    Jan 5, 2024
    Member:
    #441032
    Messages:
    22
    Gender:
    Male
    First Name:
    Trip
    Reno/Tahoe
    Vehicle:
    91 4x4 5MT Pickup, 7MGE swap coming
    295/75r16 tires, nothing else
    from 4/8/18 - shocks, horn, and bed paint:

    I finished a bunch of stuff on my list in the last week or so.

    Got the horn wiring done, it was super easy once I took some time to really look at it with a multimeter and the wiring diagram.

    [​IMG]
    [​IMG]

    wired up in parallel. regular 1/4" spade connectors in the factory plug. EASY

    [​IMG]
    [​IMG]
    [​IMG]

    I reinstalled all the emission equipment and replaced pretty much all the vacuum lines with new stuff.

    [​IMG]

    My bible for this mini-project
    [​IMG]

    I am almost certain the truck runs better with the emissions stuff installed. and i get better gas mileage. even after moving way up in altitude.
    I also managed to tuck the whole system cause i think it just looks better this way.

    [​IMG]

    Installed a 2 USB port charger into the stock cigarette lighter location. it also has a built in voltmeter so i can keep tabs on the battery. plus it matches the interior LED colors pretty well.
    [​IMG]


    I did the Big 3 grounding upgrade using some 4ga cable i picked up at one of the local audio shops here. i think i still need to do the grounding strap to from the alternator to the block.
    I noticed more stable voltage readings, and an overall increase of about 0.2 volts through decreasing the grounding resistance.

    big difference in the grounding straps for the block
    [​IMG]

    Finished the shock install. It rides worlds better now!
    [​IMG]
    the old ones had no rebound at all
    [​IMG]

    removed the rear bumper and hitch. time will tell if I like the look. eventually, I'll build my own. until then tho...
    [​IMG]

    I also finished painting the Texas flag in the bed. turned out exactly like I wanted!
    Sanded and cleaned and primed with white over
    [​IMG]
    AAAND the final result
    [​IMG]
    [​IMG]

    Lastly for this round. I did a bunch of sound deading in the cab. following RAD4RUNNER's suggestions, I bought a roll of Peel and Seal from Lowes and lined the door skins, part of the inner door frame, all around the speaker holes, and the big open spots on the inner door panels. I also put some on the back wall of the cab and a little under the floor where my sub and jack sit. It made more of a difference than I thought it would for how cheap it was. took me maybe 2.5 hours to do both doors. and another 20 minutes for the cab. well worth the $17 for the roll. quieter cab, better mid-bass, lower volume needed. less road noise. now I need better weather stripping cause I can actually hear the wind noise. I can't wait to do the rest of the cab now and see what kind of difference it makes doing a full-on sound deading treatment before I upgrade all the speakers and whatnot.

    [​IMG]
    [​IMG]

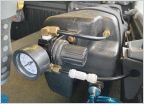
    OHHHH really last thing. Picked up an older ARB compressor with locker solenoids and all the required wiring. for $30!!!! it works great and I can't wait to build out my little tire filling system.
    Any suggestions on mounting locations would be greatly appreciated.
     
    Road_Warrior likes this.
  7. Jan 7, 2024 at 6:29 PM
    #7
    generalee2010

    generalee2010 [OP] Member

    Joined:
    Jan 5, 2024
    Member:
    #441032
    Messages:
    22
    Gender:
    Male
    First Name:
    Trip
    Reno/Tahoe
    Vehicle:
    91 4x4 5MT Pickup, 7MGE swap coming
    295/75r16 tires, nothing else
    i sure hope so, its like sky blue in real life. or a little lighter than the light blue on a can of 0 sugar red bull.
     
    Road_Warrior[QUOTED] likes this.
  8. Jan 7, 2024 at 6:32 PM
    #8
    Road_Warrior

    Road_Warrior There is nothing on my horizon except everything

    Joined:
    Aug 22, 2021
    Member:
    #374919
    Messages:
    5,269
    Gender:
    Male
    Vehicle:
    2021 Black SR5 4x4
    That makes sense! I can definitely see that in the additional pics you posted.
     
  9. Jan 7, 2024 at 6:34 PM
    #9
    generalee2010

    generalee2010 [OP] Member

    Joined:
    Jan 5, 2024
    Member:
    #441032
    Messages:
    22
    Gender:
    Male
    First Name:
    Trip
    Reno/Tahoe
    Vehicle:
    91 4x4 5MT Pickup, 7MGE swap coming
    295/75r16 tires, nothing else
    one of the more memorable camping trips 5/19/18:

    ordered the LED Dash Light Upgrade from Low Range a month or 2 ago with some other stuff I've yet to install as well. finally got around to installing it. took me a while to get the bulb orientation sorted. I'll have to put a resistor in line or do something to get the dial to work again on the dash for the dash light brightness. overall I'm pleased with the money I spent on it, but the green of the gauge backlight bulbs is definitely too green for me. I'll have to see what I can do about that in the long run. I ordered the 85-88 non-tach kit to see if it would match up and it worked out ok. they don't sell one for 89-92 non-tach dashes.

    did an oil change. or rather, I drained the oil so I could drop the pan off the motor to reseal it. worth it cause I could tell the cork gasket I used wasn't doing the one job it had. In came toyota FIPG to replace it. Stupid mistake from me being lazy. this truck is not a project of compromise.

    [​IMG]

    in the process, I had to fully drop the diff and the sway bar. I think the front crossmember may have been overkill, but it was easy enough. I also figured out most of my oil leak is coming from the lower driver-side corner of the front/TC cover. crap. I'll have to figure out something temporary to fix it. I really don't want to have to take the whole thing back apart just to seal up one little oil leak.

    got new plates. vanity. but whatever. To Yo Ta Truck

    [​IMG]

    finally finished my simple dual bike rack setup with inset captured nuts in the board to keep the bed from getting too scratched. plus i've always wanted a reason to use them. pretty pleased with the decision.

    [​IMG]

    and went on a camping trip to Graeagle

    [​IMG]

    [​IMG]
    [​IMG]
    [​IMG]
    [​IMG]
     
    Road_Warrior likes this.
  10. Jan 9, 2024 at 8:27 PM
    #10
    generalee2010

    generalee2010 [OP] Member

    Joined:
    Jan 5, 2024
    Member:
    #441032
    Messages:
    22
    Gender:
    Male
    First Name:
    Trip
    Reno/Tahoe
    Vehicle:
    91 4x4 5MT Pickup, 7MGE swap coming
    295/75r16 tires, nothing else
    Last camping trip when i lived in Reno the first time:

    went wheeling with a good buddy and camped out. cold as balls in the middle of summer and we got rained on, but still it was great to see him, camp out, and see his new rig. makes Shirlee look like a toy.

    [​IMG]

    [​IMG]

    [​IMG]

    [​IMG]
     
    Road_Warrior likes this.
  11. Jan 9, 2024 at 8:50 PM
    #11
    generalee2010

    generalee2010 [OP] Member

    Joined:
    Jan 5, 2024
    Member:
    #441032
    Messages:
    22
    Gender:
    Male
    First Name:
    Trip
    Reno/Tahoe
    Vehicle:
    91 4x4 5MT Pickup, 7MGE swap coming
    295/75r16 tires, nothing else
    Moved to back to Texas in August of 2018, went through a bunch of repairs (new brake calipers, pads, rotors, front hub bearings, a new bed rack, etc)

    Then I bought the audio equipment for my install and an SR5 cluster, and started on it:
    time for some pics

    first up is the most recent:
    ---Start of the sound system install ---
    I started my audio build this weekend(10/16), after years of waiting, and a year or more of planning.


    after much deliberation and some wheeling and dealing with my local shop (custom sounds in Austin, TX) I've finalized my parts list. It is as follows:


    Headunit: Pioneer DEH-80PRS

    Amp: Kenwood Excelon x802-5 (5 Channel)

    Sub: JL 10TW3

    Components: Focal Performance PS165v1

    sound deadening: Dynamat extreme, ccf, heat shielding, etc.


    The overall build ethos is to keep it clean, simple, and stock looking, but in the most aurally pleasing way possible given a reasonable (relative i know) budget.


    I can and will do pretty much all of the fab and finish work myself.


    the final build will have the 80prs in the dash - duh - , (already installed actually at time of posting); amp in an tbd location; custom built sealed sub box, center mounted; door pods for the woofers (probably not sealed, but TBD) with custom door pockets built in; tucked and clean, no corners cut wiring and sound deadening; bucket seats installed; and a custom built center console with some trick features i have planned.


    I was able to get a good deal on all the system parts, and i got a full single cab set of dynamat for free, so i'll be using that too.


    now for some preliminary install pics:


    original dash and HU -

    [​IMG]


    [​IMG]


    removed the dash to install a new gauge cluster with a tach and some extra gauges.


    [​IMG]

    [​IMG]

    [​IMG]


    Spaghet:

    [​IMG]


    no more spaghet:

    [​IMG]


    the odometer on the new cluster was 8000 miles low, so rigged up a setup with a drill, the worm gear, and some zipties to roll the odometer forward to make the new cluster match the old one that came out of the truck.


    [​IMG]


    removed all other dash parts to remove old crappy kenwood headunit.

    it ended up having an HD radio antenna hardwired in. i'll have to order a new antenna cable for when i go back in to run RCAs to the new amp in the next phase of install.


    HU and new cluster installed:


    [​IMG]

    [​IMG]


    I'll do glamour shots again when it's all installed. until then, you guys just get potato phone shots.


    installing the HU is just the first part of the build. I'm in the process of finishing the CAD models for the box and door panel parts. I have some decisions to make coming up on amp placement, tweeter placement, active vs passive, and general aesthetic stuff. it'll be fun for me. feel free to give 1 or 2 cents. I may ignore it.
    or not...
     
    Road_Warrior likes this.
  12. Jan 9, 2024 at 8:57 PM
    #12
    generalee2010

    generalee2010 [OP] Member

    Joined:
    Jan 5, 2024
    Member:
    #441032
    Messages:
    22
    Gender:
    Male
    First Name:
    Trip
    Reno/Tahoe
    Vehicle:
    91 4x4 5MT Pickup, 7MGE swap coming
    295/75r16 tires, nothing else
    Sub Box build:
    here start the pics:

    i started out by building a false wall for the back of the cab to pretty it up. it bolts into place across the top and has grooves to match the doors. it will also be what the amp and wiring mounts to behind the drivers seat, as well as the quick releases for the sub once they come in. on the driver's side, i'm going to make a partial Molle panel to fit the available space to hold a few things. then a fire extinguisher will go on as well, but actually get bolted to the back wall. i'm going to try to (in the future) come up with some quick release mechanism for the extinguisher because... fire.

    [​IMG]

    mock up in the cab

    [​IMG]

    i was able to get pretty decent fitment against the side of the truck with a bit of room to spare with just carboard templating. next time i'll use the washer trick to get it a bit cleaner, but i'm happy with how this turned out. also got holes drilled and rivnuts installed in the back wall to hold up the panel.

    [​IMG]

    mock mounted up with grooves to match whats on the doors

    [​IMG]

    planning out where the amp will live. the cutout next to it is or the stock bottle jack, which i'll be keeping.

    [​IMG]

    another shot of the back wall with the routed grooves in it. you can see my apprentice marks there where the guide for my router slipped. looks like a heart beat sinus rhythm, somewhat fitting for car audio as well i guess. im just glad it will be behind the sub box.

    [​IMG]

    i spent a fair amount of time moving the seat in and out and cutting cardboard to fit to get the sub box shape right, as well as some drawing to figure out all my actuals dims. here is the flat back of the box.

    [​IMG]

    and me in the layout process

    [​IMG]

    [​IMG]

    then i got it all glued and nailed up except for the face so i could figure out exactly where the driver was gonna sit. this is what i landed on. i retrospect, i should've gone down about another inch. i can always build another box. it really wasnt as bad as i expected. and i could improve my joinery a little bit in the next one. plus it was only like $20 in lumber.

    [​IMG]

    this is how it fits behind the seat before i mounted the front panel on. you can also see i finished all the seams in construction adhesive for a good seal. apparently silicone will eventually eat parts of the speaker in a sealed box? who knew...

    [​IMG]

    the final major touch i wanted to add before final trimming, edge treatment, and paint, was to add a panel on the front and create an inset for the sub. this turned out about as well as i could've asked for considering. i used the 3d model of the sub i'd generated a few months ago to create a laser cut router template.

    [​IMG]

    i also added the hole for the neutrik plug receptacle in this hidden part of the box for speaker cables. you can also see i've edge routed all the corners to soften them and complete the box.

    [​IMG]

    then i painted both the box and the back wall with a bunch of coats of sanding sealer, then hit them with some primer. then i mounted the sub finally! you can see the back panel in the background.

    [​IMG]
     
  13. Jan 9, 2024 at 9:01 PM
    #13
    generalee2010

    generalee2010 [OP] Member

    Joined:
    Jan 5, 2024
    Member:
    #441032
    Messages:
    22
    Gender:
    Male
    First Name:
    Trip
    Reno/Tahoe
    Vehicle:
    91 4x4 5MT Pickup, 7MGE swap coming
    295/75r16 tires, nothing else
    Then I moved back to Reno in 2021.

    Lots of stuff has happened between May and now.
    In summary:
    • took a new job that's remote so I can now work from anywhere I have internet
    • my partner/girlfriend graduated from grad school and got a job in Reno
    • I packed up my whole life and moved to Reno after finding an amazing house in a great area to rent
    • I HAVE MY OWN GARAGE! TOTALLY MINE
    • camped 5 or 6 times since we've moved here, enjoying the Sierras immensely
    • and truck stuff, which is why anyone comes to this page anyway, so I'll continue with that
    Here's a couple of pics of me and the doggo moving across the country. Made the drive from central Texas to northern Nevada in 2 days. Rough 18 hour first day to Flagstaff for sure.

    [​IMG]

    [​IMG]

    I'll have to make a post of just a Summer 21 recap with some pics of camping and hiking photos. Let me know if i should do that or not in a post below this!!

    one day While driving around town, I ran across the camper top sitting on the side of the road. Initial reaction was "wow I can't believe someone is just getting rid of that; no way it would fit on my truck" but I turned around anyway to take a peek at it. My partner helped me pick it up and put it on the bed. IT FIT. WHAT. It was pretty clear by the way it fit against the cab that it wasn't for an 89-95 pickup(with how close it fits, I'm guessing it was made for a first gen Tacoma, though I'm not sure of which body style), but it was close enough and $free.99, so I went home and grabbed a few tools and got that bad boy bolted to my bed, real quick. It was definitely lacking in some areas, but it had the right stuff where it counted. There was no back glass, and not all of the mounting points were still there, but it came with some attachment hardware, a serial number, and hinges and ball stud mounts for the back glass, as well as intact glass and hardware everywhere else.

    [​IMG]

    The dogs (and the girlfriend) enjoying the covered bed during a camping trip:

    [​IMG]

    [​IMG]

    I had the Snugtop dealer in town search the serial number on it and get a hold of Snugtop to see if I could just buy a back window for this (definitely the preferred solution) but apparently they don't make this model of topper anymore and thus don't have any stock of the back window, typical. Like anything else worth doing, I figured I would just do it myself. Then I got to work making "glass" for the back. I bought a piece of pseudo scrap plexiglass from a plastics supplier in town, then I made that into a pretty close match for back glass, but for much less. I'd worked with Makrolon in the past and knew it could be cut with standard woodworking tools, which is something else I'm into, and I'm a member at a makerspace in town now that has a full woodshop, so I made (relatively) quick work of mocking up the glass into a wood "mold" pattern that I then transferred to the acrylic/plexi. I ordered mounting hardware and then some generic locks from the Amazon, and got everything together and looking fresh.

    initial fab:
    [​IMG]

    [​IMG]

    [​IMG]

    mockup and mounting:
    [​IMG]

    [​IMG]

    results:
    [​IMG]

    [​IMG]

    [​IMG]

    And in use already:
    [​IMG]

    It's not fully done yet, I have a piece of aluminum deep c-channel on order(should be here in 2-3 days) that I'll be adding to the bottom of the window to stiffen it up substantially, as well as adding gas struts to it to make it stay open without a 2x4 :facepalm:. I think I'll glue and rivet that part in place, as well as paint it black, and then apply a piece of camper top window-specific weatherstripping to the back of it to seal the window to the tailgate. Other notable things done that I don't have pictures of, fixing all the wiring so the 3rd brake light works with the running light switch and wiring up the interior camper cab light to function as well. I had a trailer wiring thing under the truck from PO that I'd just zip-tied out of the way. I bought a trailer wiring plug thing and used the plug to wire in power from there, and all the lights are LEDs so I'm not concerned about blowing a fuse from the extra load. I still need to order a new perimeter seal and new mounting j-hooks for the cap to be 100% done, but I'll have less than $200 into it when all is said and done to get a fully functional camper top with all glass, working lights and all the mounting hardware. I also added a piece of pipe insulation across the top of the camper between the cab and the camper. This is wedged in there (held onto the camper with gorilla tape) to block the wind from getting forced in between the top and cab; I think I'm going to do this all around the window now so it effectively seals the cab and camper top together. This will hold me over 'til I can get a Softopper in the next year or 2.

    Lastly, I've had an awful intermittent buzzing from the left turn signal only, and I've been able to mostly ignore it for a while, but I have to get my truck inspected to get it registered here, and that won't fly if they can't get the blinker to work first try, tho it always works the second try. I'm currently in the middle of removing the lower dash panel to unplug the master dash plug so I can take apart the switch for the blink stalk and clean it, ugh. I searched around and apparently, you don't need a steering wheel puller to remove ours, and I'm glad I searched cause there was a tip in one of the threads about it that said to keep the nut on the steering column when removing the steering wheel. Glad I read that cause otherwise I would have 100% punched myself in the face with my steering wheel.

    [​IMG]

    Note - fixed the buzzing and cleaned up all the contacts in the multiswitch and it 's in great shape now.
     
  14. Jan 9, 2024 at 9:13 PM
    #14
    generalee2010

    generalee2010 [OP] Member

    Joined:
    Jan 5, 2024
    Member:
    #441032
    Messages:
    22
    Gender:
    Male
    First Name:
    Trip
    Reno/Tahoe
    Vehicle:
    91 4x4 5MT Pickup, 7MGE swap coming
    295/75r16 tires, nothing else
    Finally wrapped up the audio install. Also installed a custom center console I built, power locks, power mirrors, and power windows. I took on too much with this one, but it still turned out great. I was just sick of working on it by the end of the project.


    Tweeter pods are finished up and ready to be bolted in place. Check out that color/texture match! (I designed and printed these, then color matched and everything)

    [​IMG]

    and I've started tearing out the interior of the truck to install EVERYTHING. power windows, power locks, power mirrors, woofers, tweeters in pods, full sound deadening, etc. All power stuff has been validated as functional and is ready for install!

    [​IMG]

    [​IMG]

    Gonna be a busy week full of picture-taking to post up here as the build progresses to the tuning stage!
    if anyone knows a decent shop in the Reno/Tahoe area that can help me dial in the tune, I'd appreciate it!

    building out the wiring harness:

    [​IMG]

    [​IMG]

    my crazy dirty workbenches:
    [​IMG]

    mocking up in the car for determining wiring lengths. i think i probably installed and removed the center console like 10 times through this.
    [​IMG]

    full harness wrapped in Tesa tape and ready to go in while i wait for the door fittings. its temporarily installed so i can use the truck.
    [​IMG]

    once the bulkhead stuff is done, i'll final wrap the whole harness and do the final install. i'm not 100% happy with the power situation on it, but what I have will work for now, and i will eventually add a dual-powered fuse block with switched and constant power that i can pull power from for this whole system.

    still waiting on bulkhead connectors so i can drill holes in the doors and cab of the truck, but i got some other stuff done while waiting.
    i'd forgotten i needed to fix my seats so they have 4 bolts in them instead of 3. so i remembered that. then did it. no pics because it was lame. had to drill and rivnut some stuff, blah blah, etc. spent lots of time on this.

    wrapped the harness in the door and got the clips on so i could figure out how i wanted to start sealing up the doors and adding deadening. wrapped up door-wise harness. i shouldn't need to take this out again to do the door plug, so i also went ahead and did some of the sealing of the GAPING holes in the doors. only one hole is left now so i can figure out what to do about it as that's where the speaker will go, but that means less work later.

    [​IMG]

    [​IMG]
    also got a (crappy) video of the locks and windows working.

    in cab wiring is now done enough to lay down MLV. All wiring at the amp was left long to make room for routing to the amp.
    [​IMG]

    [​IMG]

    doors were removed to drill holes in the cab and doors for window, lock, mirror, woofer wiring to run thru and be removable.
    [​IMG]

    [​IMG]

    As Key and Peele say, "Can't go back middle now". A-pillars almost ready for tweeter pods and tweets.
    [​IMG]

    Cap'd at 47uF because the f3 on these tweeters is higher than I would like... I'll likely eventually get some other ones, but we'll see how these tune out first.
    [​IMG]

    more install pics:
    wiring into "a-pillars" to connect to doors
    [​IMG]

    [​IMG]

    tweets in pods in a-pillars fully installed
    [​IMG]

    when your hole saw isnt big enough, you sometimes have to use a "holed" saw, and some elbow grease
    [​IMG]

    doors prior to MLV. ended up having to remove some of the foam on the high spots due to the thickness of everything.
    [​IMG]

    door panels finished and installed!! speaker rings mounted, mlv in the door, all the stuff.
    [​IMG]

    i'll have a full photo shoot of the finished product once i finish tying up loose ends.

    got everything installed very hastily and set my gains on the amp using the DMM, at a 95% of max power rating for now until i can spend some real time on the tune itself. set some basic crossover points and slopes just based on the tech data and output curves from Focal. then i used the headunit's built in mic to set an auto time alignment and auto eq curve, with the mic stuck to my forehead. came out with a tune i'm ok running until i get some time with it. time alignment could maybe be a bit better, but i just don't know enough about enough to know where to go with it by ear until i download REW and start playing around with everything. i also have a ground loop or power source clicking that cycles with engine rpm. potentially a poor amp ground, but my money is on the ground for the head unit currently.

    long term i want some help with everything for sure, tune and gains and whatnot, but the install is pretty much done!!!
     
    Last edited: Jan 9, 2024
  15. Jan 9, 2024 at 9:22 PM
    #15
    generalee2010

    generalee2010 [OP] Member

    Joined:
    Jan 5, 2024
    Member:
    #441032
    Messages:
    22
    Gender:
    Male
    First Name:
    Trip
    Reno/Tahoe
    Vehicle:
    91 4x4 5MT Pickup, 7MGE swap coming
    295/75r16 tires, nothing else
    Spring and Summer '22:
    Camping trip to Bishop and Mammoth.
    Got the truck all buttoned up from the sound system exploits/detours. then immediately (like I finished the autotune on the headunit as we were loading the truck up to leave 3 hours late) hauled ass to the promised land, AKA Bishop, CA. I have been in love with Bishop and the surrounding areas for years, and I don't see that changing any time soon. One day maybe I'll post some of the highlights of the areas, but plenty of others here have been in the Bishop/Lee Vining/Lone Pine/Mammoth area and know how incredible it is. no need to harp anymore on it. Found our way to our usual campsite areas and found a rad spot, then went to town to grab some supplies. Camped for the night, then headed up the hill to catch the last few mashed potato turns of the season in Mammoth. Stopped for a while for a dip in the river outside Bishop near some boulders, then made dinner at camp and chilled. Did the Valentine Lake hike in Mammoth the next day, With the last half mile of it being a near-vertical, snowy rock scramble. Lots of fun to go back down, sucky to go up.

    [​IMG]

    [​IMG]


    A couple of other camping trips I'm sure happened, but maybe in the other car, or in Shirlee but without as much pictorial evidence. Then some time around the 4th of July i made my way out to a secluded lake to do some (what I thought would be) some low risk solo wheeling and a jaunt to a new Alpine Lake. I picked a terrible overall line because I was an idiot, and the wheeling was much more sketchy than anticipated. #Badlinesgoodtimes I guess getting out there, and I caught a couple of baby smallmouth bass, but nothing to write home about in terms of fishing. It was a delightful drive out there and back though; I will definitely be back to paddleboard and fish some more.

    [​IMG]

    [​IMG]

    [​IMG]

    [​IMG]

    [​IMG]

    [​IMG]


    one anecdote: some time during this lapse of time, I picked up and refinished a trans/t-case crossmember from a local guy who swore up and down it was out of a single case, w56, first gen 4runner with a 22r or 22re. so I thought it would work in the truck no problem. well, none of the frame rail bolt holes come anywhere close t lining up, but look to be space appropriately. so I plan to chop the frame pads off, figure out where to weld them back on, and proceed to modify the thing to make it work. it should give me like 4 inches of belly clearance back, and help my breakover angle.

    [​IMG]
     
    Last edited: Jan 9, 2024
  16. Jan 9, 2024 at 9:25 PM
    #16
    generalee2010

    generalee2010 [OP] Member

    Joined:
    Jan 5, 2024
    Member:
    #441032
    Messages:
    22
    Gender:
    Male
    First Name:
    Trip
    Reno/Tahoe
    Vehicle:
    91 4x4 5MT Pickup, 7MGE swap coming
    295/75r16 tires, nothing else
    October 22, the next trip was a shakedown through gold lakes highway after building a bed platform with a drawer to test it out before the trip after:

    My buddy's new truck

    [​IMG]


    [​IMG]


    [​IMG]

    [​IMG]


    Then Went to Arizona for a late fall trip:
    finished the camper drawer setup and used it for a bunch of camping trips.
    We went to Phoenix, Sedona, the Grand Canyon, and Zion. All of that was pretty great. Then I drove back to Reno from Zion alone, and storms destroyed my trip plans. So I just drove home through central Nevada instead of through Great Basin and ended up getting a flat in a ghost town that was a PITA to deal with before I got it patched in a podunk town.


    [​IMG]


    [​IMG]


    [​IMG]


    [​IMG]


    [​IMG]
     
  17. Jan 9, 2024 at 9:27 PM
    #17
    generalee2010

    generalee2010 [OP] Member

    Joined:
    Jan 5, 2024
    Member:
    #441032
    Messages:
    22
    Gender:
    Male
    First Name:
    Trip
    Reno/Tahoe
    Vehicle:
    91 4x4 5MT Pickup, 7MGE swap coming
    295/75r16 tires, nothing else
    More zion:

    [​IMG]

    And the road back:

    [​IMG]


    After that, i found a guy in Sac that was selling a dressed 7MG-E longblock and goodies for CHEAP so I picked it up.

    [​IMG]

    [​IMG]

    Then I found THIS during disassembly:
    [​IMG]
    [​IMG]
     
  18. Jan 14, 2024 at 11:11 PM
    #18
    generalee2010

    generalee2010 [OP] Member

    Joined:
    Jan 5, 2024
    Member:
    #441032
    Messages:
    22
    Gender:
    Male
    First Name:
    Trip
    Reno/Tahoe
    Vehicle:
    91 4x4 5MT Pickup, 7MGE swap coming
    295/75r16 tires, nothing else
    Cliff notes of the last 10 months or so:

    got the motor stripped down and dropped it off at a local machine shop that I hope has his stuff together. Block, head, and rear timing cover are all there to be decked and checked.

    [​IMG]

    swapped out the rear diff cause the pinion bearing was HOWLING. it was toast.

    [​IMG]

    old diff:
    [​IMG]

    new axle bearings too:
    [​IMG]

    Went mudding:
    [​IMG]

    first camping trip of the season, late April '23:
    [​IMG]

    got nice and stuck, spent some time digging us out...
    [​IMG]

    found a great spot for lunch:
    [​IMG]

    Now more stuff:

    Installed the Icon Add-a-Leaf kit for the 1996-2015 Tacoma, and works also for the 89-95 truck spring pack. Added an inch and a half of lift as advertised.
    [​IMG]
    [​IMG]

    went out to Independence Lake in June:
    [​IMG]


    Got an Auxbeam 8-gang switch panel to install:
    [​IMG]

    Still not hooked up, but it sure looks good in place of the ashtray:
    [​IMG]

    Also got a nice tool roll setup that I'll hopefully not need very often:
    [​IMG]
     
  19. Jan 14, 2024 at 11:13 PM
    #19
    generalee2010

    generalee2010 [OP] Member

    Joined:
    Jan 5, 2024
    Member:
    #441032
    Messages:
    22
    Gender:
    Male
    First Name:
    Trip
    Reno/Tahoe
    Vehicle:
    91 4x4 5MT Pickup, 7MGE swap coming
    295/75r16 tires, nothing else
    Road trip to Yellowstone and the Tetons, then another trip to Elko/Ruby Mountains in central NV:

    a whole-ass full-size bison, also stopped appropriately at this stop sign, not sure who taught him to read...
    [​IMG]

    The rainbow-colored hot spring. way more majestic in person. The drone shots do it justice, but mine don't.
    [​IMG]

    Tetons:
    [​IMG]
    [​IMG]


    Long weekend in the Ruby Mountains:
    [​IMG]
    [​IMG]
    [​IMG]

    Drove the truck out for this one and it was a brutal drive back with no AC and a headwind the whole way back to reno for 4.5 hours. Can't wait for more power and and AC
     
  20. Jan 14, 2024 at 11:19 PM
    #20
    generalee2010

    generalee2010 [OP] Member

    Joined:
    Jan 5, 2024
    Member:
    #441032
    Messages:
    22
    Gender:
    Male
    First Name:
    Trip
    Reno/Tahoe
    Vehicle:
    91 4x4 5MT Pickup, 7MGE swap coming
    295/75r16 tires, nothing else
    The last one til current stuff:

    Got engaged in April (a bit out of order, but a cohesive post so idc if you think it's a bit disjointed timeline-wise).
    [​IMG]


    then went searching for the right spot to get married:
    [​IMG]

    [​IMG]

    [​IMG]


    Mammoth in August:

    [​IMG]


    AAAAAAAANNNNNDDD:

    That gets me current.

    Truck has been running fine. Got new tires in mid-November. Decided to just bite the bullet and size up. I'm still waiting on my block from the machine shop, so it'll be a while but I have more power on tap coming down the line, and then turning these larger tires will be no problem. For now, I've basically negated 5th gear on all but the flattest roads with no wind :facepalm:

    Looks sweet though, so I'm not complaining.

    [​IMG]
    [​IMG]
    [​IMG]


    Yes I clearanced the fender wells. and I put back the liners with some minor modifications. Doesn't rub at all at full stuff/lock. No body lift or anything.

    [​IMG]
    [​IMG]

    [​IMG]
     
    Dalandser likes this.

Products Discussed in

To Top