1. Welcome to Tacoma World!

    You are currently viewing as a guest! To get full-access, you need to register for a FREE account.

    As a registered member, you’ll be able to:
    • Participate in all Tacoma discussion topics
    • Communicate privately with other Tacoma owners from around the world
    • Post your own photos in our Members Gallery
    • Access all special features of the site

Cylinder Head Gasket Replacement V6

Discussion in 'Technical Chat' started by haneyjbh, Jan 7, 2013.

  1. Jan 7, 2013 at 10:10 PM
    #1
    haneyjbh

    haneyjbh [OP] Member

    Joined:
    Aug 20, 2007
    Member:
    #2489
    Messages:
    18
    Gender:
    Male
    Vehicle:
    2001 extended cab 4X4 stock
    JBA cat back stainless exhaust, and rear view mirror air freshiner. Misc URD parts
    Topic: Head Gasket replacement.
    Engine: 5VZFE (3.4 V6)
    Truck: 2001 Tacoma 4WD extended cab TRD

    This project may be out of reach by some how ever with basic tools I feel anyone with the understanding of how to read a manual and take notes can accomplish this major maintenance task.
    I would recomend obtaining a Haynes manual and a 0-200 inlb torque wrench and a 10-80 ftlb torque wrench and a chain wrench. These are about the only real special tools I felt were necessary.
    Other tools Iwould highly recomend are a blow gun for cleaning and maybe a camera to document any wire/configuration routing when re assembeling.

    Parts: Fel-pro head gasket set PN:HS9227PT1 or go to the dealer.
    Fel-pro cylinder head bolts PN: QES72168.

    Advice: do not go cheap on the head gaskets. You want to use multi-layer steel head gaskets. (no graphite) The Fel-Pro set is about $430. dealer will ask about the same. Bolts arent as bad if you go with Fel-pro. Dealer will ask $15 per bolt & $5 per washer. It adds up fast. I found Summit had a set for $55. I got lucky and found the gasket set on Ebay for under $270.

    Im not going to re write the maintenance steps just tips. The overal procedure was fairly simple, just alot of steps.
    Before you begin. You are going to need a place to temporarly store alot of parts and a clean place to work. Top chain department stores sell white plastic tables that are good to have around and are fairly cheap.

    Tip 1. Once you have the radatior & cooling system draining, Remove the shroud and fan. Cut and tape a piece of cardboard over the radiator to protect it. Or just remove it if you like taking things off you really dont need to.
    Tip 2. You dont have to remove any accessory. Just once its unbolted, wire it out of the way.
    Tip 3. Make a log of what you take off. Take pictures. Reinstall in reverse order.
    Tip. 4. when you are ready to unbolt the Heads, remove bolts in a cris-cross pattern in two stages working your way from the outside in. There is a 10mm cap bolt in each head that must be removed before the head will come off. On the RH side its in the back, on the LH its in the front. Also there may be a grounding strap behind the RH head that needs to come off.
    Tip 5. When removing old gasket material, Use a sharp 1.5" steel scraper. and acetone. If you sharpen your scraper, ensure its done where theres no burrs. The edge must be perfectly straight and square.
    Tip 6. Clean your intake ports & injectors. removal of your intake gives you a oppertunity to get all that carbon/gunk cleaned out and you will thank your self later. I saw a notable improvement in fuel consumption after doing so.
    Tip 7. If your truck is a manual, This is a perfect time to remove the rest of the engine and replace the clutch. Also if you have time you can use this opertunity to clean up your engine bay.

    when you see all the engine components laying on your work benches take the time to inspect them for damage. Replace dried out hoses and seals. The Felpro head set includes most seals but dose not include everything that may need replacing.

    Tip 8. when torquing the heads, there is a requirement to torque to 90* you can make a degree wheel. All you need is a cheapo protractor and a round piece of metal or what ever. I used a can lid from corn! use the protractor to divide the round can lid into 4 sections each 90* from each other. Mark the center and insert your socket extention. When your ready to torque the cylinder head bolts, secure a piece of wire to the head through the valve cover with a valve cover bolt and set it to one mark on the lid and turn to the next mark. Make sure you can fully complete a 90* turn without runing out of room in the engine bay. Then complete the torque sequence a final time in the exact same sequence as the first time PER FACTORY RECOMENDATIONS. (Haynes manuals are like $20) get one.

    When you have everything put back together, its going to smoke for about 3-5 minuets, (white smoke) depending on how much WD-40 and water got in the engine when you were cleaning. This is normal. If for any reason the smoke dosent stop, or something dosent sound right. Shut down and think.

    If you cleaned out the injectors, you may notice a louder than what you remember tapping sound. That is what clean injectors are suppose to sound like.

    Finally, change your oil after about 100 miles. Alot of debris fell into your crank case through the oil passage ways when you were cleaning. Flush out your cooling system too. Same reason as the oil.

    LIke I said, Fairly easy, just alot of steps. Buy a Haynes manual. It has all the steps and torques as well as assembely and tear down steps.

    Good luck!

    Reassemble per factory recomendations and torque sequences
     
    This site contains affiliate links for which the site may be compensated.
    #1
  2. Jan 10, 2013 at 9:21 PM
    #2
    BamaToy1997

    BamaToy1997 Wheel Bearing Master

    Joined:
    Jan 31, 2012
    Member:
    #71846
    Messages:
    10,792
    Gender:
    Male
    First Name:
    Bill
    Navarre, FL
    Vehicle:
    1997 Tacoma 4X4 AKA "Blue Beast"
    best wheel bearings around! www.marionbumper2bumper.com
    Good bit of information. I will add this much. On step 5 you mention using a sharp metal scraper. I would advise against that. It is too easy to make a small mistake that will gouge the steel of the block, and you should NEVER use a metal scraper on aluminum heads. The best that I have seen to use for removal of gasket material is a Roloc disk that is of a soft rubber material. It removes everything, and will not damage the steel or the aluminum. Also you never mentioned after the initial repair to change the oil. (Although you did mention it to be done 100 miles later) It is always a good idea to change the engine oil and filter right after the repairs are made, and before starting it up the first time. Many times if a head gasket blows, or even when doing the job, chemicals and coolant will get into the oil pan, and will be picked up and circulated with the oil. Not a good idea.

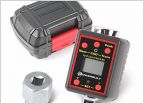
    The last thing I will mention is that while making your own degree wheel is good for a single torque angle, you might want to consider buying a torque angle meter. Some of the basic ones are less than $50 on Ebay and are more accurate. When it comes to torque-to-yield bolts, they are not very forgiving.

    Good general writeup though! Having a table to keep parts safe and clean is always a good idea, and taking pictures can sometimes save you. I always try to take pictures, especially on the engines that have a lot of vacuum lines!
     
    This site contains affiliate links for which the site may be compensated.
    #2
  3. Jan 11, 2013 at 9:03 AM
    #3
    Failure2Comply

    Failure2Comply Old HVACR Tech

    Joined:
    Sep 29, 2012
    Member:
    #87925
    Messages:
    559
    Gender:
    Male
    First Name:
    John
    Virginia, USA
    Vehicle:
    05 Access Off Road TRD/SR5
    ^ Which model number Roloc do you prefer?
     
  4. Jan 11, 2013 at 11:09 AM
    #4
    haneyjbh

    haneyjbh [OP] Member

    Joined:
    Aug 20, 2007
    Member:
    #2489
    Messages:
    18
    Gender:
    Male
    Vehicle:
    2001 extended cab 4X4 stock
    JBA cat back stainless exhaust, and rear view mirror air freshiner. Misc URD parts
    Hello again,

    For the sake of understanding. Advising aginst certian preferences of completing anything, there is and will always be more than one way to complete a task. For the removal of old gasket material on aluminum &/or steel, paitence & comon sense is key. using power tools with abrasive disks can save time. However when used incorectly, the mechanic can easily make a mistake @ the cost of your cylinder head just the same as using a steel scraper when they dont unbderstand what compound/color of roll-loc to use, how hard to press, how long to hold it there in one place, etc...
    Bamatoy 1997 is right on the money with the steel scraper & roll-loc wheels. I personally have had no problems with using a steel scraper in my experence of automotive & aircraft engine maintenance.
    Dont get in ahurry. Quality work takes time to do it right the first time.:)
     
  5. Jan 11, 2013 at 11:17 AM
    #5
    BamaToy1997

    BamaToy1997 Wheel Bearing Master

    Joined:
    Jan 31, 2012
    Member:
    #71846
    Messages:
    10,792
    Gender:
    Male
    First Name:
    Bill
    Navarre, FL
    Vehicle:
    1997 Tacoma 4X4 AKA "Blue Beast"
    best wheel bearings around! www.marionbumper2bumper.com
    I use the green ones on aluminum and the white ones on steel. I don't know the part number. It's on the box here of an image I just googled.

    [​IMG]
     
  6. Jan 11, 2013 at 11:47 AM
    #6
    Failure2Comply

    Failure2Comply Old HVACR Tech

    Joined:
    Sep 29, 2012
    Member:
    #87925
    Messages:
    559
    Gender:
    Male
    First Name:
    John
    Virginia, USA
    Vehicle:
    05 Access Off Road TRD/SR5
    Thanks! As many times as I have to replace compressor gaskets this will really help. Thanks again for the great advice.

    http://www.amazon.com/3M-07524-Tape...?ie=UTF8&qid=1357933598&sr=8-1&keywords=07524


    http://www.amazon.com/3M-07528-Rolo...1357933686&sr=1-4&keywords=roloc+bristle+disk
     
To Top