

-
Welcome to Tacoma World!
You are currently viewing as a guest! To get full-access, you need to register for a FREE account.
As a registered member, you’ll be able to:- Participate in all Tacoma discussion topics
- Communicate privately with other Tacoma owners from around the world
- Post your own photos in our Members Gallery
- Access all special features of the site
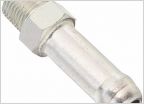 Need Help on the Rear Differential Breather Mod
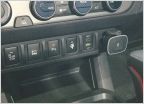 Help wiring Dual USB Port Charger
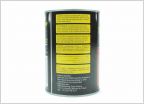 Cost of Transfer Case Fluid
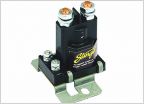 Second battery
 Green Earth Technologies "Green Oil"
1st Gen rear drum brake pad replacement
Discussion in 'Technical Chat' started by 186000mps, May 27, 2012.


