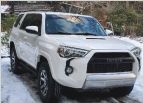
2003 4Runner Limited 4wd V8 FJ tcased overlanding rockcrawling do-it-all build

Discussion in '4Runners' started by xtremewlr, Feb 8, 2020.

  1. Aug 15, 2020 at 2:22 PM
    #161
    xtremewlr

    xtremewlr [OP] Well-Known Member

    Joined:
    Oct 25, 2018
    Member:
    #270626
    Messages:
    8,389
    Gender:
    Male
    First Name:
    Todd
    Tucson, AZ
    Vehicle:
    2003 4Runner V8 - 2012 b00sted XRunner
    I have mods
    Trying to!
     
    Phessor[QUOTED] likes this.
  2. Aug 15, 2020 at 2:22 PM
    #162
    Phessor

    Phessor Well-Known Member

    Joined:
    Feb 15, 2014
    Member:
    #123156
    Messages:
    3,556
    First Name:
    Bob
    Vehicle:
    1998 TRD XTra Cab
    Stuff
    Looks good!
     
    xtremewlr[QUOTED][OP] likes this.
  3. Aug 15, 2020 at 5:07 PM
    #163
    xtremewlr

    xtremewlr [OP] Well-Known Member

    Joined:
    Oct 25, 2018
    Member:
    #270626
    Messages:
    8,389
    Gender:
    Male
    First Name:
    Todd
    Tucson, AZ
    Vehicle:
    2003 4Runner V8 - 2012 b00sted XRunner
    I have mods
    Got a wild hair this afternoon and removed the stock roof rack. So far I like it better.

    [​IMG]

    [​IMG]

    I had some 3/4" thick rubber horse stall mat that I cut and drilled to fill the areas where the rack bolted to. Used FIGP, since I had it handy, to glue down the loose OEM weather strip and seal the bolt holes under the rubber strips I made. Then reused the stock roof rack bolts to fill those holes. I'll see what I can find for some lower profile head bolts later but they aren't super noticeable anyhow.

    [​IMG]

    [​IMG]

    Added the roof rack to my growing pile of parts that I have removed with no intention of using again.

    [​IMG]

    And my custom plate finally showed up today. So now the 4Runner is official!

    [​IMG]
     
    Wishbone Runner, hemitruk and Phessor like this.
  4. Aug 15, 2020 at 10:48 PM
    #164
    hemitruk

    hemitruk Old man , young boi truk

    Joined:
    Oct 17, 2009
    Member:
    #24461
    Messages:
    2,302
    Gender:
    Male
    First Name:
    Kurt
    Hawaii
    Vehicle:
    2010 Dbl Cab Sport,
    A few
    Had 2009 4runner sport that I removed roof rack . Used 4runner parts to cover area . Just fyi .
    Nice looking runner . If mine didnt get totaled (10 months old:facepalm:) I would still have it .

    Screenshot_20200815-193846_Chrome.jpg
    Screenshot_20200815-193901_Chrome.jpg
     
  5. Aug 15, 2020 at 11:08 PM
    #165
    xtremewlr

    xtremewlr [OP] Well-Known Member

    Joined:
    Oct 25, 2018
    Member:
    #270626
    Messages:
    8,389
    Gender:
    Male
    First Name:
    Todd
    Tucson, AZ
    Vehicle:
    2003 4Runner V8 - 2012 b00sted XRunner
    I have mods
    4Runner or Rav4?

    Yeah, it was a last minute decision and I plan on getting the parts to fill the holes properly with factory stuff eventually. Just needed something there in the mean time to prevent any water ingress. Thanks for the info!
     
  6. Aug 15, 2020 at 11:27 PM
    #166
    hemitruk

    hemitruk Old man , young boi truk

    Joined:
    Oct 17, 2009
    Member:
    #24461
    Messages:
    2,302
    Gender:
    Male
    First Name:
    Kurt
    Hawaii
    Vehicle:
    2010 Dbl Cab Sport,
    A few
    The parts I posted are from a rav4 but worked on my 09 4runner sport .Will try to see what year rav4 it was .
     
    xtremewlr[QUOTED][OP] likes this.
  7. Aug 16, 2020 at 8:31 AM
    #167
    xtremewlr

    xtremewlr [OP] Well-Known Member

    Joined:
    Oct 25, 2018
    Member:
    #270626
    Messages:
    8,389
    Gender:
    Male
    First Name:
    Todd
    Tucson, AZ
    Vehicle:
    2003 4Runner V8 - 2012 b00sted XRunner
    I have mods
    I've found all the 4Runner part numbers now. At some point, I'm going to replace all the roof drip moldings and install the roof rack delete caps.

    These are the part numbers, all for a 2009 4Runner without a roof rack. These will work on 2003 to 2009.

    Roof rack delete
    8x 90119-08C47 - bolt
    4x 63185-42020 - bracket
    4x 75596-35030 - roof drip cover

    Windshield and roof moldings (in order, front to back)
    1x 75531-35110 - MOLDING, WINDSHIELD, OUTER UPPER (center one that runs across top of windshield)
    1x 75548-35010 - FASTENER, WINDSHIELD OUTSIDE MOLDING, RH (molding retainer, windshield, side)
    1x 75549-35010 - FASTENER, WINDSHIELD OUTSIDE MOLDING, LH (molding retainer, windshield, side)
    1x 75533-35050 - MOLDING, WINDSHIELD, OUTSIDE RH (windshield, side)
    1x 75534-35030 - MOLDING, WINDSHIELD, OUTSIDE LH (windshield, side)
    2x 75557-35010 - MOLDING, ROOF DRIP SIDE FINISH, CENTER NO.2, RH/LH (long center moldings)
    1x 75553-35010 - MOLDING, ROOF DRIP SIDE FINISH, REAR, RH (rear roof molding)
    1x 75554-35010 - MOLDING, ROOF DRIP SIDE FINISH, REAR, LH (rear roof molding)
    2x 75561-60030 - CLIP, ROOF DRIP SIDE FINISH MOLDING (rear roof molding retainers, metal version)
     
  8. Sep 3, 2020 at 7:03 PM
    #168
    xtremewlr

    xtremewlr [OP] Well-Known Member

    Joined:
    Oct 25, 2018
    Member:
    #270626
    Messages:
    8,389
    Gender:
    Male
    First Name:
    Todd
    Tucson, AZ
    Vehicle:
    2003 4Runner V8 - 2012 b00sted XRunner
    I have mods
    So I got the new leather seat covers I ordered from leatherseats.com on Monday evening. Started doing the install Tuesday after work by doing the rear passenger seats.

    [​IMG]

    [​IMG]

    First seat I did.

    [​IMG]

    [​IMG]

    Then I did the other side.

    [​IMG]

    Tonight, I pulled the seat backs to start on those.

    [​IMG]

    Stripped the rear headrests and steamed the foam. Letting them dry before installing the new covers. I have been steaming all the foam before putting the new covers on. Really helps fill them out again.

    [​IMG]

    This is the driver side rear seat back foam after steaming it.

    [​IMG]

    And all the parts for that seat back. I have black small parts to replace the stuff on the floor. I think it was 2009 $runner Trail Editions that had black interiors and where I am getting the small parts from.

    [​IMG]

    Done. I haven't worried about the tan backers yet.

    [​IMG]

    [​IMG]

    [​IMG]

    [​IMG]

    [​IMG]

    More to come. I'll start work on the passenger side rear seat back tomorrow and then try and get the front seats done this weekend.
     
    hemitruk, Michaelo, jubei and 2 others like this.
  9. Sep 3, 2020 at 8:09 PM
    #169
    Phessor

    Phessor Well-Known Member

    Joined:
    Feb 15, 2014
    Member:
    #123156
    Messages:
    3,556
    First Name:
    Bob
    Vehicle:
    1998 TRD XTra Cab
    Stuff
    Very nice!
     
    xtremewlr[QUOTED][OP] likes this.
  10. Sep 5, 2020 at 5:22 PM
    #170
    xtremewlr

    xtremewlr [OP] Well-Known Member

    Joined:
    Oct 25, 2018
    Member:
    #270626
    Messages:
    8,389
    Gender:
    Male
    First Name:
    Todd
    Tucson, AZ
    Vehicle:
    2003 4Runner V8 - 2012 b00sted XRunner
    I have mods
    Slowly making progress. The passenger side rear seat back has been the most difficult to re-skin so far. Still trying to figure out how to remove the cup holder from the fold down arm rest.

    [​IMG]
     
    Phessor likes this.
  11. Sep 5, 2020 at 6:02 PM
    #171
    Kwikvette

    Kwikvette Well-Known Member Vendor

    Joined:
    Feb 27, 2019
    Member:
    #284735
    Messages:
    79,754
    Gender:
    Male
    Fresno County
    4 run, 2 don't
    Fuck yes :thumbsup:

    Looks good bro
     
    xtremewlr[OP] likes this.
  12. Sep 5, 2020 at 6:24 PM
    #172
    xtremewlr

    xtremewlr [OP] Well-Known Member

    Joined:
    Oct 25, 2018
    Member:
    #270626
    Messages:
    8,389
    Gender:
    Male
    First Name:
    Todd
    Tucson, AZ
    Vehicle:
    2003 4Runner V8 - 2012 b00sted XRunner
    I have mods
    Of course yesterday when I was working on the seat back, i realized that for some reason I only order 2 each of the headrest guides. So had to order 3 more of each. So it'll be a bit before the headrests go on. Saving the remaining 2 on hand for the driver seat.
     
  13. Sep 6, 2020 at 6:10 PM
    #173
    xtremewlr

    xtremewlr [OP] Well-Known Member

    Joined:
    Oct 25, 2018
    Member:
    #270626
    Messages:
    8,389
    Gender:
    Male
    First Name:
    Todd
    Tucson, AZ
    Vehicle:
    2003 4Runner V8 - 2012 b00sted XRunner
    I have mods
    Got the rear armrest/drink tray figured out and installed.

    These 3 holes are to access screws holding the plastic tray inside the armrest.

    [​IMG]

    Remove the screws and the plastic tray slides out and you can replace the leather.

    [​IMG]

    [​IMG]

    [​IMG]

    [​IMG]
     
    Wishbone Runner and jubei like this.
  14. Sep 6, 2020 at 6:53 PM
    #174
    xtremewlr

    xtremewlr [OP] Well-Known Member

    Joined:
    Oct 25, 2018
    Member:
    #270626
    Messages:
    8,389
    Gender:
    Male
    First Name:
    Todd
    Tucson, AZ
    Vehicle:
    2003 4Runner V8 - 2012 b00sted XRunner
    I have mods
    The rest of the day today was doing the driver seat. The front seats are by far the hardest since you have to take them so far apart. Plus I wanted to make sure I retained the factory seat heaters since they still work and work well.

    End results is well worth it tho. New seat foam makes a massive difference in the feel and sits me up a little higher. The old foam was very worn out and torn up after almost 300k miles.

    This is what I started with. Driver seat was the worst of course. The rest of the leather was worn but could probably be saved if someone really cared to.

    [​IMG]

    [​IMG]

    [​IMG]

    It was bad enough that there was no question about replacing the seat cushion. The seat back was still half way decent tho. Got a replacement cushion for heated seats to match what I have already.

    [​IMG]

    So I pulled the seat this morning and vacuumed the carpet. Even found a remote under a flap in the carpet. Not a factory one but surprisingly, it still worked.

    [​IMG]

    [​IMG]

    Pulled all the plastic off the seat.

    [​IMG]

    Pics of the wiring for reference later.

    [​IMG]

    [​IMG]

    Then I tore into it further.

    [​IMG]

    [​IMG]

    [​IMG]

    [​IMG]

    You can see just how bad the original seat foam was.

    [​IMG]

    Carefully separated the seat heater and use upholstery glue to glue it to the seat foam. It was originally attached to the seat cover with those plastic T things they use to attach tags to clothing at stores.

    [​IMG]

    Installed the new seat cover. This is as far as you can install it on the foam until it goes back onto the seat frame.

    [​IMG]

    Pulled the cover and foam off the seat back.

    [​IMG]

    Had to repair a small hole in the door side bolster. I cut a chunk of foam out of the old seat bottom foam and glued in in place to fill the hole. The white stuff is the glue.

    [​IMG]

    [​IMG]

    [​IMG]

    Smoothed it out with a file, that's why it looks dirty here.

    [​IMG]

    Got busy installing the back heater, doing that the same way as the seat bottom heater, gluing it into place. Also covered the repair with Gorilla tape to make sure it lasts a while. Then popped it back on the frame to start installing the new cover.

    [​IMG]

    [​IMG]

    Guess I forgot to take pics again cause this was all I have. The completed seat.

    [​IMG]

    And back in the 4runner.

    [​IMG]

    I really like the map pockets in the new covers as compared to the factory ones. The elastic on the factory ones had stretched out so they always hung open. The new ones won't do that.

    [​IMG]

    And tomorrow I'll do the passenger side front seat. Hopefully I won't screw up putting the headrest guides in like I did on the driver side. The guide with the lock button needs to go on the driver side or left side of the seat (when sitting in it) for both seats. I screwed up and put the lock button on the passenger/right side. There is ever so slight of a difference in the size between the posts I think. I wasn't going to tear the seat apart to fix it and forced the headrest into place. I never adjust them anyhow. And I'm waiting for the new headrest guides that I ordered yesterday anyhow. so the front passenger, middle and passenger side rear seats won't have headrests for a little while.
     
    Wishbone Runner, Kwikvette and y=mx+b like this.
  15. Sep 7, 2020 at 3:22 PM
    #175
    xtremewlr

    xtremewlr [OP] Well-Known Member

    Joined:
    Oct 25, 2018
    Member:
    #270626
    Messages:
    8,389
    Gender:
    Male
    First Name:
    Todd
    Tucson, AZ
    Vehicle:
    2003 4Runner V8 - 2012 b00sted XRunner
    I have mods
    Interior is done for now. Finished up the passenger seat today and got it reinstalled. Just waiting for the rest of the headrest guides to get here so I can put those on.

    More pics of the seat process this time. Started with this.

    [​IMG]

    And finished with this.

    [​IMG]

    After learning how the front seats go together, I was able to pull the foam and old seat covers off without taking more of the seat frame apart.

    [​IMG]

    [​IMG]

    Started with the back rest.

    [​IMG]

    This is to show how the factory seat heater is attached to the seat cover. The gold wire is the heater and gold side goes toward the seat foam.

    [​IMG]

    Heater removed from the old cover.

    [​IMG]

    I steamed all of the original foam to puff it back up again, except the driver seat which was new.

    [​IMG]

    Steaming will get ride of most of this shit and give the foam new life, filling out the seat covers much better.

    [​IMG]

    After steaming, glue the seat heater to the foam. The steamer I use is a cheap Amazon McCulloch brand one. Not the greatest but it gets the job done. Spits a lot of water tho. That's what all the triangular marks are from on the foam.

    [​IMG]

    Then the new seat cover goes on.

    [​IMG]

    Once the seat cover is attached to the foam, slip the foam back onto the frame and finish installing the cover.

    [​IMG]

    [​IMG]

    [​IMG]

    On to the seat cushion. Remove the factory heater. and glue to the seat foam after steaming the foam.

    [​IMG]

    This is the pressure/weight sensor that turns the passenger air bag on or off.

    [​IMG]

    [​IMG]

    Guess I forgot to take pics of the seat bottom stuff but there are plenty pics from the driver side which is basically the same. Didn't take any more until I was done.

    [​IMG] [​IMG]

    [​IMG]

    [​IMG]

    [​IMG]

    [​IMG]

    [​IMG]
     
    y=mx+b and Phessor like this.
  16. Sep 10, 2020 at 9:00 PM
    #176
    Wishbone Runner

    Wishbone Runner Because 4R

    Joined:
    Sep 9, 2012
    Member:
    #86546
    Messages:
    6,338
    Gender:
    Male
    First Name:
    James
    CO
    Vehicle:
    04 SR5 4Runner
    King/Dirt King
    Damn. Nice work!
     
    xtremewlr[OP] likes this.
  17. Sep 10, 2020 at 9:29 PM
    #177
    xtremewlr

    xtremewlr [OP] Well-Known Member

    Joined:
    Oct 25, 2018
    Member:
    #270626
    Messages:
    8,389
    Gender:
    Male
    First Name:
    Todd
    Tucson, AZ
    Vehicle:
    2003 4Runner V8 - 2012 b00sted XRunner
    I have mods
    Thanks!
     
  18. Sep 11, 2020 at 7:33 PM
    #178
    xtremewlr

    xtremewlr [OP] Well-Known Member

    Joined:
    Oct 25, 2018
    Member:
    #270626
    Messages:
    8,389
    Gender:
    Male
    First Name:
    Todd
    Tucson, AZ
    Vehicle:
    2003 4Runner V8 - 2012 b00sted XRunner
    I have mods
    After a couple days sitting in the heat while at work, the leather has really smoothed out. Did a 4 hour round trip drive up to Scottsdale today and the new leather with the new driver seat cushion is WAY more comfortable too. Just need the headrest guides to come in so I can finish those up.
     
    jubei and Phessor like this.
  19. Sep 12, 2020 at 11:37 AM
    #179
    xtremewlr

    xtremewlr [OP] Well-Known Member

    Joined:
    Oct 25, 2018
    Member:
    #270626
    Messages:
    8,389
    Gender:
    Male
    First Name:
    Todd
    Tucson, AZ
    Vehicle:
    2003 4Runner V8 - 2012 b00sted XRunner
    I have mods
    Burned in the lower link mount reinforcements this morning. Got them here - https://eimkeith.com/buystuff/lls/

    Factory setup. Thin metal, not the greatest angle for the mount to slide over anything either.

    [​IMG]

    The reinforcement piece.

    [​IMG]

    Welded in place. I could only get the outside of the reinforcement since the inside is up against the gas tank.

    [​IMG]

    [​IMG]

    Cleaned up the welds with a flap wheel.

    [​IMG]

    [​IMG]

    Primer.

    [​IMG]

    Painted and lower link reinstalled.

    [​IMG]

    [​IMG]

    Passenger side.

    [​IMG]
     
    eimkeith and Phessor like this.
  20. Sep 12, 2020 at 8:43 PM
    #180
    Weejub

    Weejub Active Member

    Joined:
    Oct 28, 2012
    Member:
    #89963
    Messages:
    44
    Nice work!!
     
    xtremewlr[OP] likes this.

Products Discussed in

To Top