1. Welcome to Tacoma World!

    You are currently viewing as a guest! To get full-access, you need to register for a FREE account.

    As a registered member, you’ll be able to:
    • Participate in all Tacoma discussion topics
    • Communicate privately with other Tacoma owners from around the world
    • Post your own photos in our Members Gallery
    • Access all special features of the site

2013 Block Heater Installation (Toyota Canada P/N PU140-00911)

Discussion in '2nd Gen. Tacomas (2005-2015)' started by Gerrrr, Sep 27, 2014.

  1. Sep 27, 2014 at 11:55 AM
    #1
    Gerrrr

    Gerrrr [OP] Well-Known Member

    Joined:
    Aug 20, 2013
    Member:
    #110850
    Messages:
    105
    Gender:
    Male
    First Name:
    Jeremy
    Ottawa, Canada
    Vehicle:
    2017 Blazing Blue Metallic (Limited 2013 Silver Streak DC Auto - Retired)
    Starting over.......
    This is another block heater install guide. With all the different part numbers for the heater and different configurations of the kit it can be confusing.

    The part number of the kit I used was PU140-00911. The parts counter claimed it would also work in a 2014.

    Kit Contents:
    - Heater Cartridge
    - Cable to connect to heater with rubber plug for heater and socket to mount on body of truck
    - 8' cord to connect from truck heater socket to wall plug
    - 1' cord to connect from truck heater socket to wall plug (extension cord end)
    - small tube of thermal grease
    - nylon cable ties
    - hardware to mount socket to body of the truck

    **** Note - There is no dielectric grease in the kit, make sure you have some for the rubber plug that goes into the heater cartridge.

    Tools Required:
    17mm socket to remove and replace a bracket which is in the way
    Extension / Universal / Hex Drive Adapter / Small Battery Impact
    Side cutters
    Drill
    1" Forstner Bit
    Patience

    ImageUploadedByTapatalk1411841600.174757.jpg

    Process:

    1) Drill 1" hole in the side of the fog light bezel.

    2)"Thread" the cable harness through the hole from the front of the truck starting with the rubber plug that attaches to the heater.

    3) Seat the socket in the headlight bezel

    4) Slide the plastic retainer hardware and spring over the harness and use them to lock the socket in place. The spring keeps a constant pressure on the socket to hold it in place.

    ImageUploadedByTapatalk1411841938.275363.jpg
    ImageUploadedByTapatalk1411841968.000651.jpg
    ImageUploadedByTapatalk1411842058.503069.jpg

    5) Route the harness up into engine bay, around under fuse panel, around brake booster and then let the rubber heater plug end dangle down by the O2 sensor directly below. This kit does not have a right angle plug to attach to the heater, it is a straight entry. Do not pass it between the block and exhaust manifold as suggested for kits with the right angle plug.

    ImageUploadedByTapatalk1411842208.438792.jpgImageUploadedByTapatalk1411842217.017355.jpgImageUploadedByTapatalk1411842229.410460.jpg

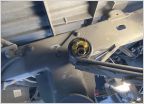
    6) Slide under the truck taking flashlight, impact and sockets with you. I was working from the drivers side laying 90 degrees to the truck body. You need to locate the bolt on the bracket and remove it. I started doing this with a socket handle but can only move it about 10 degrees. This makes it difficult to break the bolt free. I used my Milwaukee M12'impact with the extension and universal and it broke it free. This will require some different approaches for everyone based on how stuck the bolt is and what tools you have. Gently push bracket to the side once removed. The wiring for the O2 sensor is right there and could put a real damper on your day if damaged.

    ImageUploadedByTapatalk1411843279.586949.jpg

    7) Locate hole to the upper left of where the bracket bolt was removed. If you have a compressor blow out the hole just in case there is any crud in there.

    8) Coat exterior of heater cartridge with thermal grease and slide it in to the hole 1/2 way.

    9) Replace the bracket and bolt removed in step 6 but do not fully seat the bolt. Some play in the bracket will be required to seat the heater cartridge.

    10) Seat the heater cartridge in the hole making sure the retainer clip snaps into place on the engine block.

    11)Tighten the bracket bolt using the impact.

    12) Fill the holes in the rubber plug of the harness with dielectric grease and smear some on the body of the plug.

    13) Slide around so you are completely under the truck with your body inline and your head under the front axle. You can see the end of the heater cartridge from here and it is easier to insert the rubber plug as it requires a bit of force. The pins in the heater cartridge are in line one above the other. The plug can insert either way as there is no polarity. Orient the plug to match the pins and push it into the heater.

    ImageUploadedByTapatalk1411843771.918101.jpg

    *****NOTE: Steps 6 to 13 are very finicky and may take an hour to complete. Lots of deep breathing and patience!

    14) Using the cable ties secure the harness out of the way. The harness has passed behind the exhaust manifold and above the catalytic converter. The harness has an integral heat shield to protect it.


    That's it that's all - about 90 minutes to complete.

    ImageUploadedByTapatalk1411844134.061340.jpg

    I will add notes to the drawings in next few days
     
    Last edited: Sep 27, 2014
    gil_S, SR-71A, G.T. and 1 other person like this.
  2. Sep 27, 2014 at 11:34 PM
    #2
    TRDWEST

    TRDWEST Well-Known Member

    Joined:
    Jan 2, 2012
    Member:
    #69818
    Messages:
    110
    Gender:
    Male
    Tucson, AZ Area
    Vehicle:
    2012 DC TRD OFFROAD 4x4
    CVT RTT, VooDoo 10 inch bed rack
    Looks great gerrrr great write up !!!!!
     
  3. Nov 8, 2014 at 11:48 AM
    #3
    cjoker

    cjoker Active Member

    Joined:
    May 1, 2014
    Member:
    #128899
    Messages:
    30
    Gender:
    Male
    First Name:
    brent
    Ontario, Canada
    Vehicle:
    2014 Tacoma TRD Sport
    Salex console & glove box organizer, front window tint, steelie phone mount, G-Tek Sill Protectors - carbide black & diamond plate, WeatherTek digital fit mats, LED Map and Dome lights
    Great writeup!

    Anyone found a source cheaper than the 160$ at the dealership? I was going to get one today until I heard the price - I was expecting something similar to the ~60$ I've seen for other heaters. I understand that it comes with that nifty plug for the fog light which makes the price a bit easier to digest.
     
  4. Feb 20, 2017 at 12:38 PM
    #4
    wolfman2017

    wolfman2017 New Member

    Joined:
    Feb 20, 2017
    Member:
    #211111
    Messages:
    2
    Does anyone know the part number of the 8ft cord that comes with this. I am trying to figure out how to get a replacement online.
     
  5. Mar 7, 2017 at 8:04 PM
    #5
    Jcorcoran01

    Jcorcoran01 New Member

    Joined:
    Jan 18, 2017
    Member:
    #207983
    Messages:
    1
    I also need a replacement cord. Does anyone know the part number or where to find online
     
  6. Mar 10, 2017 at 3:54 PM
    #6
    wolfman2017

    wolfman2017 New Member

    Joined:
    Feb 20, 2017
    Member:
    #211111
    Messages:
    2
    2014 bumper extension cord Toyota Canada Part Number C0141-00921
    Cost me $65.00 Canadian........ouch
     

Products Discussed in

To Top