

-
Welcome to Tacoma World!
You are currently viewing as a guest! To get full-access, you need to register for a FREE account.
As a registered member, you’ll be able to:- Participate in all Tacoma discussion topics
- Communicate privately with other Tacoma owners from around the world
- Post your own photos in our Members Gallery
- Access all special features of the site
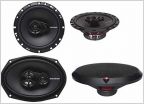 2011 DC fronts have 6x9s but crutchfield says these won't fit
 2006 TACOMA access cab, TRD Off Road
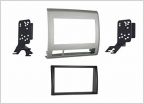 New head unit...
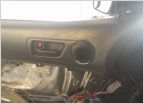 Tweeter (or seperate) speaker
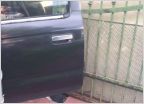 2001 Tacoma Xtended cab speaker upgrade and sound insulation
 Looking for finished installed pictures of double din HU in 3rd gens.
(2nd Gen) Vaistech SL3sat install guide (sort of)
Discussion in 'Audio & Video' started by Dozer, Feb 28, 2016.


