

-
Welcome to Tacoma World!
You are currently viewing as a guest! To get full-access, you need to register for a FREE account.
As a registered member, you’ll be able to:- Participate in all Tacoma discussion topics
- Communicate privately with other Tacoma owners from around the world
- Post your own photos in our Members Gallery
- Access all special features of the site
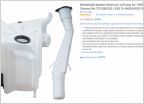 Aftermarket Windshield Washer Reservoir finally available
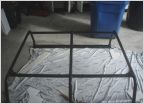 ALL-PRO Bedrack w/ Anchor Trax MOD
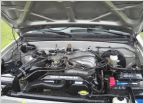 I'm such a cheapskate.... :D
 Did I buy the wrong front suspension...
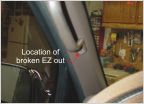 Broken EZ-Out Inside the Cab
 Looking for some 411 about Factory Service Manuals
'99 Flatbed Hunting Rig Build
Discussion in '1st Gen. Tacomas (1995-2004)' started by Tuluk, May 4, 2022.
Page 2 of 4
Page 2 of 4
