1. Welcome to Tacoma World!

    You are currently viewing as a guest! To get full-access, you need to register for a FREE account.

    As a registered member, you’ll be able to:
    • Participate in all Tacoma discussion topics
    • Communicate privately with other Tacoma owners from around the world
    • Post your own photos in our Members Gallery
    • Access all special features of the site

ABS Cover

Discussion in '2nd Gen. Tacomas (2005-2015)' started by black_magic2010, Aug 29, 2013.

  1. Aug 29, 2013 at 6:06 PM
    #1
    black_magic2010

    black_magic2010 [OP] Well-Known Member

    Joined:
    Apr 13, 2010
    Member:
    #35195
    Messages:
    262
    Gender:
    Male
    South Texas
    Vehicle:
    10 Tacoma TRD Sport DBL Cab
    I had some extra time today and was planning on doing this mod on my Yota

    http://www.tacomaworld.com/forum/2n...secondary-stand-alone-fuse-block-install.html

    Only thing is that I have an oil catch can installed on the drivers side that takes up valuable real estate on the drivers side. There's no way I could make that bracket for the stand alone fuse block.

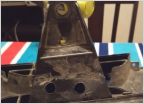
    So I looked to the passenger side of the vehicle and decided to make a cover for the the ABS brake thing ( I think that's what it it). The cover would allow me to mount my oil catch can on the passenger side. At the least it will cover up that unsightly brake system component if you don't plan on mounting anything to the cover. If you decide to add something under the hood this cover might give you a mounting location.

    When I was making this cover, I never intended to make a how to, so I didn't take any pics along the way. But if you read H2Otx how to, it's pretty much the same thing.

    *Tools and Materials
    Lexan sheet ( I purchased a sheet at Lowes)
    Utility blade (used to cut the lexan)
    Heat gun
    Rivets ( 1/8 x 3/8) first number is the diameter the second is the length
    Rivet gun
    Cardboard ( I used boxes from stuff I've ordered online)
    Files ( optional but I use them to deburr the cuts on the lexan
    I purchased a small set at Harbor freight, cheap )
    Drill
    Drill bits ( I used a 5/64 to drill a pilot hole then used the 1/8 for the rivet)
    Krylon fusion paint ( this optional if you want to paint your creation. I had
    Some left over from the BHLM retro fit I did)
    Tape measure
    Clipboard ( or anything to help you bend the lexan, a used license plate will
    Also work )
    Sharpie Marker


    Now as far as constructing the cover just like on H2Otx how to (link above) use the cardboard to make a template of your design. This design is easier because its basically a rectangular shape. Size depends on your preference but mine was a rectangle 5 1/2" x 16". I went with 5 1/2" because this allows enough space to use a ratchet with an extension to reinstall the nuts to the bolts holding down the ABS component.

    Once you have your cardboard template trace it on the lexan with the Sharpie and cut. Use the utility blade to score the cut, the use the heat gun to heat up the entire cut. I used the high heat setting and heated the cut till I saw the lexan become just a little distorted, but not bubbles. Then use a glove or a towel on one hand to grab the hot portion of the lexan and bend till it breaks. Just like cutting glass. Might take a couple of tries. Just like H2Otx mentioned, practice on a piece on lexan if you can. It's not rocket science but it has its way.

    Once you've cut the 5 1/2" x 16 " piece of lexan, from the portion that will be the bottom measure roughly 1- 1/2" inches and make a straight line across the lexan with the Sharpie. Now heat the entire width of the line with the heat gun. Once you notice the lexan distorting a bit, use that clip board or license plate or whatever you improvise with and place it on the line. Now quickly bend the lexan into a 90 degree bend. Becareful not to burn yourself. The lexan will be hot. The point to the clipboard is to have something to bend the lexan on to create the nice sharp bend. Refer to H2Otx how to, he does a great job of explaining how to bend the lexan as well. I just added the clipboard thing cause it helped me get a nice bend :D

    Once done with that first bend, measure 8 inches from the bend and make a straight line across. This will be our second bend. Heat up the along the line and bend the lexan into another 90 degree bend. Remember it may take several heat and slowly bend cycles before you get your final 90 degree bend.

    This is the final bend. Now, I used a scrap piece of 1" x 11" of lexan to make a bracket. Refer to my pics. I cut out this bracket and made a 90 degree bend at roughly 3 inches. This bend is what will bolt up the threaded hole on the right side fender. I then riveted the bracket to the top portion of the cover. I used a total of 4 rivets.

    Now at the bottom of the cover, the 1 - 1/2" bend, this is what will bolt up to the two bolts that hold the ABS thing. Place your cover, mark the holes and drill the holes so that the cover slips onto the bolts. I used a 12 millimeter socket with a 6" extension to remove those nuts. You will mostly likely have to make a cut into the the lexan bottom to allow the cover to slide in a little ( HA HA, that's what she said :D) Look at my pics for reference.

    Now that everything is done you can chose to leave it as it, or spray paint it.
    All measurements aren't going to be exact due to bending the lexan, so your measurements may be off by an 8th of an inch. Remember to measure twice cut bend once.

    Also don't know the measurement of the factory threaded hole on the inside of the fender. I'll figure that out next day off, or if any of you know let me know. And as you have guessed it I haven't permanently mounted it. Will do it on my next day off.

    That's about it, if I left anything out I'll edit this post. If you have any suggestions just post and I'll make corrections.

    photo-5.jpg
    photo-4.jpg
    photo-3.jpg
    photo-2.jpg
    photo-6.jpg
    photo-7.jpg
     
    Last edited: Aug 29, 2013

Products Discussed in

To Top