1. Welcome to Tacoma World!

    You are currently viewing as a guest! To get full-access, you need to register for a FREE account.

    As a registered member, you’ll be able to:
    • Participate in all Tacoma discussion topics
    • Communicate privately with other Tacoma owners from around the world
    • Post your own photos in our Members Gallery
    • Access all special features of the site

AC and frontend repair

Discussion in '1st Gen. Tacomas (1995-2004)' started by yodiggity42, Mar 6, 2022.

  1. Mar 6, 2022 at 6:48 PM
    #1
    yodiggity42

    yodiggity42 [OP] Active Member

    Joined:
    Dec 31, 2021
    Member:
    #385939
    Messages:
    26
    This post is a summary of some work I did recently. If someone in the future finds this thread through a search, I hope it helps!

    For backstory/context on the damage, check out this thread.

    Vehicle: 1995 2.4L

    Total cost: $673

    Frontend parts:
    AC parts:

    Resources:

    Photo Log:

    This is the frontend as I purchased it. Dented bumper and valence. Broken AC pipe behind the grille. Missing side lights. I decided to replace the grille and headlights since I would be replacing most of the frontend pieces anyhow.

    IMG_1875.jpg

    ------------

    This is a view with the grille, bumper, etc. removed.

    The big thing in the middle is the AC condenser. The AC drier is the thing that looks like a little CO2 tank to the right of the condenser. It has two pipes connected to it. One of the pipes runs behind the hood latch. The other pipe runs straight down and connects to the condenser. I'm replacing both.

    You can also see in this photo that metal framing support on the bottom was also dented inward slightly from the previous owner's collision. This was causing the hood latch assembly to bend inward so that the hood would not fully latch. I hoped that I could fix this as well.

    IMG_1876.jpg

    -------------

    View of frontend with condenser removed.

    IMG_1877.jpg

    -------------

    I used a heavy duty chain to pull out the dented metal support bar. It took some effort to slowly undo the dent. I spread the force out by periodically moving the placement of the chain.

    IMG_1878.jpg

    -------------

    Break time.

    IMG_1889.jpg

    -------------

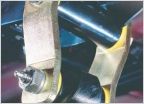
    New condenser installed. The bottom part of the condenser has two saddle-looking pieces that mount onto the piece of metal framing that it sits on.

    The top of the condenser is connected by bolted brackets. The condenser I purchased also came with new brackets. This was super easy to connect after shimmying the condenser into the correct position.

    IMG_1881.jpg

    -------------

    This is a closeup of the connections on the lefthand side of the condenser. There are two connections. The lower connection attaches to the condenser. The upper connection is for the pipe that runs along the front to the AC drier.

    IMG_1882.jpg

    -------------

    Closeup of the righthand side of the condenser. It has one connection that runs to the AC drier. In the photo, it's the thing in the middle covered by a black plastic stopper. The drier would be to the right, but it's vacant at the moment because I removed the old one.

    IMG_1883.jpg

    -------------

    New pipes installed, not yet connected to the AC drier.

    IMG_1886.jpg

    -------------

    Need to get surgical first. I used a syringe to measure out 20ml of PAG oil, and I inserted the PAG into the "out" side of the AC drier.

    IMG_1879.jpg

    IMG_1888.jpg

    -------------

    Pipes connected to the top of the AC drier. The pipes connect with some bolts. I misplaced the screw for the clamp that hold the drier in position. Some plastic zip tie made a fine substitute.

    IMG_1890.jpg

    -------------

    End of day 1.

    IMG_1891.jpg

    -------------

    The grille connects directly to the frame with plastic clips. The grille I purchase came with these, so there wasn't much to do on the grille front.

    There are a number of holes that align between the bumper and the plastic valence. The old bumper used J/U nut fasteners to connect the bumper and valence. Home depot sells these, but finding enough of them at the right size and their corresponding bolts was kind of difficult. I decided to just use some ol' fashioned nuts, bolts, and washers instead.

    The turn signal markers also connect to the bumper with U-clips and screws. The old clips were in terrible condition, but the old screws were decent. I brought the old screws to Autozone and found a match for both new screws and clips.

    IMG_1899.jpg

    -------------

    Newly attached bumper and valence. This was the only part that was difficult as a 1-person job. If you've got some help, this would be step for that would benefit from it.

    The main bolts that bracket the bumper to the frame are located sort of below the headlights underneath the vehicle. They're hard to miss.

    IMG_1904.jpg

    -------------

    Newly attached grille. This was pretty simple: (1) attach plastic clips to the metal frame, (2) shove grille into position so that plastic clips lock.

    IMG_1905.jpg

    -------------

    All done... except the whole recharging the AC system part. It got pretty cold where I'm at for a few weeks, so I had to put this on hold.

    IMG_1907.jpg

    -------------

    A few weeks later... 75 and sunny on a Saturday. Time to fix some AC! Anything I could say here, the Chris Fix video linked in the beginning says better. So check that out if you want more details on pulling a vacuum and recharging your system.

    IMG_1929.jpg


    -------------

    Shazam! Ice cold!

    If you're wondering why the plastic piece is removed for the temperature reading -- I was also replacing this piece. The old part was broken and missing a vent. Unfortunately, there is no aftermarket producer of this piece, so you're at the mercy of ebay prices on a very limited supply. I bought a decent used one, but it cost me >$100. Maybe in the future, 3D scanners and printers will make this easier and cheaper if manufacturers shared their source files :p

    IMG_1931.jpg

    Epilogue:

    The AC continues to work fine, but the AC switch inside the vehicle blinks on and off. Some googling suggests that this could be another can of worms. Hmm...
     
    This site contains affiliate links for which the site may be compensated.
    #1
    aaqr18, turbodb, Kevins60 and 2 others like this.
  2. Jul 14, 2024 at 2:01 PM
    #2
    aaqr18

    aaqr18 Member

    Joined:
    Oct 16, 2020
    Member:
    #344033
    Messages:
    22
    Gender:
    Male
    Vehicle:
    2000 Tacoma 2WD 2.4L Manual Reg Cab
    Thanks for this ^
    I am about to do the same job as P/O my project. Is the A/C still working good today?
     
  3. Jul 14, 2024 at 4:42 PM
    #3
    Sicyota04

    Sicyota04 Slowly but surely.

    Joined:
    Jan 9, 2015
    Member:
    #145940
    Messages:
    3,538
    Gender:
    Male
    First Name:
    Morgan
    California
    Vehicle:
    04 DC 4x4
    Click on OP’s handle and it’ll tell you the last time he was on the Forum.
    It was August 2022. Probably won’t get an answer.
    After a great write up like that. It sure would be nice to get one though.
    Good luck on the undertaking

    IMG_2531.png
     
    aaqr18[QUOTED] likes this.
  4. Jul 14, 2024 at 5:40 PM
    #4
    GuavaRoad

    GuavaRoad Well-Known Member

    Joined:
    Nov 24, 2023
    Member:
    #438131
    Messages:
    62
    Gender:
    Male
    Love these write ups, thanks for taking the time.
     
    aaqr18 likes this.

Products Discussed in

To Top