

-
Welcome to Tacoma World!
You are currently viewing as a guest! To get full-access, you need to register for a FREE account.
As a registered member, you’ll be able to:- Participate in all Tacoma discussion topics
- Communicate privately with other Tacoma owners from around the world
- Post your own photos in our Members Gallery
- Access all special features of the site
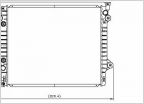 Aftermarket Denso replacement radiator question
 Retrofits
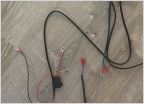 Locking tailgate (that's better quality than Pop and Lock)?
 Rough idle on my 07 just started..
 Cigarette Lighter and Accessory Power outlet went out.
 Anyone have this? thought it was funny
Anytime Camera Front/back/and side to side... whatever you like
Discussion in '2nd Gen. Tacomas (2005-2015)' started by PyroTaco, Aug 24, 2018.


