

-
Welcome to Tacoma World!
You are currently viewing as a guest! To get full-access, you need to register for a FREE account.
As a registered member, you’ll be able to:- Participate in all Tacoma discussion topics
- Communicate privately with other Tacoma owners from around the world
- Post your own photos in our Members Gallery
- Access all special features of the site
 Light timer
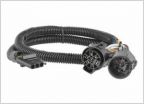 OPT7 LED BAR HELP!!!
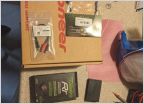 Only 3 hours till the kid goes to bed
 Better filling options than Slippery Pete?
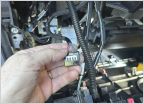 What is this plug for?
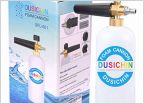 Does anyone have any experience with washing their Tacoma with a Dusichin SFL-001 Foam Cannon?
Anytimebackupcamera.com Install- Front and Rear Cameras
Discussion in '3rd Gen. Tacomas (2016-2023)' started by Papadave418, Sep 7, 2018.
Page 9 of 60
Page 9 of 60
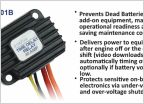
Products Discussed in


