1. Welcome to Tacoma World!

    You are currently viewing as a guest! To get full-access, you need to register for a FREE account.

    As a registered member, you’ll be able to:
    • Participate in all Tacoma discussion topics
    • Communicate privately with other Tacoma owners from around the world
    • Post your own photos in our Members Gallery
    • Access all special features of the site

Arcticelf's sold his truck BS thread

Discussion in '2nd Gen. Builds (2005-2015)' started by Arcticelf, Jul 27, 2015.

  1. Jul 27, 2015 at 4:08 AM
    #1
    Arcticelf

    Arcticelf [OP] Well-Known Member

    Joined:
    Jul 18, 2015
    Member:
    #159735
    Messages:
    7,571
    Gender:
    Male
    Vehicle:
    Gladiator
    Current Picture:
    IMG_20200705_122041153_HDR.jpg
    #cagey

    IMG_20200620_132202868.jpg

    Back when it had mid travel suspension
    IMG_20200322_103046196.jpg

    And when it looked like a truck:
    IMG_20150917_081134454_HDR.jpg
    IMG_20170727_195151.jpg


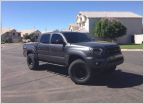
    2013 DCLB build
    Modifications so far:
    -GMF Front J-Arm LT, +1.5" width
    -JD Fab 934 CV conversion
    -King 8"x2.5 coilovers, DirtKing custom valving
    -Ruff Stuff ford 9" housing, D60 bearings, 4.88 gears, e-locker.
    -King extended rear shocks (14" travel) (20/08 valving)
    -Deaver Raptor Pack, on custom hangers and Camburg shackles.
    -Ubolt flip
    -2.5x2.5 King hydro Bumps, @200PSI rear
    -295/70/17 Patagonia MT tires
    -JBA Long Tube Headers
    -BBK Varitune Muffler
    -GMF Custom Stainless tail pipe
    -Total Chaos alignment tab gussets
    -Solid mount alignment tabs.
    -Limit straps
    -High-lift bed rail mount (see below)
    -Fender well/cab mount chop (see bellow)
    -Stainless brake lines: https://www.tacomaworld.com/threads/amazing-deal-on-steel-braded-brake-lines-group-buy.97331/
    - Amazon special LED flood lights on the back bumper.
    - Rigid Industries 20" flood/spot combo stealth mounted behind the grill.
    - TC Spindle Gussets via @glorifiedwelder
    - Gray Man Fab front bumper and IFS Skid
    - Mid and Dif skid from @Mobtown Offroad
    - flat tailgate skin/top guard @Mobtown Offroad
    - CB Radio in center console with hood mount antenna
    -Rear Diff armor @JLee
    -Dual battery: Two group 31 Yellow Top, relocated behind the rear seat.
    -bed lights
    - Solo Motorsports power steering rack
    - Solo heim joint tie rods
    -DMZ solid motor mounts.
    -Advanced Fiberglass fenders and bed sides
    -custom rear bumper

    Repaired/Replaced:
    -Wheel bearings
    -Power steering rack - Solo Motorsports Tundra Conversion
    -Power steering pump

    Planned:
    -1000W inverter
    -water tank
    -Winch
    -FJ Twin Stick

    Removed:
    -OEM Rear axle.
    -ARB OBA (salt water sucks)
    -front crossmember/crash bar
    -shock/UCA mounting tower
    -fender/radcore inner sheetmetal
    - double shear UCA mounts @Dirt King Fab
    -Demello bolt on sliders
    -1.5" Spidertrax Spacers
    -King Extended Travel 2.5" front shocks
    -Plastics Guy dual-durometer rubber bumps front and rear (great, but got hydros).
    -Moog grease fitting lower control arm bolts
    -Dirt King heimed UCAs
    -Dirt King LCAs
    - @tacodane LED hood lights: https://www.tacomaworld.com/threads/tacodane-led-kits.400988/
    -CaliRaised amber front LED pods
    -BAMF rear shock relocate @JLee
    -Panda Special ATS pack
    -I tried the sway-bar disconnect: it worked. But I always left it disconnected. So I just took it off.
    -Icon Extended Travel 2.5" front shocks
    -Icon 2" rear shocks
    -Dakar leaf pack, got too heavy.
    -Timbren bump stops (rear) failed!
    -Wheelers super bumps (front)
    -TWSS 2018 Front mudflaps.
    -Bed corner tie down gussets: https://www.tacomaworld.com/threads/bed-rail-corner-gusset-tie-down-brackets-gb-feeler.363734/
     
    Last edited: Apr 5, 2021
  2. Jul 27, 2015 at 4:24 AM
    #2
    Arcticelf

    Arcticelf [OP] Well-Known Member

    Joined:
    Jul 18, 2015
    Member:
    #159735
    Messages:
    7,571
    Gender:
    Male
    Vehicle:
    Gladiator
    Cab Mount Chop this weekend.

    Before:

    CMC_Before.jpg
    Here's the points of contact:

    Rub.jpg

    After marking and cutting. I also flattened the pinch weld. This was the picture I couldn't find anywhere else, Tacoma fender flare chop, Tacoma fender chop, Tacoma cab mount chop. Hopefully that will help someone else :)

    Marked and Cut.jpg

    After welding:
    Tiged.jpg

    Final assembly pictures to follow, I ran out of time...
     
    Nimble9 and ChadsPride like this.
  3. Jul 31, 2015 at 4:38 AM
    #3
    Arcticelf

    Arcticelf [OP] Well-Known Member

    Joined:
    Jul 18, 2015
    Member:
    #159735
    Messages:
    7,571
    Gender:
    Male
    Vehicle:
    Gladiator
    Finished, two coats of undercoat and two coats of bedliner.
    IMG_20150728_191730816_HDR.jpg

    With mudflaps installed:
    IMG_20150728_194230109_HDR.jpg
    They stick out about as far as stock, but are 3" shorter.
     
    ChadsPride and TinyTech626 like this.
  4. Aug 17, 2015 at 4:54 PM
    #4
    Arcticelf

    Arcticelf [OP] Well-Known Member

    Joined:
    Jul 18, 2015
    Member:
    #159735
    Messages:
    7,571
    Gender:
    Male
    Vehicle:
    Gladiator
    Lift with blocks spacers: 23 rear, 22 1/2 front. So much for 3 front 1 rear and level. That's with a ~200# tool box.

    OME Dakars and Icon shocks all around ordered today.
     
    ChadsPride likes this.
  5. Sep 7, 2015 at 4:06 PM
    #5
    Arcticelf

    Arcticelf [OP] Well-Known Member

    Joined:
    Jul 18, 2015
    Member:
    #159735
    Messages:
    7,571
    Gender:
    Male
    Vehicle:
    Gladiator
    Lift with the new Icons:
    22 and 7/8ths driver
    22 and 5/8th passenger
    1 and 7/16 thread showing on both.
    25" rear.

    The truck feels lower than it did before the Icon install, or I have gotten thicker, based on a calebrated crawl underneath the truck.

    Ride is drastically improved from the OEM suspension and lift.

    AE
     
    Last edited: Sep 23, 2015
    fatfurious2 and ChadsPride like this.
  6. Sep 7, 2015 at 4:09 PM
    #6
    Arcticelf

    Arcticelf [OP] Well-Known Member

    Joined:
    Jul 18, 2015
    Member:
    #159735
    Messages:
    7,571
    Gender:
    Male
    Vehicle:
    Gladiator
    Pictures of the install:
    Front
    IMG_20150830_145115533_HDR.jpg
    Rear
    IMG_20150830_165823155_HDR.jpg
    You can also see the exhaust chop in this one.
     
  7. Sep 7, 2015 at 4:11 PM
    #7
    Arcticelf

    Arcticelf [OP] Well-Known Member

    Joined:
    Jul 18, 2015
    Member:
    #159735
    Messages:
    7,571
    Gender:
    Male
    Vehicle:
    Gladiator
    Ball joint removal done easy:
    IMG_20150830_104612324.jpg
    AE
     
    13txtaco and ChadsPride like this.
  8. Sep 13, 2015 at 5:09 PM
    #8
    Arcticelf

    Arcticelf [OP] Well-Known Member

    Joined:
    Jul 18, 2015
    Member:
    #159735
    Messages:
    7,571
    Gender:
    Male
    Vehicle:
    Gladiator
    High lift jack mount, DIY. Steel from Lowes, bent and fit by hand. Bed rail attachment is a bit of aluminum and a caredge bolt.

    Rear:
    IMG_20150913_113234185.jpg
    Front, with unpatented anti-squeak bushing:
    IMG_20150913_113227895.jpg

    Fully assembled:
    IMG_20150913_135508082_HDR.jpg

    You can also see my bed corner tie down/ tonoeu cover mount. No more sliding around and flapping in the wind.
    AE
     
    ChadsPride likes this.
  9. Nov 6, 2015 at 10:18 AM
    #9
    EDDO

    EDDO                         

    Joined:
    Mar 12, 2014
    Member:
    #125165
    Messages:
    4,017
    Gender:
    Male
    First Name:
    Eric
    San Jose, CA
    Vehicle:
    19 TUNDRA
    Really nice build, @Arcticelf :bowdown:
    I saw your upper balljoint post in the WHYDTYTT thread and was wondering where you sourced the replacements? Low-mileage takeoffs? My Camburgs take the OEM balljoints and I don't need them now, but want to have them on hand...
     
  10. Nov 6, 2015 at 5:43 PM
    #10
    Arcticelf

    Arcticelf [OP] Well-Known Member

    Joined:
    Jul 18, 2015
    Member:
    #159735
    Messages:
    7,571
    Gender:
    Male
    Vehicle:
    Gladiator
    ChadsPride likes this.
  11. Nov 6, 2015 at 5:54 PM
    #11
    EDDO

    EDDO                         

    Joined:
    Mar 12, 2014
    Member:
    #125165
    Messages:
    4,017
    Gender:
    Male
    First Name:
    Eric
    San Jose, CA
    Vehicle:
    19 TUNDRA
    You got the new ones that take the Moogs; mine are the earlier version that need OEM, so I'll seek a set of low-mileage take offs. Easy swap with the press?
     
    ChadsPride likes this.
  12. Nov 6, 2015 at 5:59 PM
    #12
    Arcticelf

    Arcticelf [OP] Well-Known Member

    Joined:
    Jul 18, 2015
    Member:
    #159735
    Messages:
    7,571
    Gender:
    Male
    Vehicle:
    Gladiator
    The moog is supposed to me an OE replacement, I thought it would fit both versions of the camburg, just the new one has a different angle and comes with a moog installed.

    And yes, very easy with a press.
     
    ChadsPride and EDDO like this.
  13. Nov 28, 2015 at 4:52 AM
    #13
    Arcticelf

    Arcticelf [OP] Well-Known Member

    Joined:
    Jul 18, 2015
    Member:
    #159735
    Messages:
    7,571
    Gender:
    Male
    Vehicle:
    Gladiator
    A correction to above, apparently the old style Camburg arms need the ball joint cup opened a few thousandths before moog joints will fit. Tool of choice is apparently a barrel sander.
     
    ChadsPride and EDDO like this.
  14. Dec 12, 2015 at 6:41 PM
    #14
    Arcticelf

    Arcticelf [OP] Well-Known Member

    Joined:
    Jul 18, 2015
    Member:
    #159735
    Messages:
    7,571
    Gender:
    Male
    Vehicle:
    Gladiator
    Camburg uni-ball UCAs installed. I'm getting far too good at fishing that UCA bolt in and out.
    IMG_20151212_134839846_HDR.jpg
     
  15. Jan 16, 2016 at 7:13 PM
    #15
    Arcticelf

    Arcticelf [OP] Well-Known Member

    Joined:
    Jul 18, 2015
    Member:
    #159735
    Messages:
    7,571
    Gender:
    Male
    Vehicle:
    Gladiator
    Installed lights today, Amazon special LED floods on the back bumper, and the @tacodane hood light kit.

    Here's the final picture:IMG_20160116_213132286.jpg

    Tacodane's kit is well documented and easy to install. It looks very good installed, and the hardest part is cutting the harness cover to length. They are fantastically bright, you can see my porch lights on the side of the house in the background.

    IMG_20160116_213116656.jpg
    Follow the directions, and this is easier than changing a tire.
     
    Last edited: Jan 16, 2016
    ChadsPride likes this.
  16. Jan 16, 2016 at 7:19 PM
    #16
    Arcticelf

    Arcticelf [OP] Well-Known Member

    Joined:
    Jul 18, 2015
    Member:
    #159735
    Messages:
    7,571
    Gender:
    Male
    Vehicle:
    Gladiator
    The Amazon lights, not so much. Lights and mounts are great. IMG_20160116_163422335_HDR.jpg
    I sealed up the harness on the back of the light with some electrical tape, otherwise water will get in. You can also see my drill template there.

    Here we are post drilling, inused the crease in the bumper as a guide for the top of the template.
    IMG_20160116_164009285.jpg

    Then you just bolt them up and fabricate your wiring harness:
    IMG_20160116_205154394.jpg
    The kit from amazon was much to short, by about 20' of wire.
     
    ChadsPride likes this.
  17. Apr 10, 2016 at 2:09 PM
    #17
    Arcticelf

    Arcticelf [OP] Well-Known Member

    Joined:
    Jul 18, 2015
    Member:
    #159735
    Messages:
    7,571
    Gender:
    Male
    Vehicle:
    Gladiator
    Notes:
    6 to 8 inch front straps.
    15 to 18 inche rear straps.
    Rear travel to 24.5 inches droop, eye to eye.
    9.5 inches of up travel available.
     
    ChadsPride and EDDO like this.
  18. May 9, 2016 at 7:08 PM
    #18
    Arcticelf

    Arcticelf [OP] Well-Known Member

    Joined:
    Jul 18, 2015
    Member:
    #159735
    Messages:
    7,571
    Gender:
    Male
    Vehicle:
    Gladiator
    Front light bar, 20" Rigid.
    IMG_20160509_200046418.jpg
    Light bar only
    IMG_20160509_214026732.jpg
    Light bar and high beams
    IMG_20160509_214019674.jpg
     
    Nimble9 and ChadsPride like this.
  19. May 16, 2016 at 5:38 PM
    #19
    Arcticelf

    Arcticelf [OP] Well-Known Member

    Joined:
    Jul 18, 2015
    Member:
    #159735
    Messages:
    7,571
    Gender:
    Male
    Vehicle:
    Gladiator
    Removed
    -Moog lower ball joints.
    -Urethane bushings

    These moog and energy parts are okay, but a definite source of clunks and rattles. Probably okay if you don't hit the suspension too hard.

    -Camburg uni-ball UCAs

    These were awesome. However I a)wanted matching arms and b) wanted heimed uppers so I can solid mount the lowers.
     
    ChadsPride likes this.
  20. May 16, 2016 at 5:50 PM
    #20
    Arcticelf

    Arcticelf [OP] Well-Known Member

    Joined:
    Jul 18, 2015
    Member:
    #159735
    Messages:
    7,571
    Gender:
    Male
    Vehicle:
    Gladiator
    ChadsPride likes this.

Products Discussed in

To Top