

-
Welcome to Tacoma World!
You are currently viewing as a guest! To get full-access, you need to register for a FREE account.
As a registered member, you’ll be able to:- Participate in all Tacoma discussion topics
- Communicate privately with other Tacoma owners from around the world
- Post your own photos in our Members Gallery
- Access all special features of the site
 "budget" Flares and Flaps
 Help choosing new headlights....
 2014 RWD Access cab mods
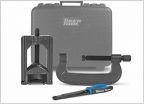 U Joint Tool Kit
 My Doors Make So Much Noise!
Aries Brush Guard Install Question
Discussion in '2nd Gen. Tacomas (2005-2015)' started by PeteK, Apr 25, 2009.


