1. Welcome to Tacoma World!

    You are currently viewing as a guest! To get full-access, you need to register for a FREE account.

    As a registered member, you’ll be able to:
    • Participate in all Tacoma discussion topics
    • Communicate privately with other Tacoma owners from around the world
    • Post your own photos in our Members Gallery
    • Access all special features of the site

ATTN: retrofit guys. Properly sealing h1 mini retrofit?

Discussion in 'Lighting' started by 1rooster, Aug 28, 2014.

  1. Aug 28, 2014 at 2:05 PM
    #1
    1rooster

    1rooster [OP] TACOMA31750

    Joined:
    Jun 14, 2010
    Member:
    #38925
    Messages:
    982
    Gender:
    Male
    Georgia
    Vehicle:
    2007 Tundra crewmax
    5100's ALL WAY AROUND, 885X COILS, DRIVER SIDE LEAN SPACER, ICON PROGRESSIVE AAL W/O OVERLOAD, 265/75/16 KENDA KLEVER M/T. 1 1/4 SPIDERTRAC WHEEL SPACERS, GEN 1 TRD COLD AIR INTAKE, STOCK MUFFLER WITH CHOPPED TURNDOWN, 5% TINT OVER FACTORY, DEBADGED, TOYOTA RUBBER BED MAT, WEATHERTECH MATS,UWS TOOLBOX, UNDERCOVER SE, LOCKER MOD, REAR BUMPER, PIONEER DOUBLE DIN WITH PARKING BREAK OVER RIDE, CUSTOM OIL CATCH CAN, FULL LED INTERIOR, ARB BUMPER REPLACEMENT. COVERKING SEAT COVERS. MORIMOTO H1 MINI COVERSION WITH MINI GATLIN GUN SHROUDS AND 5000K MORIMOTO BULBS. TRAILER PLUG RELOCTED TO BUMPER. 20 INCH LED LIGHTBAR MOUNTED BEHIND CUSTOM PAINTED GRILL. STUBBY ATNENNA
    So I got my morimoto h1 mini in the mail a few days ago and have everything figured out except how to properly seal the rear the headlight to prevent moisture from getting in. Do I need to modify my existing rubber garment or do I need to buy one of these?
    http://www.theretrofitsource.com/accessories/rubber-housing-caps.html#.U_-T99m9LCQ.

    Please help!!!! I know someone out there knows before I start this project

    Edit: got my answer from another post. But if you still have any good answers please feel free to comment.
     
    Last edited: Aug 28, 2014
  2. Aug 28, 2014 at 3:39 PM
    #2
    NightProwler

    NightProwler Well-Known Member

    Joined:
    Nov 12, 2013
    Member:
    #116470
    Messages:
    3,447
    Gender:
    Male
    First Name:
    Harlan
    Maricopa, Az
    Vehicle:
    '01 Prerunner, '16 trd4x4, '09 R1, '03 cbr954rr, '03 rc51
    No don't get those rubber caps. I got em and they rip very easily if you try to put wires through it. I used my existing grommet. But I do have a slight gap there with the H1 bulb. I ended up just wrapping the bulb with electrical tape to close the gap. Worked for now but I need a permanent fix. Post up that link to the other solution you found?
     
  3. Aug 29, 2014 at 2:03 PM
    #3
    1rooster

    1rooster [OP] TACOMA31750

    Joined:
    Jun 14, 2010
    Member:
    #38925
    Messages:
    982
    Gender:
    Male
    Georgia
    Vehicle:
    2007 Tundra crewmax
    5100's ALL WAY AROUND, 885X COILS, DRIVER SIDE LEAN SPACER, ICON PROGRESSIVE AAL W/O OVERLOAD, 265/75/16 KENDA KLEVER M/T. 1 1/4 SPIDERTRAC WHEEL SPACERS, GEN 1 TRD COLD AIR INTAKE, STOCK MUFFLER WITH CHOPPED TURNDOWN, 5% TINT OVER FACTORY, DEBADGED, TOYOTA RUBBER BED MAT, WEATHERTECH MATS,UWS TOOLBOX, UNDERCOVER SE, LOCKER MOD, REAR BUMPER, PIONEER DOUBLE DIN WITH PARKING BREAK OVER RIDE, CUSTOM OIL CATCH CAN, FULL LED INTERIOR, ARB BUMPER REPLACEMENT. COVERKING SEAT COVERS. MORIMOTO H1 MINI COVERSION WITH MINI GATLIN GUN SHROUDS AND 5000K MORIMOTO BULBS. TRAILER PLUG RELOCTED TO BUMPER. 20 INCH LED LIGHTBAR MOUNTED BEHIND CUSTOM PAINTED GRILL. STUBBY ATNENNA
    http://www.tacomaworld.com/forum/2n...-did-you-seal-your-headlight-rubber-boot.html
     
  4. Aug 29, 2014 at 3:59 PM
    #4
    NightProwler

    NightProwler Well-Known Member

    Joined:
    Nov 12, 2013
    Member:
    #116470
    Messages:
    3,447
    Gender:
    Male
    First Name:
    Harlan
    Maricopa, Az
    Vehicle:
    '01 Prerunner, '16 trd4x4, '09 R1, '03 cbr954rr, '03 rc51
    Well hell!! Sigh. I was writing up a big post with pics of my method for my next retro using a pvc cap, but I hit the God damned back button on my mouse and I lost it. I'll have to write it up later seeing as I gotta go to work..
    But.. It's been a while since I looked up any methods for this. And that other thread seems like it might work. But on mine the bulb protrudes through the grommet. Just like in the first pic of that thread. So I'm unsure that's gonna work. I messed around with my grommet for a while and just couldn't figure it out. Not too worried about it because I'm gonna be doing a new retro with all new stuff. Headlight housings and projectors. Using my pvc cap method for sealing the back. I was gonna wait and do a writeup with them but I can throw it out there so u get an idea of what I'm doing.I'll get back to you on that later.
     
  5. Sep 1, 2014 at 12:21 PM
    #5
    1rooster

    1rooster [OP] TACOMA31750

    Joined:
    Jun 14, 2010
    Member:
    #38925
    Messages:
    982
    Gender:
    Male
    Georgia
    Vehicle:
    2007 Tundra crewmax
    5100's ALL WAY AROUND, 885X COILS, DRIVER SIDE LEAN SPACER, ICON PROGRESSIVE AAL W/O OVERLOAD, 265/75/16 KENDA KLEVER M/T. 1 1/4 SPIDERTRAC WHEEL SPACERS, GEN 1 TRD COLD AIR INTAKE, STOCK MUFFLER WITH CHOPPED TURNDOWN, 5% TINT OVER FACTORY, DEBADGED, TOYOTA RUBBER BED MAT, WEATHERTECH MATS,UWS TOOLBOX, UNDERCOVER SE, LOCKER MOD, REAR BUMPER, PIONEER DOUBLE DIN WITH PARKING BREAK OVER RIDE, CUSTOM OIL CATCH CAN, FULL LED INTERIOR, ARB BUMPER REPLACEMENT. COVERKING SEAT COVERS. MORIMOTO H1 MINI COVERSION WITH MINI GATLIN GUN SHROUDS AND 5000K MORIMOTO BULBS. TRAILER PLUG RELOCTED TO BUMPER. 20 INCH LED LIGHTBAR MOUNTED BEHIND CUSTOM PAINTED GRILL. STUBBY ATNENNA
    PVC cap huh? Never thought about that. Share quick!!!
     
  6. Sep 1, 2014 at 6:26 PM
    #6
    NightProwler

    NightProwler Well-Known Member

    Joined:
    Nov 12, 2013
    Member:
    #116470
    Messages:
    3,447
    Gender:
    Male
    First Name:
    Harlan
    Maricopa, Az
    Vehicle:
    '01 Prerunner, '16 trd4x4, '09 R1, '03 cbr954rr, '03 rc51
    Ok.. So keep in mind this is not a finished product. It's just what I have in mind doing for my next set and have not seen how well it'll work. But I'm confident it will do great. Also this is for my aftermarket Spyder 1 piece headlights. I haven't looked at my oem headlights as they're in storage (a "just-in-case-backup") but I'm pretty sure all these headlights have the same lip on the back where the grommet slips onto. So really it should work for just about any 1st gen headlight and/or other gens but Idk what theirs look like.
    2012-07-25_12-39-22_913_zps84a4d76f_6c0d75c0a0fb772990b6a46945c641cba3e538d0.jpg
    First here's a shot of the rubber grommet and what you can do with it to perhaps help accommodate the seal problem, if you decide to stick with it. This is also the grommet that came with my aftermarket lights so it may be different from stock, I cant remember what the old one looked like but I think its the same.

    Here it is untouched:
    DSCF2630_zps1710ec7a_c0a53968585ae6d51114a00358739e318c870e18.jpg

    You can pull out or reverse the inner part to make room for the H1 bulb in two separate positions:
    DSCF2631_zps9150cd33_b0d1a5e2d571a013f03ad350fb84ca62004bc597.jpgDSCF2633_zpsff2c1bd3_48bcfbfff8b7b9308516dd96c3be56b1bf138d62.jpgDSCF2636_zpsfb0432fa_b6a104672834d4282c85d61d3b99efe6b647501b.jpgDSCF2635_zps89cc0ae0_c119344db2194e4d117bf5c6dc3521cdc86b964e.jpg

    The first position of the modified grommet may be enough to put that other smaller grommet that came with the hid kit that has the bulb wires fed through it. But I just don't see how that could create a perfect seal. It might. If you cut it just right. The 2nd position of the grommet is completely reversed inside out. I tired using a zip tie around it squished tight around the wires, but it was too thick and still left a gap I wasn't happy with. It may be possible to shove something inside it like a cable gland and have it be enough if its a tight fit. But I'm not gonna mess with that.


    Now, on to the pvc cap method..
    DSCF2640_zpsd495a8cc_1ab439a191e5f3906676ee4149e28fa6bfe560e9.jpg

    I looked at all kinds of pvc parts and caps, and this is what I came up with. I wanted something that was still going to be serviceable. For example if the bulb went out, I wanted to be able to easily replace it without having to cut or break off a plain pvc cap that is glued on. Plus I don't think I was able to find one with the diameter I needed. So before going out and buying parts, you need to take some measurements of your headlight housing where the cap will fit onto. You'll have to put a little thought into it if it turns out the size of the lip for the pvc cap isn't a size you can easily find. I would imagine they'd all be the same, but you need to make sure first.
    For example on my headlights, the outside diameter of the lip on the back of the headlight where the grommet fits over, is EXACTLY 3 inches. So I went down to the hardware store and looked around for a 3" pvc cap. But had a tape measure with me to measure it, as I found a lot of caps were different with inside and outside diameters depending on its use for the application needed in plumbing. Be it a cap that goes on the outside or inside of the pipe. I believe the one I got was meant to be inside of a 3" pvc pipe. I may be wrong on that, all i know is I made sure I measured it and that it would fit over the lip of the headlight. And it turned out it is a perfect fit. I remember looking for a plain cap that had the exact 3" diameter and I had a hard time finding it, even online. But even if it's a little off, there may be a way to close the gap. Maybe just silicone it on to the back of the headlight real good. Or JB Weld. But I don't recommend JB Weld because its a bitch to get back off. Silicone or I'm sure someone else can pitch in on something else that would work better. Just make sure if you use silicone, to not get it anywhere on the inside of the headlight or even the inside diameter of the pvc cap. Just slide the cap OVER then put a good bead on the OUTSIDE ONLY! Any silicone on the inside may out-gas and create a nasty silicone moisture haze that will stick on to the lens and not go away. You'll have to split your headlights apart again and clean it off!

    As you can see this is a 3" pvc cap, but has an inside diameter bigger than 3" as its a cap to fit over pvc pipe with an inside diameter of 3".
    IMAG0745_zps65eyfkmj_da0cdbf4947b3fc747db26e72c766bd2c22ec7c1.jpgIMAG0741_zpsjjcg4pld_964aa90647d42b2a0e032ea01824a7d9a52771ca.jpg

    So I just ended up using the threaded cap one I previously bought at the hardware store. At the time I thought I might be able to permanently seal the cap onto the headlight. As to service/replace the bulb by just unscrewing the top cap, but it turns out that I would have to remove the whole cap anyways since the bulb clip wont come out with the cap on. So what I'll be doing is just pressing the cap on real good (its a really tight fit) and using something to seal the gap just to make sure no water gets in. Probably silicone as that's pretty easy to clean off and re-do if/when i need to remove the cap. Maybe some butyl rubber but that can be messy.

    Here's a pic of it lightly pressed on by hand. I may be able to tap it in more.
    DSCF2645_zps1f0f7d4b_e5b7c22b24749cfaf94b90720ab96890739a44fe.jpg

    As you can see it looks pretty bulky, and just odd, but keep in mind I will be trimming the end to make it shorter, and painting it black as well.
    DSCF2646_zpsdf42ad20_a909966e1ff1ed452dc3a6c02386b4d4be63741f.jpgDSCF2647_zps400e508d_0ca784c463995e52e7aab7b69881b1166a3824ee.jpg

    This is about where I will shorten it down to (at the etch mark)
    DSCF2648_zps8255ba8f_1db9d1468f2233bfb55e1962847cfd30e8ef711f.jpg

    Ok last but not least I'll be using a cable gland for the wires to be fed through. You could use the small rubber grommet that cam with the hid kit with the bulbs too, but I don't think with this particular cap it would work. That square notch is pretty small. Perhaps if you went with a plain cap it would work.
    DSCF2649_zps9d96eae3_e0cddecf7f3b7f6d704ddab27833bbe16dd240b6.jpgDSCF2650_zpsf072282d_5e0eeb792504e98ae14c64e45d4b343d19b8c388.jpg

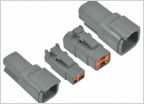
    The only downside to this small cable gland (actually one of the biggest glands they make I think) is that I'll have to remove any and all plastic wire connectors just to feed the wires through it. It's a little bit of a pain but its possible. Or you could always just cut the connectors off, run them through and put your own connectors on. I have waterproof connectors like these[​IMG] just in case I do screw up the connectors that it came with.


    Anyways I hope this helps anyone. It will be a while before I get to working on this retrofit. So maybe if someone else decides to try this, let me know how it goes.
     
  7. Sep 3, 2014 at 9:00 PM
    #7
    1rooster

    1rooster [OP] TACOMA31750

    Joined:
    Jun 14, 2010
    Member:
    #38925
    Messages:
    982
    Gender:
    Male
    Georgia
    Vehicle:
    2007 Tundra crewmax
    5100's ALL WAY AROUND, 885X COILS, DRIVER SIDE LEAN SPACER, ICON PROGRESSIVE AAL W/O OVERLOAD, 265/75/16 KENDA KLEVER M/T. 1 1/4 SPIDERTRAC WHEEL SPACERS, GEN 1 TRD COLD AIR INTAKE, STOCK MUFFLER WITH CHOPPED TURNDOWN, 5% TINT OVER FACTORY, DEBADGED, TOYOTA RUBBER BED MAT, WEATHERTECH MATS,UWS TOOLBOX, UNDERCOVER SE, LOCKER MOD, REAR BUMPER, PIONEER DOUBLE DIN WITH PARKING BREAK OVER RIDE, CUSTOM OIL CATCH CAN, FULL LED INTERIOR, ARB BUMPER REPLACEMENT. COVERKING SEAT COVERS. MORIMOTO H1 MINI COVERSION WITH MINI GATLIN GUN SHROUDS AND 5000K MORIMOTO BULBS. TRAILER PLUG RELOCTED TO BUMPER. 20 INCH LED LIGHTBAR MOUNTED BEHIND CUSTOM PAINTED GRILL. STUBBY ATNENNA
    Where the heck did you get that cable gland from? Iv checked every hardware store (even lowes) on my town and ain't nobody got them.
     
  8. Sep 3, 2014 at 9:07 PM
    #8
    NightProwler

    NightProwler Well-Known Member

    Joined:
    Nov 12, 2013
    Member:
    #116470
    Messages:
    3,447
    Gender:
    Male
    First Name:
    Harlan
    Maricopa, Az
    Vehicle:
    '01 Prerunner, '16 trd4x4, '09 R1, '03 cbr954rr, '03 rc51
    Order em online. I got mine from eBay.
     
    This site contains affiliate links for which the site may be compensated.
    #8
  9. Sep 7, 2014 at 3:17 PM
    #9
    1rooster

    1rooster [OP] TACOMA31750

    Joined:
    Jun 14, 2010
    Member:
    #38925
    Messages:
    982
    Gender:
    Male
    Georgia
    Vehicle:
    2007 Tundra crewmax
    5100's ALL WAY AROUND, 885X COILS, DRIVER SIDE LEAN SPACER, ICON PROGRESSIVE AAL W/O OVERLOAD, 265/75/16 KENDA KLEVER M/T. 1 1/4 SPIDERTRAC WHEEL SPACERS, GEN 1 TRD COLD AIR INTAKE, STOCK MUFFLER WITH CHOPPED TURNDOWN, 5% TINT OVER FACTORY, DEBADGED, TOYOTA RUBBER BED MAT, WEATHERTECH MATS,UWS TOOLBOX, UNDERCOVER SE, LOCKER MOD, REAR BUMPER, PIONEER DOUBLE DIN WITH PARKING BREAK OVER RIDE, CUSTOM OIL CATCH CAN, FULL LED INTERIOR, ARB BUMPER REPLACEMENT. COVERKING SEAT COVERS. MORIMOTO H1 MINI COVERSION WITH MINI GATLIN GUN SHROUDS AND 5000K MORIMOTO BULBS. TRAILER PLUG RELOCTED TO BUMPER. 20 INCH LED LIGHTBAR MOUNTED BEHIND CUSTOM PAINTED GRILL. STUBBY ATNENNA
    We'll I figured since I didn't have much room to spare behind my lights I figured I'd go with the easiest design. I inverted the stock rubber garmet and siliconed the round garmet to it. Pretty easy and took like 5 min. [​IMG]
     
  10. Sep 7, 2014 at 3:20 PM
    #10
    1rooster

    1rooster [OP] TACOMA31750

    Joined:
    Jun 14, 2010
    Member:
    #38925
    Messages:
    982
    Gender:
    Male
    Georgia
    Vehicle:
    2007 Tundra crewmax
    5100's ALL WAY AROUND, 885X COILS, DRIVER SIDE LEAN SPACER, ICON PROGRESSIVE AAL W/O OVERLOAD, 265/75/16 KENDA KLEVER M/T. 1 1/4 SPIDERTRAC WHEEL SPACERS, GEN 1 TRD COLD AIR INTAKE, STOCK MUFFLER WITH CHOPPED TURNDOWN, 5% TINT OVER FACTORY, DEBADGED, TOYOTA RUBBER BED MAT, WEATHERTECH MATS,UWS TOOLBOX, UNDERCOVER SE, LOCKER MOD, REAR BUMPER, PIONEER DOUBLE DIN WITH PARKING BREAK OVER RIDE, CUSTOM OIL CATCH CAN, FULL LED INTERIOR, ARB BUMPER REPLACEMENT. COVERKING SEAT COVERS. MORIMOTO H1 MINI COVERSION WITH MINI GATLIN GUN SHROUDS AND 5000K MORIMOTO BULBS. TRAILER PLUG RELOCTED TO BUMPER. 20 INCH LED LIGHTBAR MOUNTED BEHIND CUSTOM PAINTED GRILL. STUBBY ATNENNA
    And if you ever need to get to the light bulb I'm sure with a little force you could separate the two and peel the silicone off and reseal
     
  11. Sep 7, 2014 at 3:55 PM
    #11
    NightProwler

    NightProwler Well-Known Member

    Joined:
    Nov 12, 2013
    Member:
    #116470
    Messages:
    3,447
    Gender:
    Male
    First Name:
    Harlan
    Maricopa, Az
    Vehicle:
    '01 Prerunner, '16 trd4x4, '09 R1, '03 cbr954rr, '03 rc51
    Oh, wow yeah u don't have hardly any room there. I didn't even realize till now that u were 2nd gen. Yeah I got room on mine. Might be tight but it's gonna work. But your method was was easy enough. Good job.
     
  12. Sep 7, 2014 at 4:29 PM
    #12
    1rooster

    1rooster [OP] TACOMA31750

    Joined:
    Jun 14, 2010
    Member:
    #38925
    Messages:
    982
    Gender:
    Male
    Georgia
    Vehicle:
    2007 Tundra crewmax
    5100's ALL WAY AROUND, 885X COILS, DRIVER SIDE LEAN SPACER, ICON PROGRESSIVE AAL W/O OVERLOAD, 265/75/16 KENDA KLEVER M/T. 1 1/4 SPIDERTRAC WHEEL SPACERS, GEN 1 TRD COLD AIR INTAKE, STOCK MUFFLER WITH CHOPPED TURNDOWN, 5% TINT OVER FACTORY, DEBADGED, TOYOTA RUBBER BED MAT, WEATHERTECH MATS,UWS TOOLBOX, UNDERCOVER SE, LOCKER MOD, REAR BUMPER, PIONEER DOUBLE DIN WITH PARKING BREAK OVER RIDE, CUSTOM OIL CATCH CAN, FULL LED INTERIOR, ARB BUMPER REPLACEMENT. COVERKING SEAT COVERS. MORIMOTO H1 MINI COVERSION WITH MINI GATLIN GUN SHROUDS AND 5000K MORIMOTO BULBS. TRAILER PLUG RELOCTED TO BUMPER. 20 INCH LED LIGHTBAR MOUNTED BEHIND CUSTOM PAINTED GRILL. STUBBY ATNENNA
    [​IMG]
    Here's a pic of the passenger side. Got about half inch room to spare.
     
  13. Sep 7, 2014 at 6:33 PM
    #13
    NightProwler

    NightProwler Well-Known Member

    Joined:
    Nov 12, 2013
    Member:
    #116470
    Messages:
    3,447
    Gender:
    Male
    First Name:
    Harlan
    Maricopa, Az
    Vehicle:
    '01 Prerunner, '16 trd4x4, '09 R1, '03 cbr954rr, '03 rc51
    Well let's see the finished product now!
     
  14. Sep 7, 2014 at 6:47 PM
    #14
    1rooster

    1rooster [OP] TACOMA31750

    Joined:
    Jun 14, 2010
    Member:
    #38925
    Messages:
    982
    Gender:
    Male
    Georgia
    Vehicle:
    2007 Tundra crewmax
    5100's ALL WAY AROUND, 885X COILS, DRIVER SIDE LEAN SPACER, ICON PROGRESSIVE AAL W/O OVERLOAD, 265/75/16 KENDA KLEVER M/T. 1 1/4 SPIDERTRAC WHEEL SPACERS, GEN 1 TRD COLD AIR INTAKE, STOCK MUFFLER WITH CHOPPED TURNDOWN, 5% TINT OVER FACTORY, DEBADGED, TOYOTA RUBBER BED MAT, WEATHERTECH MATS,UWS TOOLBOX, UNDERCOVER SE, LOCKER MOD, REAR BUMPER, PIONEER DOUBLE DIN WITH PARKING BREAK OVER RIDE, CUSTOM OIL CATCH CAN, FULL LED INTERIOR, ARB BUMPER REPLACEMENT. COVERKING SEAT COVERS. MORIMOTO H1 MINI COVERSION WITH MINI GATLIN GUN SHROUDS AND 5000K MORIMOTO BULBS. TRAILER PLUG RELOCTED TO BUMPER. 20 INCH LED LIGHTBAR MOUNTED BEHIND CUSTOM PAINTED GRILL. STUBBY ATNENNA
    [​IMG][​IMG][​IMG]
    Not the best front end shot but you get the idea. Here's some night shots from my driveway shining about 40 yards into the woods. Low then high beams. Went thought a good heavy rain today and still no moisture!!
     
  15. Sep 7, 2014 at 6:58 PM
    #15
    1rooster

    1rooster [OP] TACOMA31750

    Joined:
    Jun 14, 2010
    Member:
    #38925
    Messages:
    982
    Gender:
    Male
    Georgia
    Vehicle:
    2007 Tundra crewmax
    5100's ALL WAY AROUND, 885X COILS, DRIVER SIDE LEAN SPACER, ICON PROGRESSIVE AAL W/O OVERLOAD, 265/75/16 KENDA KLEVER M/T. 1 1/4 SPIDERTRAC WHEEL SPACERS, GEN 1 TRD COLD AIR INTAKE, STOCK MUFFLER WITH CHOPPED TURNDOWN, 5% TINT OVER FACTORY, DEBADGED, TOYOTA RUBBER BED MAT, WEATHERTECH MATS,UWS TOOLBOX, UNDERCOVER SE, LOCKER MOD, REAR BUMPER, PIONEER DOUBLE DIN WITH PARKING BREAK OVER RIDE, CUSTOM OIL CATCH CAN, FULL LED INTERIOR, ARB BUMPER REPLACEMENT. COVERKING SEAT COVERS. MORIMOTO H1 MINI COVERSION WITH MINI GATLIN GUN SHROUDS AND 5000K MORIMOTO BULBS. TRAILER PLUG RELOCTED TO BUMPER. 20 INCH LED LIGHTBAR MOUNTED BEHIND CUSTOM PAINTED GRILL. STUBBY ATNENNA
    [​IMG]
    Here's one before I put them on the truck. I used the bleach method to remove the Crome off the Gatling gun shrouds. Turned out to be a gloss black color. Everything else was left like the depo headlights came.
     
  16. Sep 7, 2014 at 7:35 PM
    #16
    NightProwler

    NightProwler Well-Known Member

    Joined:
    Nov 12, 2013
    Member:
    #116470
    Messages:
    3,447
    Gender:
    Male
    First Name:
    Harlan
    Maricopa, Az
    Vehicle:
    '01 Prerunner, '16 trd4x4, '09 R1, '03 cbr954rr, '03 rc51
    Lookin perty good there. Those the 6.0's? 4300k?
     
  17. Sep 7, 2014 at 8:43 PM
    #17
    1rooster

    1rooster [OP] TACOMA31750

    Joined:
    Jun 14, 2010
    Member:
    #38925
    Messages:
    982
    Gender:
    Male
    Georgia
    Vehicle:
    2007 Tundra crewmax
    5100's ALL WAY AROUND, 885X COILS, DRIVER SIDE LEAN SPACER, ICON PROGRESSIVE AAL W/O OVERLOAD, 265/75/16 KENDA KLEVER M/T. 1 1/4 SPIDERTRAC WHEEL SPACERS, GEN 1 TRD COLD AIR INTAKE, STOCK MUFFLER WITH CHOPPED TURNDOWN, 5% TINT OVER FACTORY, DEBADGED, TOYOTA RUBBER BED MAT, WEATHERTECH MATS,UWS TOOLBOX, UNDERCOVER SE, LOCKER MOD, REAR BUMPER, PIONEER DOUBLE DIN WITH PARKING BREAK OVER RIDE, CUSTOM OIL CATCH CAN, FULL LED INTERIOR, ARB BUMPER REPLACEMENT. COVERKING SEAT COVERS. MORIMOTO H1 MINI COVERSION WITH MINI GATLIN GUN SHROUDS AND 5000K MORIMOTO BULBS. TRAILER PLUG RELOCTED TO BUMPER. 20 INCH LED LIGHTBAR MOUNTED BEHIND CUSTOM PAINTED GRILL. STUBBY ATNENNA
    Morimoto 6.0 w/ 5000k
     

Products Discussed in

To Top