

-
Welcome to Tacoma World!
You are currently viewing as a guest! To get full-access, you need to register for a FREE account.
As a registered member, you’ll be able to:- Participate in all Tacoma discussion topics
- Communicate privately with other Tacoma owners from around the world
- Post your own photos in our Members Gallery
- Access all special features of the site
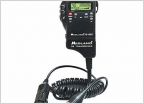 Whats a good hand held CB?
 Philrab’s Audio: Kicker 180.4 + Kicker 500.1 + Marv box
 How Well Does Your PAC SWI-JACK Steering Wheel Control Work?
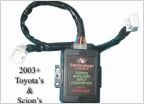 2006 with JBL wanting aftermarket upgrade
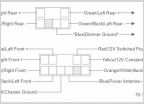 Tpp4's No Nonsense Guide to Kicker Key T-Harness (16-19)
Audio system for 2017 double cab
Discussion in 'Audio & Video' started by fathomitout, Dec 27, 2017.
Page 3 of 6
Page 3 of 6


