1. Welcome to Tacoma World!

    You are currently viewing as a guest! To get full-access, you need to register for a FREE account.

    As a registered member, you’ll be able to:
    • Participate in all Tacoma discussion topics
    • Communicate privately with other Tacoma owners from around the world
    • Post your own photos in our Members Gallery
    • Access all special features of the site

Battleship Jones: 2015 Tacoma DCLB Build Thread

Discussion in '2nd Gen. Builds (2005-2015)' started by Adventurous, Aug 23, 2016.

  1. Aug 23, 2016 at 6:41 AM
    #1
    Adventurous

    Adventurous [OP] Well-Known Member

    Joined:
    Apr 22, 2014
    Member:
    #128214
    Messages:
    820
    Gender:
    Male
    Colorado
    Vehicle:
    15 DCLB SR5
    I originally posted this through Expedition Portal but have been visiting this site a lot more frequently. Different audience, different expertise, different feedback. The first many few posts will be documenting the historical modifications and musings done to my truck and I'll eventually catch up to the present. You'll have to excuse all of the various statements referencing past events.


    So without further adieu, I present my build thread!
     
    Last edited: Aug 23, 2016
    ChadsPride likes this.
  2. Aug 23, 2016 at 6:41 AM
    #2
    Adventurous

    Adventurous [OP] Well-Known Member

    Joined:
    Apr 22, 2014
    Member:
    #128214
    Messages:
    820
    Gender:
    Male
    Colorado
    Vehicle:
    15 DCLB SR5
    Background:
    My last Tacoma, a 2007 double cab short bed TRD off road, was deemed totaled by my insurance company following an accident on 10/1. A guy pulled out in front of me while I was doing 40 and my truck took the brunt of the collision. Its loss was bittersweet, in the 5 months I owned it I had lifted it, put on some all terrains, an ARE topper, and miscellaneous other accoutrements. Although a lot of that hard work was erased after the accident, I learned plenty of valuable lessons that I will be applying to this build.

    The first thing I would like to touch on is bed length. After several camping trips and nights spent sleeping in the back of the truck, it became painfully obvious that the 5' bed is a tremendous limitation. Neither myself nor my girlfriend are very tall, but having to sleep with the tailgate down and an SUV tent off the back of the truck was a pain. It was an okay setup in Moab when we spent several nights at the same camp site, but having to tear down that tent and schlep it along day after day was a deal breaker. A 6' bed would allow us to sleep with the tailgate up and the topper closed, maximizing stealth factor and minimizing the amount of futzing we would have to do with a tent structure off the back end.

    The second thing I learned was that it was not worth it paying extra for the TRD package. Perhaps if your intent was to leave the truck in stock form it represents a decent upgrade over the stock Tacoma, but whereas I ended up replacing the suspension with an OME kit it didn't provide me with any tremendous gains other than the e-locker. While the e-locker was a nice feature, the accompanying 5' bed was not.

    With all that being said, I began my search for a double cab long bed in base trim. I quickly learned how difficult those requirements were, of the 100 or so used Tacomas in the Denver area for sale only a couple met that criteria. The math did not play out in their favor however as I felt it wasn't worth it to get a 2008 with 50K on the clock for only 5 grand less than a new one. So I turned to the 2015 inventories and once again discovered only two present at local dealers. I ended up purchasing from Mountain States Toyota in Denver and had a wonderful purchasing experience.

    The basics:
    2015 Double Cab Long Bed
    4.0L with 5 speed automatic
    SR5 Package
    Alloy wheels
    Entune premium package

    So without further delay I present to you Battleship Jones.

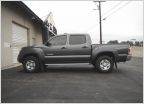
    20141012-P1010165_zpsc0743aa8_925b0eec0cf097acc83e50daac9753d6ca59895a.jpg

    Current State (not pictured):

    20150523-DSC_9872_zpsfpqsbamp_3c3f4eace02ca3e9ef89962ce443ae3e4f80f247.jpg

    Front Suspension
    Light Racing UCAs
    Icon extended travel C/Os with 700lb King springs
    Wheelers Superbumps
    Invisible Sway Bar

    Rear Suspension
    OME Dakar Leaf pack w/ add-a-leaf and removed larger overload leaf
    ICON 2.0 remote reservoir rear shocks
    Timbren off-road u-bolt flip kit and bump stops
    Toytec 3* angle shim

    Armor
    ARB front bumper
    Pelfreybilt IFS & Mid skids
    All Pro heavy duty sliders

    Wheels
    SCS F-5 16x8 3.5"BS Matte Gunmetal
    BFG Mud-Terrain KM2 255/85R16 tires

    Performance
    EBC Sport Rotors with Yellowstuff Pads
    aFe Pro Dry air filter

    Electronics
    Bussman fuse block
    Iggy switch panel
    Tekonsha P3 brake controller
    Birdawg Industries Techdeck w/Torque Pro phone

    Lighting
    Hella 500F Spot Driving Lamps
    ARB fog lights
    40" LED light bar
    Underhood LED lighting strip

    Communications
    Uniden 520Pro XL CB Radio
    Firestik 4' antenna

    Miscellaneous
    ARB CKMA12 on board air compressor
    ARB 2500 awning
    Prinsu Designs CabRac w/ Hi-lift mounts, shovel mount, Rotopax mount, Rocky mounts thru axle mount
    Prinsu Designs TopRac
    Leer topper
    Rear differential breather extension
    7-pin trailer relocate
    Sleeping platform
    Redline Tuning hood struts
    Maxsa Escaper Buddy traction mats
    Plano AW cases
    Smittybilt X20 winch with steel cable
    Spec-D towing mirrors


    Trails Run/Places Visited

    2015:
    Kokopelli Trail - CO/UT
    Top of the World - Moab, UT
    Engineer Pass - Silverton, CO
    Tincup Pass - Tincup, CO

    2016:
    Gateway Canyon Road - CO
    Polar Mesa - Moab, UT
    Thomson Canyon - Moab, UT
    Onion Creek - Moab, UT
    Shafer Trail - Moab, UT
    Marshall Pass - CO
    Boreas Pass- CO
    Stillwater Pass - CO
    Medano Pass - CO
    Lead King Basin - CO
    Crystal City - CO
     
    Last edited: May 23, 2017
    topaza, ChadsPride, Acerwin and 4 others like this.
  3. Aug 23, 2016 at 6:45 AM
    #3
    Adventurous

    Adventurous [OP] Well-Known Member

    Joined:
    Apr 22, 2014
    Member:
    #128214
    Messages:
    820
    Gender:
    Male
    Colorado
    Vehicle:
    15 DCLB SR5
    Ah, so yesterday (a yesterday of many moons ago mind you) was very good to me. The parts fairy made a visit and dropped off a few things...

    20141015-P1010173_zpsf57df610_a0cd756976feba9814fb4466ff41d17bbca11fd3.jpg

    20141015-P1010172_zps91c0d964_995106e1b942631adfd2fb19157f729ee6133ae3.jpg

    You may have noticed that there are only two tires in the picture. Why just two tires you ask? Apparently when 4wheelparts calls you and says "your tires are in" they really mean that two tires are in and the other two will be in on Monday. :confused:
     
    ChadsPride likes this.
  4. Aug 23, 2016 at 6:46 AM
    #4
    Adventurous

    Adventurous [OP] Well-Known Member

    Joined:
    Apr 22, 2014
    Member:
    #128214
    Messages:
    820
    Gender:
    Male
    Colorado
    Vehicle:
    15 DCLB SR5
    Tuesday update:

    Dropped by ToyTec last night and they dropped this big ole pallet in the back of my bed. Thanks for lending me the ratchet strap fellas!

    20141020-P1010206_zps1f5fa187_f1118f86bcceb7207eb9f710e5122a2c5165d8e2.jpg

    Here's to hoping I can get it on the truck tonight. See how well it rides on stock suspension. ;)
     
    Giffmann and ChadsPride like this.
  5. Aug 23, 2016 at 6:47 AM
    #5
    Adventurous

    Adventurous [OP] Well-Known Member

    Joined:
    Apr 22, 2014
    Member:
    #128214
    Messages:
    820
    Gender:
    Male
    Colorado
    Vehicle:
    15 DCLB SR5
    Per usual life gets in the way and you don't have enough time to accomplish what you hoped. I did however get the chance to spend Tuesday and Wednesday night installing the ARB bumper. The install was performed solo in my garage with only a basic set of hand tools. Here are my initial impressions of the kit and experiences with the install. Sorry for the lack of pictures.

    - The packing job was fantastic. The bull bar was neatly wrapped in protective cardboard, foam, and sealed in a plastic bag. It arrived with no dings, dents, or other blemishes. The same goes for all of the other hardware within the box.
    - The listed weight of the kit at 175lbs is probably a bit much, but its certainly not close to the 75lbs some have contended. I can for sure confirm that it is a handful at times.
    - Removing all trim and components for the vehicle was fairly straightforward minus the crash beam. On mine, in its assembled state, the crush cans put outward tension on the mounting studs that did not allow it to be removed as a whole. I had to loosed the bolts to the crush can in order to remove the crash beam assembly.
    - For the life of me I could not get the diagonal bolts with the 3mm trim packers torqued to spec. I tried all sorts of combinations with an extension and u-joint but there was just not enough room to fit my torque wrench in there. Snugged it down the best I could and moved on.
    - After getting everything lined up it took a bit of effort to drill the 4 bolt holes on both sides. The upper two were straightforward but the way the bullbar is shaped did not allow my drill to get to the bottom two from the outboard side. I had to take some wild *** guesses and drill from the inboard side hoping I hit the right spot. Amazingly I was pretty on the money. I didn't have a 10mm bit as recommended and used a 3/8".
    - I made the mistake of installing the turn indicators prior to putting those fascia into the bumper. Bad move. Got all brackets mounted up in the bumper and re-installed the turn indicators. Much easier.
    - No winch was added at this time
    - I didn't wire everything up yet, so I'll be back with comments on that when/if I get around to it.

    Note: I did not cut up my prior bumper. While there is a noticeable gap around the top of the bumper, it isn't enough to convince me to cut up my old one. I may however source a third party unprimed one to cut up for the sole reason that without the bumper there the grill is a bit floppy. I zip tied it to the crossmember there to keep it from rattling around.

    And a picture of the final results!

    20141023-P1010210_zpsbf868324_3ee7251812556c2d2d7b50003f5761fee16b819a.jpg

    After impressions:
    - With the stock, non-TRD suspension you can for sure notice the weight up front. There was some settling of 3/4" I'd guesstimate and I'd anticipate a little more as the springs bed in.
    - It does stick out a fair amount from the front end but I knew that going in and I suppose that's sometimes the price you pay for an aftermarket bumper
    - I very much need to install my lift and tires. It's more than a bit unbalanced with this cool bumper and the stock suspension and Dunlop turds.
     
    planters15 and ChadsPride like this.
  6. Aug 23, 2016 at 6:47 AM
    #6
    Adventurous

    Adventurous [OP] Well-Known Member

    Joined:
    Apr 22, 2014
    Member:
    #128214
    Messages:
    820
    Gender:
    Male
    Colorado
    Vehicle:
    15 DCLB SR5
    So a couple of buddies and I installed my lift and UCAs yesterday. We started at 8:15 or so in the morning and were done at 11:45, so it went pretty quickly. As expected, the most time consuming part of it was bending the sheet metal on the inside of the fender well to clear the bolts. All went well with the exception of the rear shocks, but I'll get to that later.

    I started on the rear end first and had it apart pretty quickly. Removed the brake line bracket on the axle, removed the e-brake bracket on the leaf spring, and got the u-bolts off in short order. Given how new the truck is the leaf springs and hanger came off pretty quickly as well. I was able to wrestle the Dakar pack in by myself and truth be told, it wasn't that difficult. I didn't have to employ a bottle jack or significantly manipulate the spring to get all the holes lined up.

    20141101-P1010215_zps42b5f297_b54da97decbd962e0a4206fd8e02537e8e1b1519.jpg

    And while I tackled the driver's side David was kind enough to get the passenger side going.

    20141101-P1010211_zps0adebf1a_2b45802cf0ceccc12751415b6fdf5f7d98d39ebc.jpg

    Meanwhile, Dan started getting the front suspension apart.

    20141101-P1010212_zpse1b5163d_5781c3e7ea16e692b9c5b4d6b5bc8cc58e4798ea.jpg

    Given that we had done my 07 a mere 5 months ago it all went quickly up there as well. It took a little bit of massaging to get the fender wells bent out enough to allow the control arm bolt to clear. A lot of people reported having to lever on the lower control arm significantly to get it to drop far enough down to mount up the 886s, but we didn't encounter any issues. One person to push down on the lower control arm and one person to get the bolt aligned in there. It could have been done solo but was easier to employ help.

    Looking awfully empty in here.

    20141101-P1010216_zps863e06e3_89459590315089f4acd57c47cd235abe49372c2c.jpg

    There is little to mention about re-assembly other than we encountered an issue getting the OME rear shocks mounted. The shock body could not be rotated far enough forward to align with the shock hole in the tower. This is the closest we could get it.

    20141101-P1010217_zps3b23da28_e4a67000f3d0053146e3e20df102774a5052cd2c.jpg

    Axle is at full droop in that picture by the way, and it isn't even close to lining up. I don't really want to grind out the shock mount to get things to fit. Emails have been sent to ARB and ToyTec to see if they have seen this before. I'm still waiting to hear back but in the mean time managed to stuff the stock shocks back in there. Unfortunately it only allows about 3/4" of droop before topping out...bad news bears. I'm hoping everything gets resolved quickly before something bad happens. I suppose if worst comes to worst I'd had to mount something like a set of Icons where the shock shaft is on the bottom end.

    Battleship Jones has a new stance!

    20141101-P1010218_zps460f02f0_21914b7e044edf76bfc084dd2d25ea8880b24cff.jpg

    Now to get some proper tires on there...
     
    ChadsPride likes this.
  7. Aug 23, 2016 at 6:48 AM
    #7
    Adventurous

    Adventurous [OP] Well-Known Member

    Joined:
    Apr 22, 2014
    Member:
    #128214
    Messages:
    820
    Gender:
    Male
    Colorado
    Vehicle:
    15 DCLB SR5
    Shortly after having finished off the lift it became blatantly obvious that I badly needed an alignment. Luckily I had already set up an appointment with James at Tires Plus at 120th and Washington in Northglenn. Props to him because he had me straightened out and ready to rock pretty quickly.

    Before and after alignment specs. Oh noes, so much red!

    20141102-P1010222_zps197940ff_f33b603609339729a6f3ee8f9e4f28715d5bcb5e.jpg

    And here it is on all fours again. Standing much taller. My GF had to pull some acrobatics to get up into it and shot me a dirty look about it being higher than the last one. :smiley_drive:

    20141102-P1010219_zpsd907bcd9_e44bea90a2f0fa388602ce44086f8ca0cf487d86.jpg

    Impressions after lift and tires install are all great. The truck rides much more truck like with less wallow and diving. The 886 coils up front seem well matched to the additional weight of the ARB bumper and offer pleasant small bump compliance while still maintaining a firm feel. The tires are quite a bit quieter than I was anticipating and other than the low speed grumble of mud tires offer a pleasant ride. As expected, the braking and acceleration changed noticeably but being fairly conservative in both departments I doubt it will impact my driving style significantly.
     
    ChadsPride likes this.
  8. Aug 23, 2016 at 6:49 AM
    #8
    Adventurous

    Adventurous [OP] Well-Known Member

    Joined:
    Apr 22, 2014
    Member:
    #128214
    Messages:
    820
    Gender:
    Male
    Colorado
    Vehicle:
    15 DCLB SR5
    Did some fooling around with the rear shocks last night and the conclusion stays the same, they do not fit. Well, at least not if I value their integrity as a shock absorber. All pictures are taken with the full weight of the vehicle on the wheels. Here's what things look like.

    Stock rear shock vs. OME. Significantly larger in diameter as well as the shock eyelet is much wider as well.

    20141103-P1010223_zpsdde62a66_be1edd137c139f929098590b106b5d56143c47e2.jpg

    When mounted, the inboard side barely clears the shock mount, the outboard side makes contact with the shock mount, and the top stud is not even close to lining up.

    20141103-P1010228_zps3cd0d31f_8285a34b919d68de4e5ccf7aac92c52fe442c4f5.jpg

    20141103-P1010225_zps735fec25_72213828e4800ccaebd8ba1fc4c29507552fb4ab.jpg

    20141103-P1010227_zpsfd7babd1_94ff1cb26327b7c5846ccacd02c3e063d4d4b722.jpg

    And a picture of the shock mount in case anyone can confirm that it has changed in the '15 model year.

    20141103-P1010229_zps1798b5f1_e77677308c3cde13009fd743fe119da47bb1bffa.jpg

    I have exchanged a couple of emails with ARB to get their take, apparently I'm the first person to run into this issue. Pending their response this afternoon I may run over to ToyTec to exchange the OME dampers for a set of non-reservoir Icons. I have a feeling the inverted design will allow the shock to clear the mount. But...we shall see.
     
    ChadsPride likes this.
  9. Aug 23, 2016 at 6:49 AM
    #9
    Adventurous

    Adventurous [OP] Well-Known Member

    Joined:
    Apr 22, 2014
    Member:
    #128214
    Messages:
    820
    Gender:
    Male
    Colorado
    Vehicle:
    15 DCLB SR5
    Everyone knows that stickers make things look more professional. So with that in mind I put on a TRD: Expedition sticker. Now it's official. ;)

    20141104-P1010231_zps16133a41_4d46a901a6e96cd0797d2dee98140dcf300990c9.jpg
     
    ChadsPride likes this.
  10. Aug 23, 2016 at 6:49 AM
    #10
    Adventurous

    Adventurous [OP] Well-Known Member

    Joined:
    Apr 22, 2014
    Member:
    #128214
    Messages:
    820
    Gender:
    Male
    Colorado
    Vehicle:
    15 DCLB SR5
    So it would appear that after multiple trips to their facility over the past few weeks the guys at ToyTec know me by name. I don't know if that's a good or a bad thing. :sombrero:

    I was able to exchange my OME rear shocks for a set of Icon 2.0 non-reservoir no fuss. I still have not heard back from ARB about the fitment issues I was having.

    At first glance you can tell that they are a quality product. Even the packaging that they come in is quality. It's nice to see that for a relatively small premium over the OME shocks I get a made in the USA product.

    They are super beefy compared to the stock shocks. The shock body is bigger, the rubber bumpers are massive, and they feel light as a feather. I was hoping that their inverted design would work well on my truck.

    20141104-P1010233_zpsc10123f4_dae772aa6f25a831bd4bacb186c099cfc2b58e37.jpg

    Given that I have taken the shocks on and off of this truck what feels like a billion times over the past few days it took perhaps 5 minutes per shock to get these in place. The install was straight forward and required a minimum of tools.

    14mm wrench (to remove stock shock top bolt)
    17mm wrench (to remove bottom bolt which is reused)
    19mm wrench (to tighten Icon top nut)

    Things line up just perfectly this time. I cannot say whether or not the inverted design allowed me to manipulate them a little bit more than the OME shocks or what, but they went in no problem. They look pretty badass on the truck.

    20141104-P1010235_zpsc94c32ad_44a40bf6790773595246a1e4b7490743242945d3.jpg

    20141104-P1010236_zpsfac39544_8866490b98abc2a4b64019d47dfae92c0ed74a85.jpg

    Overall feel is pretty impressive. First ride impressions, using what I remember of the OME rear shocks, have the Icons as more sensitive and don't hop as much over speedbumps and the like. Of course that's not entirely an apples to apples comparison as my last truck had the AAL on a non-TSB leaf pack whereas this one is utilizing a brand new Dakar pack.

    I am rather pleased right now with the Icon swap. Had I known things were going to go this direction I probably would have matched them with a set of Icons up front too. Oh well. Perhaps that something for later on down the line.
     
    ChadsPride likes this.
  11. Aug 23, 2016 at 6:51 AM
    #11
    Adventurous

    Adventurous [OP] Well-Known Member

    Joined:
    Apr 22, 2014
    Member:
    #128214
    Messages:
    820
    Gender:
    Male
    Colorado
    Vehicle:
    15 DCLB SR5
    So not a whole lot has been accomplished since the last update. Life has been busy and I had to check a few things off the honey to do list. That being said, I was able to look into the noisy suspension issue and another round of re-torquing has more or less cured the problem. Things that turned out to be not as tight as they should have been: lower control arm bolts, upper control arm bolts, u-bolts. After getting those back to spec my noises are more or less cured.

    Visited the registry this past week to get things registered and walked out $650 dollars lighter. That hurt. :(. I guess no winch/OBA for me for a while.

    I also took it in to have the front windows tinted. I had them tint the fronts to match the back (not a big fan of ultra dark tints) and got the Llumar window tinting film which is supposed to offer some additional heat blocking feature. Whether or not that's true I suppose I'll have to find out but the GF was sold on it and seeing as how she is the one to complain about it most during excursions, I figured it was $175 well spent.

    And another picture post tint!

    20141207-P1010238_zps4ee90264_1bae80c462861e9e8c23c12aa447d188d5bf6ae1.jpg

    Next project to tackle: Electrical!
     
    ChadsPride likes this.
  12. Aug 23, 2016 at 6:53 AM
    #12
    Adventurous

    Adventurous [OP] Well-Known Member

    Joined:
    Apr 22, 2014
    Member:
    #128214
    Messages:
    820
    Gender:
    Male
    Colorado
    Vehicle:
    15 DCLB SR5
    So I start fabricating the bracket today to hold the circuit breaker and auxiliary fuse panel for the upcoming electrical accessories. I fabricated it from a piece of 1/8" x 12" x 12" 3003-H14 aluminum I ordered off of Amazon. I made the last bracket out of the same material and it proved to be easy to bend and plenty sturdy for my purposes.

    As always, the first step was to make a cardboard template for the space in question. I chose to leave as much material as possible for reconfiguring in the future as I intend to add a dual battery controller, some relays, and perhaps relocate the winch solenoid under the hood. That's all in the future though, for now I just need the base piece.

    20141213-P1010239_zpsc7a57a2f_37191d47b4afcf91c1f1a945b0b711a33488e7b7.jpg

    A few minutes with a guide and jig saw and I had myself a 2D version.

    20141214-P1010241_zps76d66a54_872234259f4b854feea9215f079a3a26077109e8.jpg

    Being a bit of a stickler for the details I spent a good 20 minutes or so with an angle grinder and flap disk grinding the corners into nice radii, breaking edges, and removing any burrs left behind.

    The next step was to start drilling holes. 10 holes total need to go in though I only did 9 today. The missing hole is for an additional support on the inboard side of the bracket. I haven't made up my mind as to whether or not I'd like to run the support down to the bolt holding the breathers or have the support with two 90 degree bends and fasten it at the fuse box. I'm leaning towards the former but need to pop under the hood and take a look again before I drill the final hole.

    Anyway, I got the all the mounting holes drilled and demurred. The bracket will eventually get paint + primer but being that my garage is not heated, it may have to wait til warmer weather rolls around. I still need to throw the 80 degree bend in it, a bit tough given that I don't have anything good to clamp it with. Perhaps the fellas in the shop at work won't mind me hopping in there for a second...

    The final (2D) product! I can't wait to start wiring, it's a skill I've always wanted to learn.

    20141214-P1010242_zps30724462_7e41612bde442708aad246a5f09e24518b7da250.jpg
     
    ChadsPride likes this.
  13. Aug 23, 2016 at 6:53 AM
    #13
    Adventurous

    Adventurous [OP] Well-Known Member

    Joined:
    Apr 22, 2014
    Member:
    #128214
    Messages:
    820
    Gender:
    Male
    Colorado
    Vehicle:
    15 DCLB SR5
    Bought myself a little Christmas present. Got an ARB CKMA-12 air compressor and a fill up kit. Any suggestions as to where to mount it? I've seen some people tuck them in the storage boxes in the bed but I'd prefer to tuck it under the hood for multiple reasons.

    20141220-P1010244_zpsdca0a69f_0adec96efae23593fa02c8e35e82e2dad60b4d5e.jpg

    Looking forward to having OBA. Should make airing up after running trails much, much easier.
     
    ChadsPride likes this.
  14. Aug 23, 2016 at 6:54 AM
    #14
    Adventurous

    Adventurous [OP] Well-Known Member

    Joined:
    Apr 22, 2014
    Member:
    #128214
    Messages:
    820
    Gender:
    Male
    Colorado
    Vehicle:
    15 DCLB SR5
    So nothing revolutionary here, but I finally got the opportunity to do the differential breather extension. There are plenty of ways to do this, so this is just one.

    Tools used:
    14mm wrench
    10mm wrench
    10mm ratchet and socket
    T30 torx wrench
    1/8" and 3/8" drill bits
    2 smallish hose clamps
    Shears
    Your choice of hose
    Primer & Paint
    Zip ties
    Plumbers tape

    20150108-P1010247_zps9e1fe136_2b267f99c2effc314e9fc58ac0c441090197413d.jpg

    Luckily this is a fairly straightforward install. The first step is to remove the tail light, in my case it was on the driver's side. Remove the three bolts on the side and give it a healthy yank to pop the tail light out. You'll end up with something that looks a little bit like this.

    20150108-P1010248_zps60ffc138_e736aecd2f4e20d7299b689be118ec2dde34b533.jpg

    There's a whole lot of real estate back there to relocate the breather to. In the most scientific way possible, I grabbed my drill, gave it the ole eyeball, and put a hole in my truck. I enlarged the hole size to 3/8", chamfered the hole, the gave it a quick shot of primer and paint.

    20150108-P1010249_zps988dd0de_ffad42d294f92255bf5a914b87d45a4d70d089ca.jpg

    While the paint was drying I removed the stock breather with a 14mm wrench, put a wrap of plumbers tape around the new breather port, and put that back in using a 10mm wrench. I secured the hose to the breather port using a small hose clamp for the time being but I may end up throwing a small piece of marine heat shrink down there to really seal things up. I routed the hose up and over the frame, zip tied it to the electrical harness, and snaked it up to the new breather.

    20150108-P1010251_zps5a7877a7_c742faabec2d46981fb345e656135dd0c3871f38.jpg

    Now, pro tip. Don't be a dumb@ss like me and reach your arm up there and try to put the hose on. While it could work, it was rather awkward and painful. So, just remove the cubby and you'll have plenty of space to work with. Once I did that the struggle was no more. Another hose clamp and tada, breather in.

    20150108-P1010250_zpsa0b9fa11_9ad8836ceb4d1ab13909518c2ed4e65e97042a80.jpg

    Barring a water crossing that's midway up the doors, this should keep the rear diff water free and happy!
     
    ChadsPride likes this.
  15. Aug 23, 2016 at 6:54 AM
    #15
    Adventurous

    Adventurous [OP] Well-Known Member

    Joined:
    Apr 22, 2014
    Member:
    #128214
    Messages:
    820
    Gender:
    Male
    Colorado
    Vehicle:
    15 DCLB SR5
    I began mounting my CB radio and antenna yesterday. On my last truck I had the BAMF tailgate antenna mount. For multiple reasons I decided to go in a different direction this time around and ordered up the Relentless Fab hood hinge mount. I have to hand it to the fellas at Relentless, he was prompt getting back to me through email (less than 30 minutes) and shipped out my bracket the day I placed an order. Big thumbs up to them!

    Anyway, the installation of this sucker

    20150110-P1010253_zps825e41e3_9adad2f337efeece6430aa651f3e682cb9cc680f.jpg

    is fairly straight forward. In order not to let the hood shift at all when removing the bolts, I took the top one out first and mounted the bracket, snugged up the bolt, then removed the lower bolt. I then rotated the bracket into place and put the lower bolt back in. It took all of 5 minutes and the mount is everything I could have asked for. For mock up purposes I mounted the stud and antenna and have had those on for a couple of days now. I cannot discern any movement from the mount and am pleasantly surprised to report that it has not greatly impacted visibility like I was anticipating. Overall a pretty solid mod and I'm looking forward to getting the radio mounted up.

    20150116-P1010256_zps837b1b50_4762b8c06f6a118475a8dddc17b6572669bc80dc.jpg

    I'll add a few more pictures tomorrow of the final position of the antenna when the hood is down. It clears everything just fine.
     
    ChadsPride likes this.
  16. Aug 23, 2016 at 6:55 AM
    #16
    Adventurous

    Adventurous [OP] Well-Known Member

    Joined:
    Apr 22, 2014
    Member:
    #128214
    Messages:
    820
    Gender:
    Male
    Colorado
    Vehicle:
    15 DCLB SR5
    As promised...

    20150117-P1010260_zpsefaec15c_94effca8da60286b0df015edc8ccf97127fd21c5.jpg

    20150117-P1010261_zps6b309caf_69dd2d0b967cf0fc3ac53abc4b1ebd74f8d27795.jpg

    20150117-P1010262_zps4eb5a9a9_7240af7a6a02a8d9af66cfc2fad8a6012f117bb9.jpg

    20150118-P1010263_zps63a8b8e0_de91262ff52653fd1cbb03a0ffff28e826f95675.jpg

    It comes pretty close to the edge the hood, so I'll have to make sure that during flexing it doesn't contact, but other than that I'm pleased with the way it turned out. Just for reference, that is a 3' antenna.

    Next post = finishing mounting up the compressor
     
    ChadsPride and CowboyTaco like this.
  17. Aug 23, 2016 at 6:55 AM
    #17
    Adventurous

    Adventurous [OP] Well-Known Member

    Joined:
    Apr 22, 2014
    Member:
    #128214
    Messages:
    820
    Gender:
    Male
    Colorado
    Vehicle:
    15 DCLB SR5
    So I managed to get a few minutes of alone time towards the end of the week and today to finish up mounting the air compressor. I ended up going with the proposed location behind the passenger side headlight. I really wanted it under the hood for a combination of reasons and with the exception of the real estate near the fuse box, which will be taken up by the auxiliary fuse block and breaker, this was the only real space under the hood that could accept it.The compressor drops snugly into the space available and with the proper space and clocking does not touch any other components.

    I will admit that this location is not the easiest to secure the compressor into. I had to test fit several times, go to work with the drill and files, and make multiple trips to the hardware store to get the correct configuration. That being said, there were definitely some lessons learned along the way that I will get into at the end of the post for those considering mounting one of the ARB compressors in the same location.

    Tools & materials used:
    - 4mm extended hex bit
    - 4mm short hex bit
    - 4mm allen key
    - 1/8", 1/4", and 5/16" drill bits
    - flexible drill coupling
    - right angle drill adapter
    - 10mm socket and wrench
    - 40mm M6 flange head bolt
    - 1/4" ID x 1" L spacers
    - M6 fender washers and nuts

    One of the biggest challenges to mounting in this location is access to the fasteners. ARB supplies the compressor with carriage bolts which anti-rotate within the slots on the mounting bracket. This happens to work out great if you have a flat area to work on with sufficient access at the front and back. The location I chose had an angled reinforcement piece that prevented me from simply bolting things up. This combined with the fact that I had to space the compressor upward to clear a radiator line meant that I had to ditch their mounting hardware and source my own.

    Their instructions say to use the backer plate as a template for drilling the mounting holes. Again, if it was a flat mounting area, sure, that would have worked out handily. Unfortunately due to the geometry of the area I also had to take some liberties with the locations of my holes. I also had to drill them slightly oversize (ARB recommends 1/4" holes, 5/16" max for misalignment) to give myself enough room to clock things properly.

    A look at the underside of the fender where things mount. Currently I'm just using fender washers behind the sheet metal, at some point in the future I'll make a backer plate that correctly matches my modified bolt pattern.

    20150118-P1010264_zps13b3469c_8cb6c4615329f1f3397e54049b16dc796945429f.jpg

    I ended up bolting up the mounting bracket first on accounts of the anti-rotation feature of the carriage bolts not being there. Everything went in just fine and I got lucky that the position I snugged things up in the first time around put the compressor in the right orientation. After dropping the compressor in the real challenge came, bolting it to the mounting bracket. During my initial test fits I busted my hands up trying to snug the bolts down, there was just no good way to get an allen wrench or hex socket in there to tighten things up. A quick trip to Home Depot left me with this combination of devices..

    20150116-P1010259_zps68b79649_74f33187b17a2a6629f9e3f6610ccc505259af63.jpg

    It worked like a charm. I zipped in the back bolts in all of 2 seconds but had to change technique for the front two. One went in using a ratchet and extended length hex bit, the other using a ball end allen key. Here's to hoping I never have to take this thing out!

    20150116-P1010255_zps49529cfb_ad0f8d50c502d1858b25358dee3eb63b011175b3.jpg

    I also hooked up the wiring harness to see what kind of modifications I was looking at making. Luckily the routing to the other side of the truck is pretty clean, of course, being that it is just about the longest possible trip across the perimeter of the engine bay, the cables to hook up to power are too short. Looks like I'll be ordering up some more cable to splice onto the end of those.

    I routed the cables underneath the cowl alongside the current wiring harness. A couple of zip ties to hold things in and it looks like it belongs.

    20150118-P1010265_zpsf80f7910_c21e2ebe3564703351d55d3fcc7fa22f16dd6c4b.jpg

    20150118-P1010266_zpsf6ac5bb5_56e153282d2b68c0f42475428f82f36e918546ff.jpg

    I had originally planned to put a mounting bracket for all of the relays where the auxiliary fuse block is going, however, this would mean extending the wires leading to the current connection and traversing over to the other side of the vehicle. I may just say screw it and put the relay by the air intake and the windshield washer fluid bottle in the following location...

    20150118-P1010267_zpsd794338d_e7b7966caaf9acb8fff9800bea7ec17fb67f8614.jpg

    Now, the lessons learned portion of the post:
    - Get the right angle adapter and flexible coupling. It'll make your life loads easier.
    - Unless you have ample room and a flat place to mount, skip using the backer plate as your drilling template. It made things far more work than they should have been. In hind sight I would have drilled the holes where I wanted to and fabricated a backer plate after the fact to match those hole sizes and locations. Trying to use the backer plate as my drilling template just led to excess frustration and an extraneous hole.
    - Even if you have a fairly straight forward place to mount things, unbolt the mounting bracket from the compressor and bolt that in separately. I tried for a while to mount with the bracket attached to the compressor and getting the bolts to line up properly with their respective spacers and holes quickly became a nightmare.

    Hopefully next time I get a chance to work on the truck I'll be able to get the auxiliary block in there and get power to this. Chances are I'll wait a little bit until I figure out how I want to mount my electronics in the cab before I go tearing the dash apart.
     
    ChadsPride likes this.
  18. Aug 23, 2016 at 6:57 AM
    #18
    Adventurous

    Adventurous [OP] Well-Known Member

    Joined:
    Apr 22, 2014
    Member:
    #128214
    Messages:
    820
    Gender:
    Male
    Colorado
    Vehicle:
    15 DCLB SR5
    So I had a chance this morning to revisit the auxiliary fuse panel and breaker that I had been working on before with the thought of actually starting to run some wires and get power to my accessories. I had previously cut out the base panel and drilled all the holes to mount the breaker and fuse panel but that was as far as I got. Today I fabbed up the support, test fitted, cut some more, test fitted, cut some more a few times to make sure everything fit in the space just fine. So without further commentary, lets get into it!

    I have seen several ways of making a support for the cantilevered end of the panel with some people running it down to the bolt holding the OEM fuse box to the fender. I chose to utilize the bolt attaching the breathers as a means to attach the support to the truck. Given that it is slightly offset from the center line of the panel project, I had to do a bit more manipulation of the support to get the proper angles on it. In the end I came up with this.

    20150124-P1010278_zpso0iczhur_7863013bcfbc7eae9061ab3a91013d7cd324ae4c.jpg

    A little bit of massaging with the angle grinder and flap disk to round off corners and remove burrs and I put it in the engine bay.

    20150124-P1010282_zpsip1fl2zc_cd2771e667bff906a280e9bbb08dfb5f12e9837c.jpg

    First test fit of the panel didn't give adequate clearance with the brake fluid reservoir. It was close, but I didn't really want to risk repeated vibrations wearing a hole in the plastic. So I busted out the jig saw and angle grinder and trimmed things up nicely.

    20150124-P1010281_zpsymtjjtpr_720f6d4ff77fa25e3902f96ae8eb388684bcbf6e.jpg

    And back in the engine bay! Bolted everything up and the assembly is pretty darn solid.

    20150124-P1010283_zpsod0cpme7_59bc651524bc6ffe1bc8baf82efaf684aa43325e.jpg

    Meanwhile I got started on some battery cables for the whole shebang. I couldn't justify spending $200 for a good hydraulic lug crimper, so I ended up trying out a $20 hammer type crimper from Amazon. I will say that I am pretty impressed with the crimps it laid down.

    20150124-P1010287_zpslphxlpx8_d076978ffbb7ab21cbbda4ecb7f851a2e9042d76.jpg

    Now unfortunately one of the missing items from my recent order was the red colored expandable braided sheathing. Call me crazy but I wanted red sheathing and heat shrink for the hot cables, and black/black for the ground. So it will be a few days before I can get the hot cables done, but I was able to put the finishing touches on the ground. All junctions use marine adhesive heat shrink for additional protection.

    20150124-P1010289_zpse90uwwih_c9b553f275006e4273fa71cfef461ebc1c5a5f8d.jpg

    I'm still trying to figure out how I want to do the switches in cab. I would like to utilize the current blank holes in the dash to house at least some of the lights to minimize the amount of cutting I have to do. Way I figure, I'll have a maximum of 7 or so switches (some day that is). Oh well, that's a problem for another day.
     
    ChadsPride likes this.
  19. Aug 23, 2016 at 7:12 AM
    #19
    totmacher

    totmacher automotive hypochondriac

    Joined:
    Sep 7, 2009
    Member:
    #22430
    Messages:
    4,663
    Gender:
    Male
    First Name:
    Daniel
    TN (memphis-ish)
    Vehicle:
    4Runner, Tundra
    Cut & broke off some stuff.
    Tell me more about this Dakar leaf pack with add-a-leaf but an overload leaf removed.
    What's the gain from doing that? What's the down side?
     
    ChadsPride likes this.
  20. Aug 23, 2016 at 7:23 AM
    #20
    Adventurous

    Adventurous [OP] Well-Known Member

    Joined:
    Apr 22, 2014
    Member:
    #128214
    Messages:
    820
    Gender:
    Male
    Colorado
    Vehicle:
    15 DCLB SR5
    Sure! I'll definitely be covering that in a later post but I won't make you wait around for that.

    If you look at the stock Dakar packs they come with two overload leafs, one that's frowny shaped and longer (second from the bottom) and one that is flat and shorter (on the bottom of the pack). They carried weight great with this configuration but kind of blew without having 400 or so pounds in the bed of the truck. When I say they kind of blew, I mean that uptravel was limited without that additional weight and they would hit a point during compression where that larger overload leaf would engage and it wouldn't compress any more. This would cause the rear of the truck to feel like it was hopping a bit and was generally unpleasant.

    When I rebuilt the pack I put the OME D29XL add-a-leaf kit in and removed that larger overload leaf. Removal of the overload leaf negated the additional lift provided by the add-a-leaf, BUT the spring pack is now flexier and more comfortable unloaded without sacrificing performance while loaded. The new configuration will still carry a commendable amount of weight (I've had 1,600lbs in the bed for a short trip) without squatting terribly. It is better on road and off road though some of this is attributable to the Timbren bump stops being taller and progressive.

    The only down side I can see so far with this system is you have to pull everything out, disassemble, and will need new u-bolts. It doesn't provide as much lift (maybe 1/2" less actually) but I would contend that the additional lift is only useful if you can actually use it. For my purposes it was a very welcomed change and I would do it again.
     
To Top