

-
Welcome to Tacoma World!
You are currently viewing as a guest! To get full-access, you need to register for a FREE account.
As a registered member, you’ll be able to:- Participate in all Tacoma discussion topics
- Communicate privately with other Tacoma owners from around the world
- Post your own photos in our Members Gallery
- Access all special features of the site
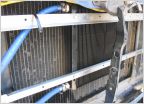 Has anyone managed to add a Transmission cooler to their 2021?
 ARB compressor in bed storage??? - anyone running one???
 Newbie Winch Wiring Question
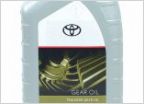 Transfer case fluid
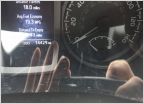 Speedo cluster scratches
 USB port vs. 12V DC power for charging iPhone 7 and Kindle
Belt tensioner replacement DIY
Discussion in '3rd Gen. Tacomas (2016-2023)' started by gsingh, Jul 26, 2020.
Page 2 of 2
Page 2 of 2

