

-
Welcome to Tacoma World!
You are currently viewing as a guest! To get full-access, you need to register for a FREE account.
As a registered member, you’ll be able to:- Participate in all Tacoma discussion topics
- Communicate privately with other Tacoma owners from around the world
- Post your own photos in our Members Gallery
- Access all special features of the site
 Need help with trimming fender and fender flares
 Too much antifreeze ?
 Pop and Lock tailgate lock for back up camera..anyone use?
 Of bump stops, leaf springs, shocks, and lifts
 Holding stuff in the bed
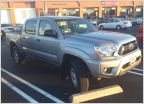 Sky Silver SR5 make over part numbers guide. 285s and color match
BHLM - hope this helps
Discussion in '2nd Gen. Tacomas (2005-2015)' started by dtd608, Sep 27, 2016.
Page 1 of 2
Page 1 of 2


