1. Welcome to Tacoma World!

    You are currently viewing as a guest! To get full-access, you need to register for a FREE account.

    As a registered member, you’ll be able to:
    • Participate in all Tacoma discussion topics
    • Communicate privately with other Tacoma owners from around the world
    • Post your own photos in our Members Gallery
    • Access all special features of the site

Blacking Out Headlights, How to

Discussion in 'Lighting' started by spencer_hong, Jul 31, 2007.

  1. Mar 8, 2010 at 5:43 PM
    #261
    Bullzi511Tacoma06

    Bullzi511Tacoma06 KCCO

    Joined:
    Mar 3, 2010
    Member:
    #32485
    Messages:
    1,718
    Gender:
    Female
    Southeast Louisiana
    Vehicle:
    2016 MGM Doublecab SR5
    Did you manage to get the headlights pried apart? I feel like a complete dumbass for spending all this time on the project and coming up short.

    And sorry, I tried saving the hassle of the wrong screw removal for anybody else who attempts this.
     
  2. Mar 8, 2010 at 5:50 PM
    #262
    ImpulseRed008

    ImpulseRed008 Gone But Not Forgotten

    Joined:
    Sep 9, 2008
    Member:
    #9104
    Messages:
    46,841
    Gender:
    Female
    First Name:
    Susan
    SC
    Vehicle:
    08 PreRunner SR5 V6 w/tow pkg
    OEM SS tube steps, Access LE tonneau cover, pop n'lock, AVS in-channel vent visors, stubby antenna, Wet Okole seat covers, bed mat, rear diff breather mod, 4 extra d rings in bed, K&N air filter.
    I didn't have a problem with the screws... but the headlights were a bear to pull apart. I read the guys who had theirs done and back in, in 3 - 4 hours... mine took longer, but I finally got them done.

    Too bad you aren't closer, or I'd give you a hand.
     
  3. Mar 8, 2010 at 6:01 PM
    #263
    nuddle

    nuddle nuddle

    Joined:
    Nov 12, 2009
    Member:
    #25864
    Messages:
    90
    Gender:
    Female
    First Name:
    aleese
    Canada
    Vehicle:
    06 TRD Sport DC Longbed 4x4
    BHLM, custom painted interior pieces, simple sound system

    I did indeed get them pried apart. That was super hard the first time around. I had to pry them once and then put them back in the oven again and then they came apart. Unfortunately I am a dumbass too because instead of buying adhesive promoter I bought adhesive spray, not realizing they are different my paint isn't sticking very good. Oh well I guess thats what I get for not paying attention. I'm hoping it looks good but I am starting to have my doubts.
     
  4. Mar 8, 2010 at 6:07 PM
    #264
    ImpulseRed008

    ImpulseRed008 Gone But Not Forgotten

    Joined:
    Sep 9, 2008
    Member:
    #9104
    Messages:
    46,841
    Gender:
    Female
    First Name:
    Susan
    SC
    Vehicle:
    08 PreRunner SR5 V6 w/tow pkg
    OEM SS tube steps, Access LE tonneau cover, pop n'lock, AVS in-channel vent visors, stubby antenna, Wet Okole seat covers, bed mat, rear diff breather mod, 4 extra d rings in bed, K&N air filter.
    I didn't use any adhesion promoter... I just used krylon fusion spray paint after sanding the chrome off and then wiping down with alcohol. Then several light coats of paint. Let dry and re-install.
     
  5. Mar 8, 2010 at 6:44 PM
    #265
    nuddle

    nuddle nuddle

    Joined:
    Nov 12, 2009
    Member:
    #25864
    Messages:
    90
    Gender:
    Female
    First Name:
    aleese
    Canada
    Vehicle:
    06 TRD Sport DC Longbed 4x4
    BHLM, custom painted interior pieces, simple sound system

    ya I bought the krylon spray paint, not the fusion, thats why I wanted the adhesive promoter. I wanted to paint them satin black and where I bought the paint didn't have any in the fusion. I know stupid decision but I guess thats what I get. It seems like its going to be okay though. I just keep putting light coats on. I sprayed windex on the chrome and it took it right off. I was kind of surprised.
     
  6. Mar 8, 2010 at 6:52 PM
    #266
    ImpulseRed008

    ImpulseRed008 Gone But Not Forgotten

    Joined:
    Sep 9, 2008
    Member:
    #9104
    Messages:
    46,841
    Gender:
    Female
    First Name:
    Susan
    SC
    Vehicle:
    08 PreRunner SR5 V6 w/tow pkg
    OEM SS tube steps, Access LE tonneau cover, pop n'lock, AVS in-channel vent visors, stubby antenna, Wet Okole seat covers, bed mat, rear diff breather mod, 4 extra d rings in bed, K&N air filter.
    ^ good luck
     
  7. Mar 8, 2010 at 6:54 PM
    #267
    nuddle

    nuddle nuddle

    Joined:
    Nov 12, 2009
    Member:
    #25864
    Messages:
    90
    Gender:
    Female
    First Name:
    aleese
    Canada
    Vehicle:
    06 TRD Sport DC Longbed 4x4
    BHLM, custom painted interior pieces, simple sound system
    i sure need it from the way my day has been going. just one stupid thing after another. lol thanks :)
     
  8. Mar 8, 2010 at 9:02 PM
    #268
    Bullzi511Tacoma06

    Bullzi511Tacoma06 KCCO

    Joined:
    Mar 3, 2010
    Member:
    #32485
    Messages:
    1,718
    Gender:
    Female
    Southeast Louisiana
    Vehicle:
    2016 MGM Doublecab SR5
    Thanks!

    Sweet! Keep it up, I'm sure you'll get it done.

    :facepalm: I have figured out what MY problem was (due to exhaustion!) I totally didn't think to take out the screws in the headlight. The write-up I printed out said something about unscrewing screws once I got the thing pried open. My dumbass was thinking that's what he was referring to. I am going to try to get a buddy of mine to help me out with the mod. He's got a whole lot more experience with this kind of thing. I always find a way to screw it up!
     
  9. Mar 8, 2010 at 9:32 PM
    #269
    nuddle

    nuddle nuddle

    Joined:
    Nov 12, 2009
    Member:
    #25864
    Messages:
    90
    Gender:
    Female
    First Name:
    aleese
    Canada
    Vehicle:
    06 TRD Sport DC Longbed 4x4
    BHLM, custom painted interior pieces, simple sound system
    Good news! I gotter done. It's pretty dark out now but maybe I'll get some pictures up sometime soon to show you guys how it turned out. It looks good too, with all my screw ups today it worked out good. :)

    I forgot about those screws too but then after 30 seconds of prying I was like oh crap forgot about those screws.
     
  10. Mar 8, 2010 at 9:48 PM
    #270
    Bullzi511Tacoma06

    Bullzi511Tacoma06 KCCO

    Joined:
    Mar 3, 2010
    Member:
    #32485
    Messages:
    1,718
    Gender:
    Female
    Southeast Louisiana
    Vehicle:
    2016 MGM Doublecab SR5
    Glad you got it finished! Can't wait for pics. Yeah, I guess I had just been awake too many hours and had entered that delirious mode where common sense is gone.
     
  11. Mar 9, 2010 at 12:12 AM
    #271
    Viet2100

    Viet2100 Well-Known Member

    Joined:
    Jun 27, 2007
    Member:
    #1930
    Messages:
    2,505
    Gender:
    Male
    First Name:
    Viet
    South Florida
    Vehicle:
    2016 Prius 4T
    I can help... I can get the lights out on 5 mins, pried apart and painted in an hour. Dried, resealed and back on your truck in 3 hours.
     
  12. Mar 9, 2010 at 12:47 AM
    #272
    rmb_crew

    rmb_crew My other ride has 18,400HP!!!!!!

    Joined:
    Jan 21, 2009
    Member:
    #12837
    Messages:
    6,068
    Gender:
    Male
    First Name:
    Ryan
    Jacksonville, FL 30.243103, -81.591007‎
    Vehicle:
    2010 F150 XLT SuperCrew 4X4
    Access larado tonneau, magnaflow exhaust
    Yeah once you get it the first time it makes it very easy from there on out. And that 4th pain in the ass bolt i just left it out. The headlight stays put just fine without it.
     
  13. Mar 9, 2010 at 12:54 AM
    #273
    Bullzi511Tacoma06

    Bullzi511Tacoma06 KCCO

    Joined:
    Mar 3, 2010
    Member:
    #32485
    Messages:
    1,718
    Gender:
    Female
    Southeast Louisiana
    Vehicle:
    2016 MGM Doublecab SR5
    Thanks, but too bad we don't live closer to each other...
    :pout:

    rmb_crew - I'm still having issues getting one headlight back on - without doing the mod! And yeah, I went ahead and said F-it to the 4th screw.
     
  14. Mar 9, 2010 at 1:08 AM
    #274
    rmb_crew

    rmb_crew My other ride has 18,400HP!!!!!!

    Joined:
    Jan 21, 2009
    Member:
    #12837
    Messages:
    6,068
    Gender:
    Male
    First Name:
    Ryan
    Jacksonville, FL 30.243103, -81.591007‎
    Vehicle:
    2010 F150 XLT SuperCrew 4X4
    Access larado tonneau, magnaflow exhaust
    the light kinda rolls into place. You cant just slide it directly in because that bottom mount will get stuck under the bumper lip. there is a little notch in the bumper lip that it is supposed to go into and as soon as it gets in there everything slides into place. Its kinda hard to explain without just doing it.
     
  15. Mar 9, 2010 at 5:49 AM
    #275
    Bullzi511Tacoma06

    Bullzi511Tacoma06 KCCO

    Joined:
    Mar 3, 2010
    Member:
    #32485
    Messages:
    1,718
    Gender:
    Female
    Southeast Louisiana
    Vehicle:
    2016 MGM Doublecab SR5
    Yeah, I know what you mean because the passenger side went in without any problems. Trust me, with the day I had, I was shocked b/c of it. But the driver side just will not cooperate! I must not have "the touch." :frusty:
     
  16. Mar 9, 2010 at 5:26 PM
    #276
    Bullzi511Tacoma06

    Bullzi511Tacoma06 KCCO

    Joined:
    Mar 3, 2010
    Member:
    #32485
    Messages:
    1,718
    Gender:
    Female
    Southeast Louisiana
    Vehicle:
    2016 MGM Doublecab SR5
    This site contains affiliate links for which the site may be compensated.
  17. Mar 9, 2010 at 9:37 PM
    #277
    nuddle

    nuddle nuddle

    Joined:
    Nov 12, 2009
    Member:
    #25864
    Messages:
    90
    Gender:
    Female
    First Name:
    aleese
    Canada
    Vehicle:
    06 TRD Sport DC Longbed 4x4
    BHLM, custom painted interior pieces, simple sound system
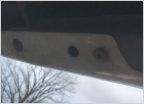
    I totally understand what you mean, I work in construction and right now I am doing 15 hour days. 3hrs of it is a drive to and from the work place. Since I had to work this morning I was running short on time last night and I had to put my lights and grille back on at 10pm in the dark! It was definitely difficult, I wouldnèt recommend it. Anyways I don't get a day off until friday so I won't get to see them in the day light until then but I did take some pictures of them in the dark. They didn't turn out too bad IMO.

    Here they are:

    Before;
    [​IMG]

    After;


    [​IMG]

    [​IMG]

    [​IMG]


    I kept the orange reflector out. Just my personal preference I guess.
     
  18. Mar 10, 2010 at 1:12 AM
    #278
    Bullzi511Tacoma06

    Bullzi511Tacoma06 KCCO

    Joined:
    Mar 3, 2010
    Member:
    #32485
    Messages:
    1,718
    Gender:
    Female
    Southeast Louisiana
    Vehicle:
    2016 MGM Doublecab SR5

    Well, they look good at night! I only have about half of your drive, but it sure is killer when you try to get anything done other than sleep.
     
  19. Mar 10, 2010 at 5:57 AM
    #279
    Bullzi511Tacoma06

    Bullzi511Tacoma06 KCCO

    Joined:
    Mar 3, 2010
    Member:
    #32485
    Messages:
    1,718
    Gender:
    Female
    Southeast Louisiana
    Vehicle:
    2016 MGM Doublecab SR5
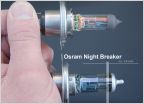
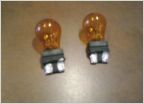
    Woo hoo! Got in from work motivated to give it another go and somehow managed to easily slide the headlight into place. Thanks for the help guys! I must say, I am impressed with those new lightbulbs I have in. Of course for $50+, my wallet was praying that they'd impress me.

    th_293da9a8-1-1_ffe6f1b1c7e23e64fd5c933dbef05c6a7cbb3b6c.jpg
     
  20. Mar 10, 2010 at 6:28 AM
    #280
    Ese Loco

    Ese Loco Taco Man Sam

    Joined:
    Jul 13, 2009
    Member:
    #19623
    Messages:
    423
    Gender:
    Male
    Vero Beach, FL / Tampa, FL
    Vehicle:
    2009 DC TRD Off-Road 4x4 V6 6-speed
    Legal Florida Tint all-around, 1.5" add-a-leaf, bilstein 5100 rear shocks, Light Racing Coilovers, Removed secondary air filter, K&N airfilter, Amsoil 100% synthetic motor oil, Amsoil synthetic severe gear in rear differential, Differential breather mod, Painted rims and logo's black, amsoil oil filter
    Hey,
    I did this awhile ago but unfortunately one is leaking and it seems its formed water spots on the inside. Any ideas on what is the best way to clean it and seal it back up right? i have already put tape around the edge but it doesnt seem to be working. Any ideas?
     

Products Discussed in

To Top