

-
Welcome to Tacoma World!
You are currently viewing as a guest! To get full-access, you need to register for a FREE account.
As a registered member, you’ll be able to:- Participate in all Tacoma discussion topics
- Communicate privately with other Tacoma owners from around the world
- Post your own photos in our Members Gallery
- Access all special features of the site
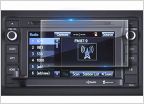 Screen coating coming off radio
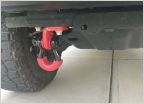 Front recovery point?
 Installed my new CB Radio Set Up!
 What is the real payload capacity of our trucks???
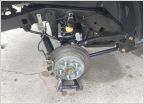 Shocks
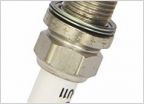 Spark plug replacement
BudBuilt Gas Tank Skid Installation
Discussion in '2nd Gen. Tacomas (2005-2015)' started by ExpoSpy, Jul 6, 2011.


