

-
Welcome to Tacoma World!
You are currently viewing as a guest! To get full-access, you need to register for a FREE account.
As a registered member, you’ll be able to:- Participate in all Tacoma discussion topics
- Communicate privately with other Tacoma owners from around the world
- Post your own photos in our Members Gallery
- Access all special features of the site
 LED reverse lights?
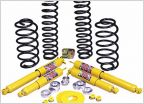 A little lift help - selection and purchase
 Wix best price $$ ??
 The ultimate foglight upgrade H11 (not LED or HID)
 Getting spare down without special tool?
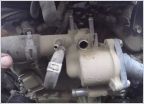 Best Water Pump To Use? Replacement Time
CB Antenna in Factory Antenna Location
Discussion in '2nd Gen. Tacomas (2005-2015)' started by hoverlover, Apr 2, 2018.
Page 1 of 2
Page 1 of 2


