1. Welcome to Tacoma World!

    You are currently viewing as a guest! To get full-access, you need to register for a FREE account.

    As a registered member, you’ll be able to:
    • Participate in all Tacoma discussion topics
    • Communicate privately with other Tacoma owners from around the world
    • Post your own photos in our Members Gallery
    • Access all special features of the site

Clsn's 2019 TRD OR Build

Discussion in '3rd Gen. Builds (2016-2023)' started by Clsn, Nov 1, 2018.

  1. Nov 1, 2018 at 7:06 PM
    #1
    Clsn

    Clsn [OP] Well-Known Member

    Joined:
    Oct 26, 2018
    Member:
    #270705
    Messages:
    64
    Gender:
    Male
    Colorado
    Vehicle:
    2018 TRD Off Road
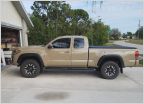
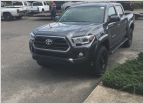
    Hey everyone! This is a thread to track my build on my 2019 TRD OR. It's mainly used as my daily driver but does end up off road when needed. Most of my upgrades will focus on adding function for my life with a few that I think look cool! Enjoy and let me know if anyone has any questions.

    Current Pics
    IMG_20181208_145440.jpg
    IMG_20181107_142632.jpg

    Installed Mods
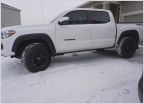
    TRD Pro Wheels 4Runner 17" Matte Black (Toyota Part #PTR20-35110-BK)
    265/70/17R KO2 Tires (No cutting or lift required with this size)
    A/C Drain Mod
    Fluid Film Undercoating (Annually)
    Toyota Predator Steps (Toyota Part #PT925-35170)
    TRD Wheel Cap Vinyl (Thanks @rrentrop )
    Pop N Lock for Tailgate
    Interior LED/License Plate LED Lights
    Vinyl Flags
    Greyman tactical Molle Panels
    Redline Hood Struts
    Diamondback SE Cover
    LED Bed Lighting

    Incoming Mods (On Order or Planning In progress)
    LED Reverse Spotlights

    Future Mods
    New Grill
    SwitchPro 9100
    Front Light Bar/Yellow Auxillary Fogs
    White Fog light replacement
    Dash Camera
    Window Tint
    Roof Rack
     
    Last edited: Aug 2, 2019
    arelindsea, Elkhitman and rrentrop like this.
  2. Nov 1, 2018 at 7:21 PM
    #2
    Clsn

    Clsn [OP] Well-Known Member

    Joined:
    Oct 26, 2018
    Member:
    #270705
    Messages:
    64
    Gender:
    Male
    Colorado
    Vehicle:
    2018 TRD Off Road
    Picked up from dealer on October 31st. I had them swap the original wheels and tires for new 4Runner TRD Pro's and KO2's.
    IMG_20181031_141953.jpg IMG_20181031_142010.jpg IMG_20181031_142006.jpg
     
    Elkhitman likes this.
  3. Nov 2, 2018 at 4:53 AM
    #3
    Amchuge

    Amchuge Well-Known Member

    Joined:
    Sep 23, 2018
    Member:
    #267144
    Messages:
    225
    Gender:
    Male
    Vehicle:
    2018 Tacoma trd pro
  4. Nov 3, 2018 at 7:10 AM
    #4
    Clsn

    Clsn [OP] Well-Known Member

    Joined:
    Oct 26, 2018
    Member:
    #270705
    Messages:
    64
    Gender:
    Male
    Colorado
    Vehicle:
    2018 TRD Off Road
    When I picked up the truck I also picked up a set of predator steps from the dealer Part #PT925-35170. Very easy to install (6 bolts) and all aluminum which made them a breeze by myself.

    IMG_20181031_161545.jpg
    IMG_20181031_162651.jpg
    IMG_20181031_162657.jpg

    There are 6 plastic "bolts" per side that act as plugs in the frame. You can unscrew them a full turn with a flat head and they fall right out.

    IMG_20181031_164152.jpg

    Finished product, took about a half hour going slow by myself.

    IMG_20181031_165224.jpg
     
  5. Nov 3, 2018 at 5:38 PM
    #5
    Clsn

    Clsn [OP] Well-Known Member

    Joined:
    Oct 26, 2018
    Member:
    #270705
    Messages:
    64
    Gender:
    Male
    Colorado
    Vehicle:
    2018 TRD Off Road
    Last few things before real mods start. I covered inside the frame and under the truck with Fluid Film to prep for the upcoming winter.

    IMG_20181101_160519.jpg

    Took about 5 cans to do it thoroughly, I ran out in the middle and had to buy more. Next year I think I'll invest in some ramps, there were a few dicey moments this year with the low clearance in some areas.

    IMG_20181101_193619.jpg
    IMG_20181101_182116.jpg

    Also dipped all the emblems on the outside. Other than the grille (which will be replaced eventually) they were the only real chrome showing from the factory. In the past I've always used straight dip but this time I hit it with 2 coats of glossifier and I like the look.
     
  6. Nov 7, 2018 at 4:54 PM
    #6
    Clsn

    Clsn [OP] Well-Known Member

    Joined:
    Oct 26, 2018
    Member:
    #270705
    Messages:
    64
    Gender:
    Male
    Colorado
    Vehicle:
    2018 TRD Off Road
    I added color matched TRD Wheel Vinyl. Very straight forward process and easy to do even though it was my first time. Just follow the provided instructions. A few letters did have a very slight red outline (user error not the product :thumbsup:). I decided to leave those few letters instead of re-doing them because unless your 6" away you can't tell.

    IMG_20181105_210145.jpg

    IMG_20181105_213154.jpg
    IMG_20181105_221814.jpg
    IMG_20181107_142646.jpg
    IMG_20181107_142637.jpg
    IMG_20181107_142632.jpg

    Looks great and I'm pretty happy with the results.
     
    Amchuge likes this.
  7. Nov 25, 2018 at 12:58 PM
    #7
    Clsn

    Clsn [OP] Well-Known Member

    Joined:
    Oct 26, 2018
    Member:
    #270705
    Messages:
    64
    Gender:
    Male
    Colorado
    Vehicle:
    2018 TRD Off Road
    Installed a Pop N Lock for my tailgate.

    Started by testing before I bothered to run everything. I used Positaps to connect to the stock harness.

    IMG_20181107_125737.jpg

    I had to drill out the two stock harness plugs in the tailgate to accommodate the Pop N Lock harness.

    IMG_20181107_132719.jpg
    IMG_20181107_133223.jpg

    Then I ran the wires to the passenger side using the stock harness routing as a guide. Wherever the stock harness was wrapped in heat protection I ran the new harness on the opposite side away from the exhaust. I then connected the wires up through the grommet under passenger seat and along the door sill harness.

    IMG_20181107_141801.jpg
    IMG_20181107_141757.jpg

    Works great and once I get a bed cover it'll help keep everything secure.

    IMG_20181107_141806.jpg
     
    jwctaco likes this.
  8. Nov 25, 2018 at 1:11 PM
    #8
    Clsn

    Clsn [OP] Well-Known Member

    Joined:
    Oct 26, 2018
    Member:
    #270705
    Messages:
    64
    Gender:
    Male
    Colorado
    Vehicle:
    2018 TRD Off Road
    Completed my PowerTray @Mr.PowerTrays. Still have to install it once I finish up a few other things on the truck.

    I started by 3d modeling the tray to make sure the components would fit and work around the clearance in the truck. The final design can be seen below.

    Option 3 3D.jpg

    Option 3 Top.jpg

    Then I test fitted and drilled out the holes to mount all the components on the tray. I used all stainless steel hardware with lock washers to make sure nothing vibrates loose.

    IMG_20181129_210055.jpg

    Finally I wired the Bussman and ran all the connectors. I followed this awesome guide by @tacozord which made everything really easy. I did deviate in a few ways:

    -I used Weatherpack connectors for all of the connections. These are limited to 20A per connection, but I don't anticipate drawing more power than that even for my light bar (I don't need space ship level light). Also, in the future I can easily change the connections to Metripack connectors if I decide to upgrade without rewiring the Bussman.
    -I used 12 gauge wire, again with 12 gauge I feel comfortable with 25-30A depending on the length of the run if I decide to switch a connection or 2 to Metripack connectors for more power. This also makes crimping/connections much easier than with 10 gauge, which barely fits the connectors.
    -I am using the Blue Sea Bus Bar (top right) to connect all the grounds. I also added a fuze holder (center) which I will use for diodes. This way if I have a relay that I want to run off of 2 sources I can run it back to the panel and place the diodes there before running to the relay input. This gives me one central location to troubleshoot with only wire and final connections being located elsewhere in the truck.

    IMG_20181202_111201.jpg

    IMG_20181202_111206.jpg

    I still have to install and add battery cables but otherwise I look forward to using it.
     
    Last edited: Dec 5, 2018
    Atl_taco_ likes this.
  9. Dec 9, 2018 at 3:05 PM
    #9
    Clsn

    Clsn [OP] Well-Known Member

    Joined:
    Oct 26, 2018
    Member:
    #270705
    Messages:
    64
    Gender:
    Male
    Colorado
    Vehicle:
    2018 TRD Off Road
    Small mod, interior LEDs. Replaced the license plate bulbs and all interior bulbs. I ordered from Super Bright Leds, part numbers below:

    (4) 194-CW5-CBT [Front Vanity Lights and License Plate Bulbs]
    (4) F30-WHP-12V [Visor Mirror Bulbs]
    (1) 3110-CW18-CB [Rear Overhead]

    IMG_20181202_162833.jpg
    IMG_20181202_162804.jpg

    As you can see they're much brighter and I think a good upgrade for less than $50.
     
  10. Aug 2, 2019 at 7:38 PM
    #10
    Clsn

    Clsn [OP] Well-Known Member

    Joined:
    Oct 26, 2018
    Member:
    #270705
    Messages:
    64
    Gender:
    Male
    Colorado
    Vehicle:
    2018 TRD Off Road
    Installed my New Diamondback cover. I used RTV silicone to seal the gaps at the front of the bed and added a tailgate seal. '

    IMG_20190801_181150.jpg

    As noted on their website it ships full freight on a pallet. It was well packaged and they dropped it right inside my garage.

    IMG_20190802_163511.jpg IMG_20190802_163531.jpg

    RTV started off clean, I used tape as a dam to contain it around the cap. However, once I looked from inside the bed the gaps underneath the rail you could see the massive amount of daylight so I removed the dam and filled the whole area with RTV and smoothed it with a putty knife. Not the cleanest but looks good enough and I think it'll keep most of the moisture out.

    IMG_20190802_163920.jpg IMG_20190802_164120.jpg
     

Products Discussed in

To Top