

-
Welcome to Tacoma World!
You are currently viewing as a guest! To get full-access, you need to register for a FREE account.
As a registered member, you’ll be able to:- Participate in all Tacoma discussion topics
- Communicate privately with other Tacoma owners from around the world
- Post your own photos in our Members Gallery
- Access all special features of the site
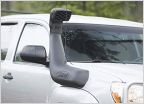 ARB snorkel is ready...
 How can I clean my dirty engine? Liquimoly?
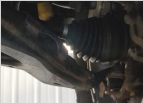 What do you think of the frame on the Tacoma I may want to buy?
 New head unit only works in ACC.
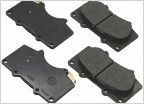 2013 TRD Sport Brake Pad OEM thickness.
 KAZOOOO sound with crosswind
Custom roof basket access cab build
Discussion in '2nd Gen. Tacomas (2005-2015)' started by Bradpad, Apr 18, 2012.
Page 6 of 8
Page 6 of 8


