

-
Welcome to Tacoma World!
You are currently viewing as a guest! To get full-access, you need to register for a FREE account.
As a registered member, you’ll be able to:- Participate in all Tacoma discussion topics
- Communicate privately with other Tacoma owners from around the world
- Post your own photos in our Members Gallery
- Access all special features of the site
 Good Christmas Gift for New Tacoma
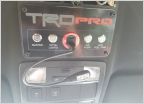 Starting my get out of dodge, auxiliary fuel tank setup. :)
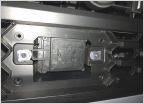 Faux TRD Pro Grill(Cali Raised) TSS/Garnish Issue
 Moving data usb to top of dash
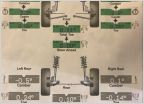 Alignment and steering wheel
 KC | Plug-n-Play Fog Lights for 3rd Gen!
Detailed Review : NickJ's/KBVoodoo's REMOTE START KIT
Discussion in '3rd Gen. Tacomas (2016-2023)' started by GoGoStAm, Dec 14, 2016.
Page 1 of 5
Page 1 of 5

