

-
Welcome to Tacoma World!
You are currently viewing as a guest! To get full-access, you need to register for a FREE account.
As a registered member, you’ll be able to:- Participate in all Tacoma discussion topics
- Communicate privately with other Tacoma owners from around the world
- Post your own photos in our Members Gallery
- Access all special features of the site
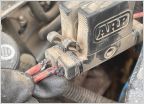 ARB compressor wire melting?
 Fluid pump for gear oils?
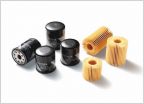 By-pass pressure rating for 90915-YZZD3?
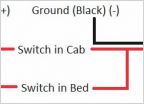 Question: Double Switch DIY Lighting
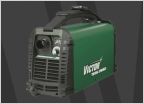 Plasma cutter, bang for the buck?
 Second battery
DIY: Gen 2 Illuminated 4wd switch
Discussion in 'Technical Chat' started by maverick491, Oct 31, 2007.
Page 1 of 5
Page 1 of 5


