

-
Welcome to Tacoma World!
You are currently viewing as a guest! To get full-access, you need to register for a FREE account.
As a registered member, you’ll be able to:- Participate in all Tacoma discussion topics
- Communicate privately with other Tacoma owners from around the world
- Post your own photos in our Members Gallery
- Access all special features of the site
 Tag lights
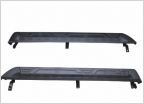 Running Boards or Tubes?
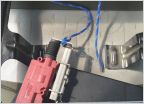 Pop N Lock PL8521 Install With Emergency Release
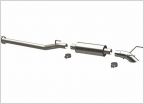 MagnaFlow cat-back dump exhaust
 Is my Front supposed to make this Clank sound?
 Any ever try a straight pipe with stock cats on a 2nd gen V6 standard?
DIY: Increase Approach Angle with Modified Skid and Bumper
Discussion in '2nd Gen. Tacomas (2005-2015)' started by EatSleepTacos, Jul 21, 2020.
Page 1 of 5
Page 1 of 5


