

-
Welcome to Tacoma World!
You are currently viewing as a guest! To get full-access, you need to register for a FREE account.
As a registered member, you’ll be able to:- Participate in all Tacoma discussion topics
- Communicate privately with other Tacoma owners from around the world
- Post your own photos in our Members Gallery
- Access all special features of the site
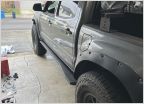 3rd Gen DCSB Rock Sliders on a 2nd Gen ACLB? 65% off at 4WP?!
 Leveling Kits Hard To Finds
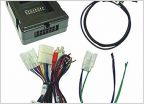 Radio question
 Inner Tie Rods
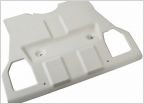 Can someone tell me if this skid plate will fit an 09 4x2 base?
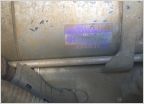 Starter solinoid repair kit (finding the right model)
Do I need to remove the fogs to apply yellow laminex film ?
Discussion in '2nd Gen. Tacomas (2005-2015)' started by Wattapunk, Jun 9, 2010.


