

-
Welcome to Tacoma World!
You are currently viewing as a guest! To get full-access, you need to register for a FREE account.
As a registered member, you’ll be able to:- Participate in all Tacoma discussion topics
- Communicate privately with other Tacoma owners from around the world
- Post your own photos in our Members Gallery
- Access all special features of the site
 Ideas for backup illumination
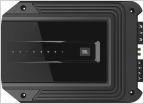 (Factory JBL system) Help Installing Pioneer DMH-WC6600NEX
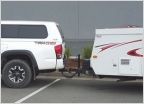 Rear End Support for Weight.
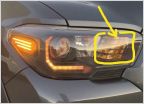 Headlight Mods - Amber Tint?
 PSA: Don't buy an RSI Smartcap if you live in a cold climate - frozen locks
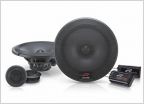 JBL Audio option upgrade
Electrical - Ground location from bed
Discussion in '3rd Gen. Tacomas (2016-2023)' started by evdog, May 8, 2021.

