1. Welcome to Tacoma World!

    You are currently viewing as a guest! To get full-access, you need to register for a FREE account.

    As a registered member, you’ll be able to:
    • Participate in all Tacoma discussion topics
    • Communicate privately with other Tacoma owners from around the world
    • Post your own photos in our Members Gallery
    • Access all special features of the site

emergency brake cable replacement

Discussion in '1st Gen. Tacomas (1995-2004)' started by mytacoma2001, Sep 10, 2010.

  1. Sep 10, 2010 at 12:23 PM
    #1
    mytacoma2001

    mytacoma2001 [OP] New Member

    Joined:
    Sep 10, 2010
    Member:
    #43028
    Messages:
    1
    Gender:
    Male
    First Name:
    Ron
    Ohio
    Vehicle:
    4 Wheel Drive 2.4L
    Have 2001 tacoma 4 wheel drive. Tried to replace front emergency brake, but can't get the pin that holds the emergency brake out. any body know of an easy way to remove the pin without taking it to a dealer. Don't want to do that. Thanks
     
  2. Jul 20, 2012 at 12:21 PM
    #2
    Ecnerwal

    Ecnerwal Well-Known Member

    Joined:
    Jul 20, 2012
    Member:
    #83039
    Messages:
    125
    Gender:
    Male
    NW Mass
    Vehicle:
    '02 4x4 2.7 A/T Ext Cab
    gradually replacing the bumper with hairy bondo ;-)
    Huh. two years and no answer?

    Just had to figure this out. Found posts with people removing the whole assembly, removing the pin by driving it out, all sorts of work. Couldn't be right. Wasn't.

    Take a flashlight, 12mm wrench or socket, pair of needlenose pliers. Grab the handle above the door and slide awkwardly under the dash on your back (don't take it apart.) Pull the pin retaining the axle on the pulley. Slide the axle out (easier if you push down the gas pedal.) set pulley, axle and pin aside. Use the 12mm to remove the parking brake switch. Now the "trick" - reach up near the dash, on top of the shaft mechanism, and feel for the two ratcheting bits. Push on them until the handle will push in just that extra bit that will let you pull the cable end out with the pliers (over where the pulley was).

    Grease all the exposed parts of the cable very well, and use grease or antiseize on all the nuts and bolts for clamps and such, to slow the rate of rusting and reduce the time and frustration the next time you have to do this. Especially grease the exposed cable where the old one rusted and broke...

    The pin at the other end (under the truck) was rusted in place, but a simple use of an old sledgehammer head with the hole over the pin as an "anvil" on top of it (with room to drive the pin into) and a hammer on the pin got that out.
     
    GH0STRYDER57 likes this.
  3. Sep 8, 2012 at 4:17 AM
    #3
    rgd720

    rgd720 New Member

    Joined:
    Sep 8, 2012
    Member:
    #86468
    Messages:
    1
    Gender:
    Male
    Vehicle:
    99 2wd 2.4L
    Ecnerwal has the best method. Not the easiest to get to, but not bad. Thanks for the posting. Now I can get this truck registered and on the road.
     
  4. Sep 10, 2012 at 6:21 AM
    #4
    Ecnerwal

    Ecnerwal Well-Known Member

    Joined:
    Jul 20, 2012
    Member:
    #83039
    Messages:
    125
    Gender:
    Male
    NW Mass
    Vehicle:
    '02 4x4 2.7 A/T Ext Cab
    gradually replacing the bumper with hairy bondo ;-)
    HtH. It was one of those things where it simply didn't make sense what some people were going through to do it. Maybe on one of those cars where it's "remove fenders to change spark plugs" it would be that hard, but not on a Toyota...though "remove intake to change spark plugs" is getting there, come to think of it...but at least they are 100,000 mile plugs.
     
  5. Nov 22, 2013 at 10:50 AM
    #5
    JLee50

    JLee50 Well-Known Member

    Joined:
    Nov 20, 2013
    Member:
    #116986
    Messages:
    391
    Gender:
    Male
    Phoenix
    Vehicle:
    Stockish 99 4x4 TRD
    ToyTec coilovers
    Old post. Worth reviving. :p

    I had read about driving the pin out - was like WTF, that doesn't make sense at all. I tried, and bent my punch without moving the pin. So, I searched again..ran into this. WAY easier.
     
  6. Jan 7, 2015 at 7:40 AM
    #6
    chaco

    chaco Member

    Joined:
    Jan 7, 2015
    Member:
    #145800
    Messages:
    23
    Gender:
    Male
    First Name:
    Chase
    Evergreen, CO
    Vehicle:
    '99 SR5 manual chaco taco
    I tried for a while with the screw driver technique on the ratcheting bits and finally figured out a "better" way to get the e-brake to push all the way in to allow for the removal of the cable.

    I cut an aluminum can from my recycling bin into a strip about as wide as the e-brake shaft. From the front, I pull the e-brake all the way out (engaged brake position), set the strip of aluminum on top of the brake shaft so it covers the final, lone groove. As you push the e-brake in (dis-engaged brake position) keep the aluminum on the top of the shaft. It's thin enough it'll slip into the ratchet housing and block the ratchet teeth from engaging with the grooves in your e-brake shaft and allowing you to push the brake shaft all the way down, exposing the end of the cable to remove.

    I found this technique to work well and not require me to be shoving my hand up under the dash blindly feeling for the ratchets pieces to force open.
     
  7. Apr 29, 2015 at 1:30 PM
    #7
    Lumpskie

    Lumpskie Independent Thinker

    Joined:
    Apr 20, 2013
    Member:
    #102450
    Messages:
    1,978
    Gender:
    Male
    New Hampshire
    Vehicle:
    '96, 4x4, v6, manual hub
    Toytec 16" coilovers with Tundra Bilstein 5100s, Light Racing UCAs, Alcan Leafs with Orbit Eyes, 12" Bilstein 7100 short Bodies, ARB rear locker, 33x12.5 Duratracs, CBI sliders, Bushwacker fender flares, self made front bumper, M8000, Vision X 6.7" Hi/Lo Beam HIDs, full skids, Inchworm dual case setup - 15º clocking
    Thread worth reviving again. I just used this method and it saved me so much work. Thanks, Ecnerwal.
     
  8. Mar 21, 2016 at 1:41 PM
    #8
    1stGenGoob

    1stGenGoob New Member

    Joined:
    Mar 21, 2016
    Member:
    #181907
    Messages:
    1
    Vehicle:
    95.5 2WD
    All Stock, except for the aftermarket stuff!
    Great method!
    I'd add that the ratchet bits are at the aft end of the tube, near the dash/handle (took me a minute to find them). And that you must pull both ratchet bits forward (towards the engine).
    thanks Ecnerwal.
     
  9. May 14, 2016 at 3:56 PM
    #9
    jbernardstone

    jbernardstone New Member

    Joined:
    May 14, 2016
    Member:
    #186944
    Messages:
    1
    Gender:
    Male
    Vehicle:
    2003 Tacoma 4x4 2.7L 4cyl
    Thanks Ecnerwal and to others! I followed the advice posted here and it took me about 2 hours to replace the entire cable assembly.
     
  10. Dec 10, 2016 at 8:02 AM
    #10
    wvannah

    wvannah New Member

    Joined:
    Dec 10, 2016
    Member:
    #204496
    Messages:
    1
    Gender:
    Male
    First Name:
    Villeneuve
    Vehicle:
    1996 Tacoma base 2.4 rwd
    Thanks all. '96 Tacoma base: remove lower dash panel (easy) to get easy access to the two ratchets.
     
  11. Mar 24, 2017 at 7:37 AM
    #11
    bowyer2002

    bowyer2002 always tinkering

    Joined:
    Sep 4, 2009
    Member:
    #22295
    Messages:
    439
    Gender:
    Male
    NE Missouri
    Vehicle:
    01 Taco SR5 D-cab 4WD
    OME 882s, OME shocks all around and OME Dakar spring packs, ARB, Warn 8000, ARE shell, Custom rear bumper w/ reciever, 5-235/80R17 Cooper Discoverer ST MAXX on FJ wheels, grey wire mod, Hi-Lift, Hellas, Red-Line hood lifters, Scion radio, sliders, Safari snorkel & LED Ditch lights on CBI mounts.
    Do you, or anyone else, have the part numbers for this cable replacement part? Where did you source them? Thx.
    My e-brake cable(s) is (are) totally frozen - as I freed up the drum parts to no avail.
     
  12. Jun 20, 2017 at 6:42 PM
    #12
    Ecnerwal

    Ecnerwal Well-Known Member

    Joined:
    Jul 20, 2012
    Member:
    #83039
    Messages:
    125
    Gender:
    Male
    NW Mass
    Vehicle:
    '02 4x4 2.7 A/T Ext Cab
    gradually replacing the bumper with hairy bondo ;-)
    The "front" cable (the one this post is about, attached to the handle) is variable with the model of your truck - For my 2002 4WD Ext Cab it was a:

    DORMAN C660250
    Alternate/OEM Part Number(s): 464103D010, BC660250, C9981

    Which I bought from Rock Auto. $21 then, $16 now. 2WD, different cab, different year, other cables in the system will potentially be different. Not sure if one of those alternates is actually the Toyota number. That cable is still good 5 years on, but there's a bellcrank kit sitting in the truck for the other end of the system now.
     
    cruiserguy likes this.
  13. Jun 21, 2017 at 4:49 AM
    #13
    ghs57

    ghs57 Well-Known Member

    Joined:
    Jul 27, 2010
    Member:
    #40832
    Messages:
    1,091
    Gender:
    Male
    First Name:
    Chops
    Catskill Mts. NY
    Vehicle:
    '07 Black TRD OR xtracab 4.0L 4WD
    Pretty much stock right now
    IMG_1822.jpg
     
    cruiserguy likes this.
  14. Jun 21, 2017 at 12:10 PM
    #14
    Wyoming09

    Wyoming09 Well-Known Member

    Joined:
    Apr 24, 2015
    Member:
    #153833
    Messages:
    14,277
    Gender:
    Male
    New Tripoli Pa
    Vehicle:
    2000 Work truck 5 speed 4x4 3.4
    Super Springs
    Myself as long as I can still get Toyota E-Brake cables they will be my first choice.
     
    cruiserguy likes this.
  15. Jun 21, 2017 at 1:19 PM
    #15
    cruiserguy

    cruiserguy Well-Known Member

    Joined:
    Jul 31, 2016
    Member:
    #193416
    Messages:
    18,924
    Gender:
    Male
    First Name:
    Elijah
    SLC
    Vehicle:
    2000 ext cab, 2.7L, auto, 4x4
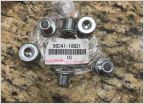
    Feels good to know I'm not the only one to take pictures of OEM parts in their OEM bag, lol.
     
  16. Jun 21, 2017 at 2:18 PM
    #16
    Wyoming09

    Wyoming09 Well-Known Member

    Joined:
    Apr 24, 2015
    Member:
    #153833
    Messages:
    14,277
    Gender:
    Male
    New Tripoli Pa
    Vehicle:
    2000 Work truck 5 speed 4x4 3.4
    Super Springs
    I am not much of a picture taker.

    It is a easy way to remember part numbers but my hard drive would crash and my back up thumb drive would get lost in the tool box
     
    bowyer2002 likes this.
  17. Jul 21, 2018 at 9:16 AM
    #17
    quag600

    quag600 Active Member

    Joined:
    Aug 28, 2013
    Member:
    #111373
    Messages:
    29
    Gender:
    Male
    Vehicle:
    03 Xtra cab Mystic Gold
    DEBADGED
    Just had to do my cable. Thanks for the write up! It helped immensely :thumbsup:
     
  18. Sep 21, 2018 at 5:33 AM
    #18
    MtTop_1

    MtTop_1 New Member

    Joined:
    Sep 18, 2018
    Member:
    #266639
    Messages:
    1
    Gender:
    Male
    Vehicle:
    2002 TRD, 240K
    stock
    Great write up, thanks!
    The ratchet bits aren't bad to get at, on top of the shaft, right behind the dash.
    Press them both down (and toward the floor) at the same time. Moving shaft towards floor that extra little bit that allows access to cable.
     
  19. Jul 18, 2019 at 4:25 PM
    #19
    mtnkid85

    mtnkid85 Well-Known Member

    Joined:
    Sep 10, 2014
    Member:
    #137993
    Messages:
    272
    Gender:
    Male
    MT
    Vehicle:
    1999 TRD Taco
    35s, Locked, blown
    Bumping this old thread up for everyone else. Just did the job for the third time, but first time not pulling the pin out. This way is WAY easier! Reaching the pawls under the dash is easy peasy.
     
  20. Jan 13, 2020 at 2:27 PM
    #20
    Karateauthorized

    Karateauthorized New Member

    Joined:
    Dec 13, 2019
    Member:
    #313240
    Messages:
    4
    Gender:
    Male
    Vehicle:
    1997 Tacoma Xtra cab V6 manual
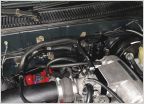
    I know old thread, but any idea how to get it out of there? Noob here.

    image.jpg
     

Products Discussed in

To Top