

-
Welcome to Tacoma World!
You are currently viewing as a guest! To get full-access, you need to register for a FREE account.
As a registered member, you’ll be able to:- Participate in all Tacoma discussion topics
- Communicate privately with other Tacoma owners from around the world
- Post your own photos in our Members Gallery
- Access all special features of the site
 Pro Comp Lift
 Replacing Control Arms & Brakes @ 161K, what else should I do while it's torn apart?
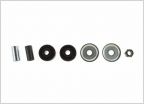 Rear lift, which shock?
 OME Shocks - rust prone?
 How long does an AAL last?
 Front higher than rear - OME 3" Suspension
Energy suspension lower control arm bushing install 8.3128R
Discussion in 'Suspension' started by Justinlhc, Jan 6, 2016.
Page 1 of 2
Page 1 of 2


