

-
Welcome to Tacoma World!
You are currently viewing as a guest! To get full-access, you need to register for a FREE account.
As a registered member, you’ll be able to:- Participate in all Tacoma discussion topics
- Communicate privately with other Tacoma owners from around the world
- Post your own photos in our Members Gallery
- Access all special features of the site
 Pigtails, plugs, and where to find them
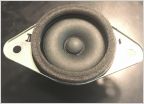 Dash tweeter connector mod DIY..Lots of pics
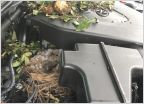 Engine Bay Rat F*cked - Advice
 Where can I find a black aluminum tool box for my 2017 Tacoma SR5?
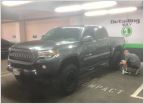 Looking for the best overall manufacturer nerf bars/sliders/running boards...
 TPMS nightmare
Ham Radio Clean Install - Yaesu FTM6000
Discussion in '3rd Gen. Tacomas (2016-2023)' started by snydoodlsh, Jan 14, 2025.
Products Discussed in


