

-
Welcome to Tacoma World!
You are currently viewing as a guest! To get full-access, you need to register for a FREE account.
As a registered member, you’ll be able to:- Participate in all Tacoma discussion topics
- Communicate privately with other Tacoma owners from around the world
- Post your own photos in our Members Gallery
- Access all special features of the site
 I think I’m killing my truck lol
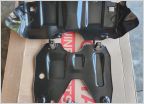 Stock Skid Plate Bolt Size? 2nd Gen TRD OR
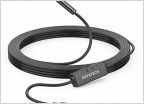
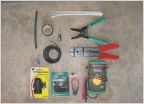 How To: Easy GPS Hardwiring
 The spark plugs on the trdparts4u.com
 Another transfer and diff fluid change question....
 Jack stands and storage options
Head light swap question...
Discussion in '2nd Gen. Tacomas (2005-2015)' started by SilTac10, Apr 23, 2019.


