1. Welcome to Tacoma World!

    You are currently viewing as a guest! To get full-access, you need to register for a FREE account.

    As a registered member, you’ll be able to:
    • Participate in all Tacoma discussion topics
    • Communicate privately with other Tacoma owners from around the world
    • Post your own photos in our Members Gallery
    • Access all special features of the site

Hodakaguy's Overland Tacoma Builds - on to new adventures.

Discussion in '3rd Gen. Builds (2016-2023)' started by Hodakaguy, Jan 12, 2018.

  1. Feb 3, 2018 at 5:21 PM
    #61
    Hodakaguy

    Hodakaguy [OP] Well-Known Member

    Joined:
    Dec 23, 2017
    Member:
    #239189
    Messages:
    371
    Gender:
    Male
    Vehicle:
    12 Tacoma/Vagabond Drifter
    I believe it's a 100XR

    Hodakaguy
     
  2. Feb 3, 2018 at 5:21 PM
    #62
    Hodakaguy

    Hodakaguy [OP] Well-Known Member

    Joined:
    Dec 23, 2017
    Member:
    #239189
    Messages:
    371
    Gender:
    Male
    Vehicle:
    12 Tacoma/Vagabond Drifter
    Our Husky X-act fit Contour floor liners arrived this weekend :). The stock Toyota all weather mats leave a lot to be desired and the passenger side mat constantly creeps forward since it doesn't have a anchor. The Husky mats come with a anchor for the passenger side, has an excellent fit and a heaps more coverage than the stock mats. The quality of the Husky units is top notch! Lot's of pics since I was having a hard time finding good pics when I was looking at them.

    Husky Mats available here: 16-17 models: CLICK HERE, 18-19 Models: CLICK HERE

    Pics of the Husky mats next to the OEM units.

    [​IMG]

    [​IMG]

    [​IMG]


    Anchor for passenger side, screws into carpet/under matting. The floor mat snaps onto this anchor.

    [​IMG]

    [​IMG]

    [​IMG]

    [​IMG]


    Mats installed.

    [​IMG]

    [​IMG]

    [​IMG]

    [​IMG]

    [​IMG]

    [​IMG]

    [​IMG]


    Next up start installation of a dual battery system in my truck, I'll be piecing together the setup using different brand components. For the passenger side Battery I purchased an Off Grid Engineering aluminum mount, the battery in this location will be a NorthStar Group 35 740 CCA Batt and will be the starting battery for the truck.

    The mount....machined aluminum goodness :)

    [​IMG]


    The mount/battery will be placed in the open space on the passenger side, The TRD Off Road models have this space open since the ABS controller is integral with the master cylinder and located on the drivers side.

    [​IMG]


    These three studs will be part of the mount setup.

    [​IMG]


    Mount Installed........Well....Kinda

    [​IMG]

    [​IMG]


    Should have been a quick and easy install but the mount does not line up with the rear most stud on the fender well, the hole for the stud (Blue Arrow) is about 2" away from the rear stud (Red Arrow). Maybe this battery mount is for a different year Tacoma? I'll make some calls on Monday, for now this project is on hold.

    [​IMG]


    Picked up my fathers Wheels/Tires from the tire shop, all balanced and ready to go.

    [​IMG]


    Managed to install both front shocks, reservoirs and upper air bag/mounts on my fathers truck this afternoon.

    [​IMG]

    [​IMG]


    Almost twins...:)

    [​IMG]


    More to come....

    Hodakaguy
     
    Last edited: May 23, 2020
    kairojya, CoachRed74, trlfrk and 4 others like this.
  3. Feb 3, 2018 at 6:03 PM
    #63
    FrayAdjacent

    FrayAdjacent Well-Known Member

    Joined:
    Aug 7, 2017
    Member:
    #226135
    Messages:
    375
    Gender:
    Male
    First Name:
    Matthew
    Austin, TX
    Vehicle:
    2017 Tacoma SR5 4x4

    Thanks for the reply, and the pic. Looks pretty nice! I don't think I'm going to end up getting at truck camper at all... turns out (at least) with the Palomino, there's literally NO way I could get it in my garage to store it, and I'd really rather store a camper there. With the jacks all the way down and the top collapsed, it's only 2" shorter than my garage door. I like my small house, but not my small ass garage!

    My tentative plans are now to end up going with the Go Fast Camper, then make the bed area a modular camper with bits I can add and remove as needed.
     
  4. Feb 9, 2018 at 6:48 PM
    #64
    Hodakaguy

    Hodakaguy [OP] Well-Known Member

    Joined:
    Dec 23, 2017
    Member:
    #239189
    Messages:
    371
    Gender:
    Male
    Vehicle:
    12 Tacoma/Vagabond Drifter
    Time to get some work done on this project.

    Since I installed the lift on my truck I've had a vibration/shudder each time I pass through 20 MPH. I ordered some Degree Shims (3 Degree) to rotate the pinion upward and place the drive line back into proper orientation.

    Dropped the axle, clamped the springs with two C-Clamps and removed the pins holding the spring pack together.

    [​IMG]


    Shims Installed.

    [​IMG]


    Trimming the excess stud to clear the lower Air Bag mounts...and being careful not to touch the shock :)

    [​IMG]


    And back together again. I took it for a test drive after installing the shims and the Vibration is gone, the shims did the trick! :). Now to make progress on other items.....

    [​IMG]


    Next up install the passenger side battery in my truck. I contacted Off Grid Engineering about the bottom rear stud (Red Arrow) not lining up with the hole in the mount (Blue Arrow), they said on the 3rd Gen's the rear mount isn't utilized and the mount is strong enough without it. Seemed like this mount was made for the 2nd Gen trucks and they just called it good for the 3rd Gen's instead of re-designing it to fit properly....bummer since it's not a cheap piece. Once installed I could pull up on the rear of the mount and get a little flex, I decided that it would be best to go ahead and anchor the rear of the mount down to prevent any fatigue over time from flexing when hitting bumps etc.

    [​IMG]


    Mount removed. You can see the three studs in this picture. I will be installing a Rivet Nut into the hole just ahead of the rear most stud and will use a bolt to anchor the mount down.

    [​IMG]


    Rivet Nut tool. This tool is very handy for installing threads into sheet metal.

    [​IMG]

    [​IMG]


    Hole drilled out to proper size and Rivet Nut being installed.

    [​IMG]


    And Rivet Nut Installed.

    [​IMG]


    Mount re-installed, rock solid and no flexing.

    [​IMG]

    [​IMG]


    NorthStar Group 35 Battery. This battery will be the starting/Truck battery.

    [​IMG]


    Everything Secured.

    [​IMG]

    [​IMG]


    Time to install the Drivers side NorthStar Group 31M Battery. This battery will run the Winch, fridge etc and will be tied to the Four Wheel Camper as well.

    [​IMG]


    For the drivers side I will be using a PerfreyBuilt Stainless Steel tray.

    [​IMG]


    Factory battery Removed.

    [​IMG]


    The edge of the tray is against the wiring bundle, I installed a piece of rubber fuel line to keep the sharp edge of the tray from wearing into the wiring.

    [​IMG]


    And installed. I will be modifying the stock wiring to extend over to the passenger side battery soon as well as installing the ACR etc.

    [​IMG]

    [​IMG]


    Next up installing a retractable step on the rear of my truck. It tucks up pretty high but time will tell if it will get in the way while off road, it will be very handy for every day use though.

    Step available here: CLICK HERE

    [​IMG]


    Step installed and retracted

    [​IMG]


    With a flick of your foot the step is extended.

    [​IMG]


    Preparing to install the Dakar springs on my fathers truck, here I'm installing the shims straight away this time while the springs are off the truck.

    [​IMG]


    Drivers side Spring out of the truck. OEM rear spring next to the Dakar springs.

    [​IMG]

    [​IMG]


    Dakar spring on the left, stock unit on the right.

    [​IMG]


    Time to install the Shocks.

    [​IMG]


    And both rear shock assemblies installed.

    [​IMG]


    Starting fabrication on the lower air bag mounts to adjust them to correct height following the Dakar Spring install.

    [​IMG]


    Both Diffs back from the shop today with the REM Polished Nitro 4:88 Gears Installed! Hope to get these babies back in the truck this weekend.

    [​IMG]


    More to come......

    Hodakaguy
     
    Last edited: May 23, 2020
    kairojya, CoachRed74, PB FAB and 6 others like this.
  5. Feb 10, 2018 at 4:21 PM
    #65
    Hodakaguy

    Hodakaguy [OP] Well-Known Member

    Joined:
    Dec 23, 2017
    Member:
    #239189
    Messages:
    371
    Gender:
    Male
    Vehicle:
    12 Tacoma/Vagabond Drifter
    Up early and started fabricating parts to extend the lower air bag mounts for my fathers truck. The thicker Dakar springs puts the outer support leg on the bottom mount about 3/4" off the axle, time to extend them for proper fit.

    Marking and cutting the new support legs

    [​IMG]

    [​IMG]

    [​IMG]


    Welding it all up

    [​IMG]

    [​IMG]

    [​IMG]


    Lower mounts primed and painted. Installed the Daystar Cradles, these will allow the air bags to separate from the lower mount during suspension droop, this will allow full droop on the suspension and eliminate the stress on the air bag from the axle assembly hanging off the bag.

    [​IMG]

    [​IMG]


    Installing the extended Stainless Braided rear brake lines.

    [​IMG]


    Installed the air lines for the air bags. I ran the fill fittings out the rear the same way I did on my truck, so they perform double duty as license plate mounting bolts.

    [​IMG]

    [​IMG]


    Installed the carrier bearing drop spacers.

    [​IMG]


    Lower air bag mounts installed, the cradles and bags come back into alignment as the suspension is compressed.

    [​IMG]


    Re-installed the rear diff with REM polished 4:88 Nitro Gears :). The 4:88 gearing is my favorite mod so far, makes the truck WAY more fun to drive! These 3rd gen trucks should have came from the factory with these gears installed!

    [​IMG]

    [​IMG]


    Rear end complete, just have to finish torque on the spring eye bolts after the truck is sitting back on the wheels.

    [​IMG]


    Next up re-install the front Diff. Installed painters tape over the axle seals to keep any nasties out during install. No pics of installing the support arms back onto the front diff.

    [​IMG]

    [​IMG]


    Running the air tubing for the ARB front locker.

    [​IMG]


    Locker air tubing fitted up to the Diff, tubing not yet fully routed and secured in this pic.

    [​IMG]


    Front Diff back in the truck.

    [​IMG]


    Should be able to test drive this baby tomorrow, my father is excited to get his truck back :)

    [​IMG]


    More tomorrow.....

    Hodakaguy
     
  6. Feb 12, 2018 at 2:33 AM
    #66
    Hodakaguy

    Hodakaguy [OP] Well-Known Member

    Joined:
    Dec 23, 2017
    Member:
    #239189
    Messages:
    371
    Gender:
    Male
    Vehicle:
    12 Tacoma/Vagabond Drifter
    4:30 am on Sunday...time to get back to work.

    Routed the ARB air tubing down to the front diff following the breather lines. Will be installing the compressor soon.

    [​IMG]

    [​IMG]


    Getting ready to re-install the front axles. I pulled my fathers axles while they are still assembled to the spindles, this turned out to be a huge time saver and made re-installation a breeze. Not sure why I didn't do it this way on my Truck, oh well the second time always goes easier and faster :)

    [​IMG]


    Seal greased and the inside carrier/splines lubed with fresh gear oil

    [​IMG]


    Front drive line re-installed and torqued to spec.

    [​IMG]


    Fresh gear oil applied to the axle shaft. The red arrow is pointing at the clip that locks the axle in place, during installation you want this clip facing upwards to it doesn't hang down and stop the axle from sliding into the carrier. (Clip is upside down in this pic).

    [​IMG]


    Lower two bolts loosely fit on the spindle and holding the axle in place.

    [​IMG]


    Getting ready to seat the axle/internal clip into place. The red arrow is pointing to the machined lips where I'll rest the brass drift to drive the axle in.

    [​IMG]


    Using a brass drift to seat the axles, a couple hits and the axle pops into place.

    [​IMG]

    [​IMG]

    [​IMG]


    Drivers side completely assembled and torqued (Minus the UCA Bolt) with new SS Brake line installed, no pics but the passenger side was assembled right after this pic.

    [​IMG]


    Installing SDHQ ABS sensor guards, should do a decent job at protecting the vulnerable wiring connectors. Red arrow pointing to the passenger side front ABS Connector.

    [​IMG]


    SDHQ Guards, very well built and finished.

    [​IMG]


    And installed on the truck.

    [​IMG]


    Managed to get a cut on my thumb in the middle of all this on a sharp thread, couldn't be bothered to walk to the house so had to improvise :)

    [​IMG]


    New Tires/Wheels installed and brakes bled.

    [​IMG]


    Off the jacks and back on the wheels.

    [​IMG]


    After bouncing on the suspension several times it's time to torque the upper control arms and rear spring perch bolts. Greased the UCA's before final torque then re-installed the rear splash aprons.

    [​IMG]


    My father setting the tire pressure to 30 psi, we will do a chalk test to find the proper inflation pressure for these tires but I'm betting this will be close.

    [​IMG]


    Adding gear oil to both diffs.

    [​IMG]


    Out for a quick test drive to test all systems and get the first heat cycle on the gears. 20 minutes of driving total to allow the diff to heat up then will let it completely cool down again at home. All systems performed perfectly, no vibration issues, no codes, 4WH, 4WL and Rear Locker all working perfectly. Now to get the truck aligned and start getting some easy break in miles on the gears. Stopped here for a quick photo shoot as we hit a gravel road to try out the 4WD system.

    [​IMG]


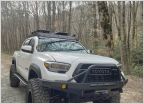
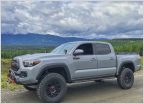
    My fathers truck next to mine...twins! You can see my suspension has settled about an inch in the 500 miles that I've put on my truck since installing the kit, my fathers will settle out the same. Once the additional weight of the sliders, front bumper/winch get installed it should be about perfect. The initial harshness has also calmed down and my truck is riding better all the time, I'm really like this suspension setup so far.

    [​IMG]

    [​IMG]


    Posing with the trucks.

    [​IMG]


    Now that my fathers truck is out of the shop I warmed up my Diffs and dropped the initial break in oil. The rear looked really clean, the front had a little bit of grayish tint to it. Both magnets on the drain plugs had just a light gray film on them. We re-filled both diffs with fresh oil and I will drive another 1000 miles and drop the oil again, if all is clean at that point I will install the Redline Syn oil.

    [​IMG]


    Next up install the bed mounting bars for the Four Wheel Camper. These bars will anchor the camper to the bed with turn buckles hidden beneath the camper. There is a multi piece rubber mat that goes on either side of the bars to make the floor one height.

    [​IMG]

    [​IMG]


    The bed bars are held in place with the factory bed mount bolts.

    [​IMG]

    [​IMG]


    Quite a bit of progress this weekend, now to just keep up that pace :)

    More to come....

    Hodakaguy
     
  7. Feb 12, 2018 at 7:09 AM
    #67
    transworldmoto

    transworldmoto Well-Known Member

    Joined:
    Aug 6, 2014
    Member:
    #135540
    Messages:
    995
    Gender:
    Male
    First Name:
    Ben
    California Coast
    Vehicle:
    2016 Access Cab TRD OR 4X4
    Sun's. Wow, what a build so far!
     
    Hodakaguy[OP] likes this.
  8. Feb 12, 2018 at 8:22 AM
    #68
    mr_jrock

    mr_jrock Well-Known Member

    Joined:
    Feb 2, 2018
    Member:
    #243288
    Messages:
    152
    Gender:
    Male
    First Name:
    Jeric
    Las Vegas, NV
    Vehicle:
    2016 BR Tacoma TRD
    wow! things are coming along very nicely :thumbsup:

    do you still have the link on the toyota pro grille ?
     
    Hodakaguy[OP] likes this.
  9. Feb 12, 2018 at 10:09 AM
    #69
    Hodakaguy

    Hodakaguy [OP] Well-Known Member

    Joined:
    Dec 23, 2017
    Member:
    #239189
    Messages:
    371
    Gender:
    Male
    Vehicle:
    12 Tacoma/Vagabond Drifter
    I purchased the grills from Areyoushopa on EBay. Both grills arrived in perfect cond.

    Hodakaguy
     
    This site contains affiliate links for which the site may be compensated.
    #69
    CoachRed74 and mr_jrock[QUOTED] like this.
  10. Feb 12, 2018 at 12:36 PM
    #70
    Backcountry89

    Backcountry89 Well-Known Member

    Joined:
    Dec 30, 2017
    Member:
    #239845
    Messages:
    103
    Gender:
    Male
    Been following along on expo. Nice builds thus far!
     
    Hodakaguy[OP] likes this.
  11. Feb 16, 2018 at 4:56 AM
    #71
    roth_nj

    roth_nj Well-Known Member

    Joined:
    Sep 29, 2015
    Member:
    #165396
    Messages:
    558
    Vehicle:
    2017 DCLB trd off-road bbp
    what did you repaint the springs with? mine came in the same way
     
  12. Feb 16, 2018 at 7:49 PM
    #72
    Hodakaguy

    Hodakaguy [OP] Well-Known Member

    Joined:
    Dec 23, 2017
    Member:
    #239189
    Messages:
    371
    Gender:
    Male
    Vehicle:
    12 Tacoma/Vagabond Drifter
    I just left them alone :)

    Hodakaguy
     
  13. Feb 16, 2018 at 7:49 PM
    #73
    Hodakaguy

    Hodakaguy [OP] Well-Known Member

    Joined:
    Dec 23, 2017
    Member:
    #239189
    Messages:
    371
    Gender:
    Male
    Vehicle:
    12 Tacoma/Vagabond Drifter
    My father completed the break in miles on his truck so back in the shop to change both diff oils and the engine oil. All oils looked good, we will flush the diffs one more time then install the Syn oil.

    [​IMG]


    Time to install the wiring for the Four Wheel Camper. This connection will tie the camper into the Deep cycle aux battery on the truck, I will also use this connection to power the ARB fridge when the FWC isn't installed.

    Drilled the hole in the bed for the electrical plug using a Uni-bit. I picked this spot since it's out of the way and will protect the plug nicely.

    [​IMG]


    After the hole is drilled I De-burred the edges with the De-Burring tool. This tool smooths out the sharp edges and reduces the chances of any cracks forming from the sharp edges. (Not a big concern on this plastic bed but still a good practice).

    Tool available here: CLICK HERE. Look for Video Demo of this tool at the end of this build thread.


    [​IMG]


    Wiring up the Electrical plug before installing. The blue wire won't be used so here I'm just placing a piece of shrink tubing over the end to cover the bare wire. I placed some Liquid electrical tape on the end of the wire and into the end of the heat shrink tubing before shrinking it with the heat gun, makes a nice tight seal. This wire will then be enclosed in the larger shrink tubing with the rest of the wiring.

    [​IMG]

    [​IMG]

    [​IMG]


    I use marine crimps and heat shrink tubing, both have glue on the inside and when heated the glue oozes out of the connection forming a nice water tight seal.

    [​IMG]


    Connections made up and ready for install, heat shrink tubing sealed on both ends with liquid electrical tape to get between each wire.

    [​IMG]


    Installed

    [​IMG]

    [​IMG]


    Carefully routing the wiring up to the battery. I followed the factory wiring looms up to the front being careful of any rub points, exhaust etc.

    [​IMG]


    Fitting up the Blue Sea ACR (Automatic Combining Relay). This relay with combine the Aux and main batteries together when charging as well as disconnecting the two so the starting battery can't go dead . You can manually combine the two as well to jump start yourself off the aux battery if needed or to supply extra juice to the Winch. I'll weld on some small studs to the top of the Stainless battery mount to attach the ACR.

    ML-ACR Available here: CLICK HERE

    [​IMG]


    This is where I'm planning on mounting the ACR. The factory harness will be removed from this battery, extended and connected to the smaller battery on the passenger side.

    [​IMG]


    Making up the connections to the battery on the FWC wiring, shown here pre-heat shrink.

    [​IMG]


    This will be a temporary connection for the FWC power until I finish the dual battery wiring.

    [​IMG]


    Installing the 30A Maxifuse into the fuse holder.

    [​IMG]


    Testing for power in the bed....looking good!

    [​IMG]


    Earlier in the build I modified the lower air bag mounts so that the outer support leg would contact the axle again after I installed the thicker Dakar spring packs. All was good until I added the Degree shims to the rear axle and the outer support legs no longer touched the axle again. Time to fix it......again lol.

    You can see the gap between the lower perch and the axle. What looks like grease is actually a layer of battery anti-corrosive wax that I had installed between the axle and the pad, this stuff drys to a waxy consistency and will prevent moisture from getting between the axle and support pad. When I installed the degree shims and the pad no longer rested on the axle it allowed dirt to stick to the wax.

    [​IMG]

    [​IMG]


    Getting ready to cut off the support tab again.

    [​IMG]


    Time to cut out some new support pads. Laying out the lines with a wrap around.

    [​IMG]

    [​IMG]


    New support pad fabricated. Performing fit up and getting ready to weld on the new support leg.

    [​IMG]

    [​IMG]


    Newly modified lower mount next to the previously modified mount. You can see the height difference here. I also changed the support shape to give a little extra strength.

    [​IMG]

    [​IMG]


    And re-modified mounts installed and fitting as designed.

    [​IMG]


    Installed the 285/75-R16 spare in the stock location. It's a VERY tight fit but it does fit. Had to tweak/bend the two forward mounts out a bit to allow clearance. I will also be fabricating a new extended heat shield to protect the tire from the exhaust pipe heat.

    Installed in the truck.

    [​IMG]


    It has clearance but I will be fabricating a better heat shield for the tire.

    [​IMG]


    The two forward tabs (Red Arrow) need to be bent forward some for clearance, a large set of channel locks or crescent wrench works nicely.

    [​IMG]


    Received the SSO hybrid bumper today. Overall the quality looks great although the push bar isn't level, it's a little less than a 1/4" lower on the right side than the left. I will cut the left side free and level the bar before painting, As well as cleaning up their welds. Pretty disappointing to see this on the bumper as I was going to paint it in the morning....oh well I can't leave it as it would drive me crazy knowing it's crooked :)

    [​IMG]


    Baja Designs lighting that will be going in the bumper.

    [​IMG]

    [​IMG]


    Warn Zeon 10-S that will be hiding behind the bumper.

    [​IMG]


    Factor 55 flat link, should stow nicely on the front.

    [​IMG]


    Back together once again.

    [​IMG]


    Lot's more work to go.....

    Hodakaguy
     
    Last edited: May 23, 2020
  14. Feb 16, 2018 at 8:02 PM
    #74
    RocTaco

    RocTaco Free stun!

    Joined:
    Nov 12, 2016
    Member:
    #202199
    Messages:
    2,040
    First Name:
    Pete
    Green Mtns
    Vehicle:
    03' Reg. Cab 4x4 5MT
    Looks like you’re making some good progress, excited to see the finished product.

    What plans do you have for the OEM take-offs?
    :anonymous:
     
  15. Feb 16, 2018 at 8:05 PM
    #75
    Hodakaguy

    Hodakaguy [OP] Well-Known Member

    Joined:
    Dec 23, 2017
    Member:
    #239189
    Messages:
    371
    Gender:
    Male
    Vehicle:
    12 Tacoma/Vagabond Drifter
    Selling them off

    Hodakaguy
     
  16. Feb 16, 2018 at 8:06 PM
    #76
    Lt. Dangle

    Lt. Dangle RIP @stun gun 2016-2020

    Joined:
    Jan 25, 2017
    Member:
    #208645
    Messages:
    7,282
    Ohio
    Vehicle:
    2017 7544
    This is like the second time I have seen someone complaining about the hoop not being level. That's very disappointing.
     
    Skydvrr likes this.
  17. Feb 16, 2018 at 8:08 PM
    #77
    Hodakaguy

    Hodakaguy [OP] Well-Known Member

    Joined:
    Dec 23, 2017
    Member:
    #239189
    Messages:
    371
    Gender:
    Male
    Vehicle:
    12 Tacoma/Vagabond Drifter
    Yeah I had read that as well after I ordered mine, was hoping mine would be straight but nope. I will fix it soon though, not sure I would recommend this bumper after seeing this although the rest seems very high quality and well built.

    Hodakaguy
     
    Lt. Dangle[QUOTED] likes this.
  18. Feb 16, 2018 at 8:48 PM
    #78
    upTOPOverland_Drew

    upTOPOverland_Drew upTOP Overland Technical Design and Application

    Joined:
    May 22, 2016
    Member:
    #187612
    Messages:
    2,709
    Gender:
    Male
    First Name:
    Drew
    Littleton, CO
    Vehicle:
    2017 TRD OR DCSB SUPER WHITE
    All the things...click the link in sig
    your issue seems to be common with the SSO bumpers, i have seen that in numerous threads now! awesome build BTW!
     
  19. Feb 16, 2018 at 9:15 PM
    #79
    El Latigo

    El Latigo Well-Known Member

    Joined:
    Jan 4, 2018
    Member:
    #240278
    Messages:
    655
    Gender:
    Male
    Anaheim CA
    Vehicle:
    2017 MGM TRD OR Double Cab Short Bed
    Amazing build... Trucks look awesome!! thanks for the pics and sharing the progress.. :thumbsup:
     
  20. Feb 16, 2018 at 10:38 PM
    #80
    cohiker

    cohiker Well-Known Member

    Joined:
    Nov 29, 2015
    Member:
    #171006
    Messages:
    212
    Gender:
    Male
    Vehicle:
    2016 DCSB SW V6 4X4 Tacoma
    Thanks for the detailed pictures. I'm learning a ton from this thread.

    Great trucks and great work!
     

Products Discussed in

To Top