

-
Welcome to Tacoma World!
You are currently viewing as a guest! To get full-access, you need to register for a FREE account.
As a registered member, you’ll be able to:- Participate in all Tacoma discussion topics
- Communicate privately with other Tacoma owners from around the world
- Post your own photos in our Members Gallery
- Access all special features of the site
 Some info needed...
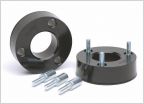 Daystar Front Leveling it
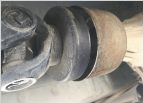 Drive shaft is falling off, please advise!
 Bike rack!!??
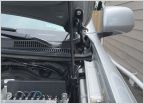 What goes here? (Under the hood question)
 Rust-Oleum Factor 4 Synthetic System Car Wax
how do you change belt?
Discussion in '2nd Gen. Tacomas (2005-2015)' started by TheTacoManChach, May 10, 2010.
Page 2 of 4
Page 2 of 4

