1. Welcome to Tacoma World!

    You are currently viewing as a guest! To get full-access, you need to register for a FREE account.

    As a registered member, you’ll be able to:
    • Participate in all Tacoma discussion topics
    • Communicate privately with other Tacoma owners from around the world
    • Post your own photos in our Members Gallery
    • Access all special features of the site
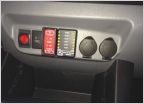
How-To: 2012 complete DTLT // URD y-pipe install

Discussion in '2nd Gen. Tacomas (2005-2015)' started by JustAddMud, May 23, 2013.

  1. Aug 17, 2013 at 12:47 PM
    #21
    JustAddMud

    JustAddMud [OP] Professional Grease Monkey

    Joined:
    Aug 20, 2012
    Member:
    #85169
    Messages:
    1,707
    Gender:
    Male
    First Name:
    J
    Summerville SC
    Vehicle:
    12 4x4 TRD OR
    Yes

    Well I'm not sure how Texas is regarding their vehicle inspection laws. Where my truck is registered grants immunity if the vehicle was built after a certain year. I don't need to get a yearly or quinquennial emissions test. Even when I move to Texas in a few months, ill be keeping my Florida tags and plates. I may look in to transferring my plates and tags to Arizona as it may be cheaper and they too have similar laws regarding emissions tests.

    -J
     
  2. Sep 3, 2013 at 9:47 PM
    #22
    ezemanf

    ezemanf TaTonka

    Joined:
    Oct 3, 2012
    Member:
    #88265
    Messages:
    20
    Gender:
    Male
    First Name:
    EZE
    Cut Off, LA
    Vehicle:
    2012 DCSB Prerunner TRD Sport 4x2
    Debadged, JBL factory sound system w/ Entune, Katzkin Grey Leather Interior, Black Suede Headliner, Bilstein 5100 Adjustable Shocks w/ 3” Toytec CoilOvers’ 4.5” Maxtrac Spindle Lift, Ome Dakar Leaf Package, Performance Accessories 3" Body Lift w/ Gap Guards, JBA UCAs, Toytec 2” add-a-leaf, 3” Rear Blocks, U-Bolt Flip Kit w/ Wheelers off-road Plates and Timbren Rear BumpStops, DTLT Headers, Vibrant Ultra Quiet Resonator, URD MAF Calibrator, URD Exhaust w/ MagnaFlow Muffler, URD Intake, URD Y-Pipe w/ Cat Delete, GrillCraft Mx Upper/Lower Billet Grills, Clear Spyder LED Tail Lights & 3rd Brake Light, Spyder Projector Headlights w/ 6000K HIDs, Cali-Raised LED FogLights, Predator Tube Steps, Avid Front Light Bar, BakFlip G2 Tonneau Cover, and RGBW Rock Lights.

    Thanks agasin for the header bolt sizes a few weeks ago. Now due to the rasp because of my exhaust system I had to purchase the 3" vibrant Resonator. Through all of my research I can find anywhere that shows how/where to install the resonator. I see it goes before the muffler but do i need to cut the URD Y-pipe or anything to fit the resonator in place.
     
  3. Sep 3, 2013 at 10:14 PM
    #23
    STiLL WILL

    STiLL WILL MY NAME ISN'T WILL

    Joined:
    Jan 29, 2012
    Member:
    #71677
    Messages:
    1,434
    Gender:
    Male
    First Name:
    Matt [again, not WILL]
    CA
    Vehicle:
    2021 Tundra TRD Sport 4wd
    Yes, I sold my '13 Taco. :'(
    You'll want the resonator welded in anywhere after the y-pipe but before the muffler. The catback piping will need to be cut and the resonator will need to be welded in.
     
  4. Sep 3, 2013 at 10:34 PM
    #24
    ezemanf

    ezemanf TaTonka

    Joined:
    Oct 3, 2012
    Member:
    #88265
    Messages:
    20
    Gender:
    Male
    First Name:
    EZE
    Cut Off, LA
    Vehicle:
    2012 DCSB Prerunner TRD Sport 4x2
    Debadged, JBL factory sound system w/ Entune, Katzkin Grey Leather Interior, Black Suede Headliner, Bilstein 5100 Adjustable Shocks w/ 3” Toytec CoilOvers’ 4.5” Maxtrac Spindle Lift, Ome Dakar Leaf Package, Performance Accessories 3" Body Lift w/ Gap Guards, JBA UCAs, Toytec 2” add-a-leaf, 3” Rear Blocks, U-Bolt Flip Kit w/ Wheelers off-road Plates and Timbren Rear BumpStops, DTLT Headers, Vibrant Ultra Quiet Resonator, URD MAF Calibrator, URD Exhaust w/ MagnaFlow Muffler, URD Intake, URD Y-Pipe w/ Cat Delete, GrillCraft Mx Upper/Lower Billet Grills, Clear Spyder LED Tail Lights & 3rd Brake Light, Spyder Projector Headlights w/ 6000K HIDs, Cali-Raised LED FogLights, Predator Tube Steps, Avid Front Light Bar, BakFlip G2 Tonneau Cover, and RGBW Rock Lights.

    Perfect exactly the info i needed...Thanks bro! Hoping this corrects my rasp problem
     
  5. Oct 29, 2013 at 9:53 PM
    #25
    cdelgado14

    cdelgado14 Well-Known Member

    Joined:
    Dec 11, 2012
    Member:
    #92905
    Messages:
    827
    Gender:
    Male
    First Name:
    Chris
    Alice,Texas
    Vehicle:
    Supercharged micro machine ;)
    Bilstein 3 inch w/ 5100's
    Great instructions.i will be getting my headers and mk2,urd y on Friday!im pumped
     
  6. Nov 10, 2013 at 3:22 PM
    #26
    JoyStick

    JoyStick Member

    Joined:
    Aug 14, 2013
    Member:
    #110463
    Messages:
    21
    Gender:
    Male
    First Name:
    Benjamin
    Lantana, Texas
    Vehicle:
    13' Texas Edition
    Running Boards Delete, Tint, Big R Type Shift Knob, Core Short Shifter, Borla Cat Back, Afe ProDry CAI, URD- Maf Calibrator, Doug Thorley Long Tube Headers
    I just installed my DTLT's this weekend and of course I'm reading this after I'm done But for those that are reading this before doing their install the only thing I would like to add would be if you disconnect the steering shaft try and not get the steering angle sensor out of alignment (Looking like I did and now I'm possibly going to have to have the zero point calibration done) and my #1 favorite tool doing this install was a flex head 12mm geared wrench.

    JustAddMud, Awesome write up
     
  7. Jan 10, 2014 at 8:41 PM
    #27
    KingKoda

    KingKoda Never Satisfied

    Joined:
    Aug 2, 2012
    Member:
    #83946
    Messages:
    291
    Gender:
    Male
    Palmetto
    Vehicle:
    '12 TRD.S DCSB 4x4
    Boosted TRD/URD All Terrain Sleeper w/ Sockmonkey Decals Worth +666HP
    So, OP thank you for taking the effort to post this original thread. Got my y pipe installed tonight while doing my favorite things, sniffing petrol products and breaking out air tools.

    But side effects aside my Urd y pipe installed without a scratch and only required two hands and a foot. Maybe some choice language for grunt. Haven't had a chance to open 'er up rolling onto the highway yet, but your post ended up being my go to for reference; +1 time saver.
     
    Last edited: Jan 10, 2014
  8. Jan 11, 2014 at 1:28 AM
    #28
    B3AS7808

    B3AS7808 Well-Known Member

    Joined:
    Jan 7, 2011
    Member:
    #48848
    Messages:
    131
    Gender:
    Male
    San Diego, CA
    Vehicle:
    13 DCSB 4.0 4x4
    TRD S/C,URD 2.8 Stealth pulley, DTLT Headers,URD ypipe, URD rear O2 Sims, TRD catback, Powerstop rotors and pads, weathertech floor liners. RCD 4.5 lift. Nitto Trails 295/70R/17, KMC XD125's.
    awesome write up!! I did the install with a buddy over black friday weekend. I had to get the URD y-pipe reshaped at local exhaust shop to avoid the front driveshaft because of the lift.
     
  9. May 16, 2015 at 9:34 AM
    #29
    TheFang

    TheFang No Big Deal

    Joined:
    Jul 15, 2014
    Member:
    #133985
    Messages:
    2,642
    Gender:
    Male
    SoCal
    Vehicle:
    Tacoma TRD Sport
    TRD Exhaust, URD Short Shift, TRD Supercharger, Hellwig rear sway bar, TWM shift knob, limo tint, URD Y-pipe, URD LT Headers, URD Rear O2 Sim, Custom tube front and rear bumpers, LED spot pods, K&N CAI
    Installed mine today. No clue what that bracket is for in step three either. I found that taking the cat off the stock Y-pipe on the passenger side helped a lot in removing the whole thing. Gives you more room to wiggle the drivers side out.
     
    Last edited: May 16, 2015
    Stryker420 likes this.
  10. Jun 3, 2015 at 5:25 PM
    #30
    JustAddMud

    JustAddMud [OP] Professional Grease Monkey

    Joined:
    Aug 20, 2012
    Member:
    #85169
    Messages:
    1,707
    Gender:
    Male
    First Name:
    J
    Summerville SC
    Vehicle:
    12 4x4 TRD OR
    Yes
    It is my understanding that the small piece of metal as outlined in pic 3 in the OP is there for stability. As you "lay the hammer down" the engine will torque a bit in the engine compartment as it delivers power to the wheels. Now this is just my understanding and not to be taken as fact, so I may be wrong, just pointing that out. I believe that this pieces of metal prevents undue strain on the 6 bolts/studs that your headers mount to on either side. There is a chance that you could damage your headers. I decided to take the risk and not reinstall them for two reasons. One, it didn't fit and I couldn't force it to fit. Two, I was too lazy to fab up a workaround. It was late and I was tired. It's been on for about 3 years now and I haven't noticed any issues.

    -J
     
    Stryker420 likes this.
  11. Jun 21, 2016 at 1:58 PM
    #31
    rjohnson009

    rjohnson009 New Member

    Joined:
    Jun 21, 2016
    Member:
    #190177
    Messages:
    1
    Gender:
    Male
    First Name:
    Rick
    Vehicle:
    2006 X-Runner
    URD CAT Back, URD U-Spec LT Headers, short shift kit, custom shift knob (Coupe)
    Hi JustAddMud,

    Kudos to you on the detailed instructions on installing the LT. I just installed URD U-Spec and your instructions were great! I ordered the Vibrant resonator which made the overall sound perfect for my 2006 X-Runner!

    Thanks again for taking the time to take pics and provide guidance!

    Rick
     
  12. Jun 23, 2016 at 7:17 PM
    #32
    JustAddMud

    JustAddMud [OP] Professional Grease Monkey

    Joined:
    Aug 20, 2012
    Member:
    #85169
    Messages:
    1,707
    Gender:
    Male
    First Name:
    J
    Summerville SC
    Vehicle:
    12 4x4 TRD OR
    Yes
    Thanks a lot Rick. I try to be as informative as I can when I write up my DIYs. I'm glad it helped out. Let me be the first one to welcome you to the wonderful world of modding your truck and welcome to TacomaWorld!

    -J
     
  13. Nov 15, 2017 at 10:57 AM
    #33
    DEDAFLO670

    DEDAFLO670 Well-Known Member

    Joined:
    Nov 7, 2014
    Member:
    #141875
    Messages:
    963
    Gender:
    Male
    First Name:
    Manuel
    Waipio
    Vehicle:
    15 Trd sport
    did you ever have problems with the check engine light coming on? after install
     
  14. Dec 6, 2017 at 12:43 PM
    #34
    JustAddMud

    JustAddMud [OP] Professional Grease Monkey

    Joined:
    Aug 20, 2012
    Member:
    #85169
    Messages:
    1,707
    Gender:
    Male
    First Name:
    J
    Summerville SC
    Vehicle:
    12 4x4 TRD OR
    Yes
    Since installing it back in 2013 to approximately the first onset of winter in 2015, I never had any issues with the CEL coming on. I had installed URD's rear O2 simulator since the beginning. I started getting that dreaded P0420 and P0430 CEL codes but those are just telling me what I already knew that I don't have CATs installed. I suspect that during the time that the simulator has been installed, it may have been exposed to heat that might have damaged the electronics. I haven't been underneath the truck in a long time with all the Pelfreybilt armor removed to put eyes on the O2 sim. I tucked and zip-tied it above the gearbox to some loose wires up there. It seems like its the short trips around town when the engine doesn't fully warm up will throw the code. I have a Blue tooth OBDII reader handy that I use to reset the code. Don't get me wrong, it's not an every day occurrence or something like that. Sometimes Ill get the code twice in a week, other-times ill go many months between CEL's. It doesn't bother me and it takes about a minute to fire up the reader to reset the code so its not a big deal for me. In hindsight, I probably would have routed the brains of the O2 simulator to up in the engine bay because who knows if water caused corrosion inside the unit or not. Now you've got me thinking about it. Here I am waffling on and on, I hope this answered your question?

    -J

    https://www.urdusa.com/urd-rear-o2-simulator-1gr-fe-4-0l-v6-dual-channel/
     
  15. Dec 20, 2017 at 10:13 PM
    #35
    DEDAFLO670

    DEDAFLO670 Well-Known Member

    Joined:
    Nov 7, 2014
    Member:
    #141875
    Messages:
    963
    Gender:
    Male
    First Name:
    Manuel
    Waipio
    Vehicle:
    15 Trd sport
    Ya I have the o2 simulator from urd An it's still throwing the codes I recently moved the o2 sensor to the furthest inlet on the header for the o2 sensor talk to urd An he said they haven't had any luck with the o2 sims working for the 2015 tacomas I do the same thing I just reset An clear the code when it comes up I was just wondering if you did anything different I didn't do
     
  16. Dec 22, 2017 at 6:09 PM
    #36
    JustAddMud

    JustAddMud [OP] Professional Grease Monkey

    Joined:
    Aug 20, 2012
    Member:
    #85169
    Messages:
    1,707
    Gender:
    Male
    First Name:
    J
    Summerville SC
    Vehicle:
    12 4x4 TRD OR
    Yes

    Hmm, I'd have to go take a peak under the hood to be certain as to which bung I selected but if my memory serves me correctly, I selected the bung closest to the headers. I believe I tried the furthest hole but the wires weren't reaching because the loom was very short. As for the code popping up, yeah I just hit it with my Bosch Blue Tooth OBDII reader (worth the money mind you) and reset the code. As I've said before, the P0420 and P0430 code pop sporadically so I've learned to deal with it. The truck is just doing its job letting me know that there is an issue but I'd rather not remove the bulb from the dash cluster and loose the ability to see when my truck's throwing trouble codes. Sometimes it's a few times a week and others it'll go many months between codes. I'm sorry that I can't be more of a help for you.

    -J
     
  17. Mar 24, 2019 at 12:02 PM
    #37
    Stryker420

    Stryker420 Well-Known Member

    Joined:
    Apr 6, 2017
    Member:
    #215523
    Messages:
    673
    Gender:
    Male
    First Name:
    Benedict
    Mooresville IN
    Vehicle:
    2012 Tacoma DCLB
    When you took the 6 nuts off that hold on the stock manifold, did you have to use any special technique or did the nuts back off easily? Did you use air tools? Thanks for your time!
     
  18. Mar 24, 2019 at 1:51 PM
    #38
    TheFang

    TheFang No Big Deal

    Joined:
    Jul 15, 2014
    Member:
    #133985
    Messages:
    2,642
    Gender:
    Male
    SoCal
    Vehicle:
    Tacoma TRD Sport
    TRD Exhaust, URD Short Shift, TRD Supercharger, Hellwig rear sway bar, TWM shift knob, limo tint, URD Y-pipe, URD LT Headers, URD Rear O2 Sim, Custom tube front and rear bumpers, LED spot pods, K&N CAI
    I used regular hand tools. Removing the studs is the hard part.
     
    Stryker420 likes this.
  19. Mar 29, 2019 at 7:14 AM
    #39
    Stryker420

    Stryker420 Well-Known Member

    Joined:
    Apr 6, 2017
    Member:
    #215523
    Messages:
    673
    Gender:
    Male
    First Name:
    Benedict
    Mooresville IN
    Vehicle:
    2012 Tacoma DCLB
    I got the drivers side 6 off, the Right Top Rear and Right Bottom Rear off. Right top middle is rounded off so I'm dealing with that issue now.
     
  20. Mar 29, 2019 at 11:07 AM
    #40
    TheFang

    TheFang No Big Deal

    Joined:
    Jul 15, 2014
    Member:
    #133985
    Messages:
    2,642
    Gender:
    Male
    SoCal
    Vehicle:
    Tacoma TRD Sport
    TRD Exhaust, URD Short Shift, TRD Supercharger, Hellwig rear sway bar, TWM shift knob, limo tint, URD Y-pipe, URD LT Headers, URD Rear O2 Sim, Custom tube front and rear bumpers, LED spot pods, K&N CAI
    Get two of the nuts that fit on the stud. Screw them both on, and then tighten them against each other. Then using the bottom nut, turn it counterclockwise, or off. It should turn the stud out with it.
     

Products Discussed in

To Top