

-
Welcome to Tacoma World!
You are currently viewing as a guest! To get full-access, you need to register for a FREE account.
As a registered member, you’ll be able to:- Participate in all Tacoma discussion topics
- Communicate privately with other Tacoma owners from around the world
- Post your own photos in our Members Gallery
- Access all special features of the site
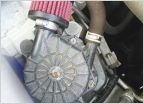 Uni Filter mod on 2.7
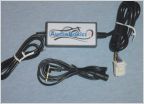 What kind of Radio (stock or aftermarket) does my 08 support?
 2012 TRD Sport Wheel bearing noise/replacement
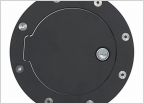 Billet Gas Locking Door
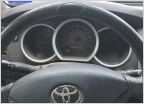 Steering wheel cover ideas?
 Another LED Wiring question
HOW TO: install Hi-Lift mounts in bed
Discussion in '2nd Gen. Tacomas (2005-2015)' started by Skootter14, Dec 20, 2014.


