

-
Welcome to Tacoma World!
You are currently viewing as a guest! To get full-access, you need to register for a FREE account.
As a registered member, you’ll be able to:- Participate in all Tacoma discussion topics
- Communicate privately with other Tacoma owners from around the world
- Post your own photos in our Members Gallery
- Access all special features of the site
 Driveline clunk, A/C resitor, are they a big deal?
 Roof Racks
 Adding Bluetooth to factory stereo, with blulogic
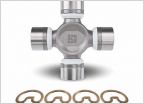 U Joints replaced?
 Fresh air fan clicking when orange light is off
 Protecting the lower body
How To Remove CV Axle+Replace Front Wheel Bearing 2nd Gen
Discussion in '2nd Gen. Tacomas (2005-2015)' started by KenpachiZaraki, Nov 22, 2011.
Page 7 of 24
Page 7 of 24
Products Discussed in


