

-
Welcome to Tacoma World!
You are currently viewing as a guest! To get full-access, you need to register for a FREE account.
As a registered member, you’ll be able to:- Participate in all Tacoma discussion topics
- Communicate privately with other Tacoma owners from around the world
- Post your own photos in our Members Gallery
- Access all special features of the site
 Headliner removal for cable keeping? (for GoPro power)
 Do I add more Mods to my Taco?
 Spare tire upside down
 Slide in camper setup.
 LED Lights
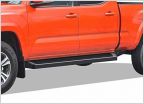 Looking for high mounted running boards or sliders (mainly for protection)
How to remove the center console on your 3rd Gen Taco
Discussion in '3rd Gen. Tacomas (2016-2023)' started by Dammit Evie, May 23, 2019.


