1. Welcome to Tacoma World!

    You are currently viewing as a guest! To get full-access, you need to register for a FREE account.

    As a registered member, you’ll be able to:
    • Participate in all Tacoma discussion topics
    • Communicate privately with other Tacoma owners from around the world
    • Post your own photos in our Members Gallery
    • Access all special features of the site

How To: Spark Plug Change (1 GR-FE)

Discussion in 'Technical Chat' started by chris4x4, Mar 16, 2009.

  1. May 11, 2014 at 8:43 AM
    #1321
    chris4x4

    chris4x4 [OP] With sufficient thrust, pigs fly just fine. Moderator

    Joined:
    May 8, 2008
    Member:
    #6497
    Messages:
    112,751,674
    Gender:
    Male
    First Name:
    FlimFlubberJAM
    Tenoe, AZ
    Vehicle:
    2019 Rubicon 4 Door,
    4.10 gears, sliders, and lots of buttons.
    You can either remove the hose, or slide the intake tube out from under it.
     
  2. May 11, 2014 at 8:46 AM
    #1322
    Mit122

    Mit122 Well-Known Member

    Joined:
    Oct 26, 2013
    Member:
    #115302
    Messages:
    94
    Gender:
    Male
    Plattsburgh, NY
    Vehicle:
    2012 DCSB TRD Sport
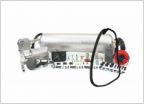
    See above post. Here is another shot of my engine compartment. Anyone one know what that component is, the one with the hose going over my air intake hose??

    P1010426.jpg
     
  3. May 11, 2014 at 8:47 AM
    #1323
    Mit122

    Mit122 Well-Known Member

    Joined:
    Oct 26, 2013
    Member:
    #115302
    Messages:
    94
    Gender:
    Male
    Plattsburgh, NY
    Vehicle:
    2012 DCSB TRD Sport
    Thanks Chris, I will try to slide the intake hose out of the way. But do you know what that is and why my truck has it and yours didn't?
     
  4. May 11, 2014 at 8:48 AM
    #1324
    BBBsti LTD

    BBBsti LTD Well-Known Member

    Joined:
    Sep 4, 2009
    Member:
    #22280
    Messages:
    231
    Gender:
    Male
    Irvine, CA
    Vehicle:
    2010 TRD Off Road 4WD
    All I did in mine was to unclip the filter housing and get it out of the way. I did not remove the intake tube. Is it easier removing it? Maybe, I had no problems moving the tube out of the way and accessing the coils. Gerry good write up by Chris.
    FYI, it only took me 1hr to change mine on my first attemp. Gotta love this easy to work engine!!
     
  5. May 11, 2014 at 9:27 AM
    #1325
    chris4x4

    chris4x4 [OP] With sufficient thrust, pigs fly just fine. Moderator

    Joined:
    May 8, 2008
    Member:
    #6497
    Messages:
    112,751,674
    Gender:
    Male
    First Name:
    FlimFlubberJAM
    Tenoe, AZ
    Vehicle:
    2019 Rubicon 4 Door,
    4.10 gears, sliders, and lots of buttons.
    Its an air pump for emissions.
     
  6. May 11, 2014 at 10:22 AM
    #1326
    replica9000

    replica9000 Das ist no bueno

    Joined:
    Apr 6, 2008
    Member:
    #5782
    Messages:
    16,371
    Lake Chargoggagoggmanchauggagoggchaubunagungamaugg
    Vehicle:
    2019 T4R ORP
    I didn't remove the intake tube when I did mine. I just detached the box portion of the intake from the tube.
     
  7. May 11, 2014 at 11:30 AM
    #1327
    Mit122

    Mit122 Well-Known Member

    Joined:
    Oct 26, 2013
    Member:
    #115302
    Messages:
    94
    Gender:
    Male
    Plattsburgh, NY
    Vehicle:
    2012 DCSB TRD Sport
    Successfully changed my plugs. :) I think i did everything correctly, took the truck for a quick spin, idled smooth, sounded good. Just curious, since i am a nervous nelly, how soon would you know is something wasn't right, such as cross threading the plug or plug too tight or not tight enough besides for the obvious stuff like truck not starting, misfiring, rough idle??
     
  8. May 11, 2014 at 11:39 AM
    #1328
    replica9000

    replica9000 Das ist no bueno

    Joined:
    Apr 6, 2008
    Member:
    #5782
    Messages:
    16,371
    Lake Chargoggagoggmanchauggagoggchaubunagungamaugg
    Vehicle:
    2019 T4R ORP
    Did you use anti-seize? If not, they'll be tough to remove a few years from now. You'd know if you cross-threaded. The plug would be hard to tighten, but never actually finish tightening. It would potentially pop out after a while, if not right away.
     
  9. May 11, 2014 at 11:47 AM
    #1329
    Mit122

    Mit122 Well-Known Member

    Joined:
    Oct 26, 2013
    Member:
    #115302
    Messages:
    94
    Gender:
    Male
    Plattsburgh, NY
    Vehicle:
    2012 DCSB TRD Sport
    Yup, i used anti-sieze on the threads and just a touch of di-electric grease on the terminal end. I hand tightened all my plugs, then finished them off with my torque wrench. I had my torque wrench set to 14ft-lbs as i wasn't sure how accurate it is and def. didn't want to over tighten.
     
  10. May 12, 2014 at 9:40 AM
    #1330
    HopTaco

    HopTaco Member

    Joined:
    Jul 27, 2011
    Member:
    #60668
    Messages:
    11
    Gender:
    Male
    DFW, MetroTEX
    Vehicle:
    '12 DCLB 4x2 Sport, Entune, Tow
    I did mine this weekend and had the same issue-That component (Emissions Pump?) Was secured with 3x10mm screws so I just moved it out of the way enough to get to the Intake bracket screw and then carried on as normal. First time changing the Plugs for me (30k service), but thanks to Chris's write up it only took 2.5 hours start to finish and that included Cleaning the MAF and Throttle Body while I was in there.

    Thanks Chris!

     
  11. May 17, 2014 at 9:47 PM
    #1331
    doughboy

    doughboy Well-Known Member

    Joined:
    Dec 8, 2009
    Member:
    #27214
    Messages:
    421
    Gender:
    Male
    norcal
    Vehicle:
    2010 Tacoma TRD 4x4
    hid head lights, hid fog lights, always on fog lights, bed lights
    I did this today. got the denso plugs for $23 on ebay. It was pre-gapped to exactly 0.04. For the most part, it was straightforward, except for the driver side leftmost one, the connector was a royal PITA to remove. I'm just changing the plugs the first time at 57k (only been doing oil change and rotate tires every 5k). I am not looking forward to change it after 30k. perhaps after another 60k. The old plugs gap, I can pass the 0.45 easily. other than that, the old plugs were clean. I got to say I did not really notice anything different after changing the plugs.

    I also did the u-joint grease. The front were PITA to do. It seems there is always something in these maintenance jobs that make it not easy.

    next, gear oil change.
     
    This site contains affiliate links for which the site may be compensated.
  12. May 24, 2014 at 3:18 AM
    #1332
    triplejjj

    triplejjj Pictographer

    Joined:
    Apr 4, 2013
    Member:
    #101330
    Messages:
    227
    Gender:
    Male
    First Name:
    Jerry
    Florida
    Vehicle:
    2013 XSP-X 4X4
    LoPro QT, Toyota Bed Mat, Husky Liners, ScanGauge, WeatherTech Deflectors, Drop in Billet Grill, Train Horns, PanoFlex Window Tint, Viper Alarm, Remote Start, Console Vault,
    I changed mine yesterday and was a snap thanks to the write up Chris made. The only two things I did different was, I just loosened the air filter hose clamp and took one end of the tube off. On the drivers side I only removed the vent hose and not the bracket or anything else.
     
    Last edited: May 24, 2014
  13. May 25, 2014 at 7:57 AM
    #1333
    VinTaco

    VinTaco Well-Known Member

    Joined:
    Feb 14, 2014
    Member:
    #123059
    Messages:
    386
    Gender:
    Male
    Burnaby bc
    Vehicle:
    2016 Black Tacoma TRD OR
    Which plug did you replace them with, the original or something different..?
     
  14. May 26, 2014 at 12:36 PM
    #1334
    triplejjj

    triplejjj Pictographer

    Joined:
    Apr 4, 2013
    Member:
    #101330
    Messages:
    227
    Gender:
    Male
    First Name:
    Jerry
    Florida
    Vehicle:
    2013 XSP-X 4X4
    LoPro QT, Toyota Bed Mat, Husky Liners, ScanGauge, WeatherTech Deflectors, Drop in Billet Grill, Train Horns, PanoFlex Window Tint, Viper Alarm, Remote Start, Console Vault,
    All Denso plugs, it was Denso on passenger side and NGK on drivers side straight from the factory. Pic shows two NGK's on the end and a Denso in the middle for comparison. Notice the ceramic on the NGK is burned of hence the reason I went with Denso. Thats with only 7,000 miles.
    [​IMG]
     
    Last edited: May 26, 2014
  15. Jun 21, 2014 at 4:39 PM
    #1335
    Fundillo

    Fundillo adrianmcbeardguns

    Joined:
    Apr 21, 2014
    Member:
    #128168
    Messages:
    105
    Gender:
    Male
    First Name:
    Adrian
    Tucson, AZ
    Vehicle:
    13 MGM DCSB
    Finished changing them using this just a couple hours ago
    Only thing different was I didn't remove the intake pipe because the second bolt was blocked by the smog thing (forgot what it's actually called lol) and I didn't feel like taking that off too

    Thanks Chris for the DIY!
     
  16. Jun 22, 2014 at 6:54 AM
    #1336
    VinTaco

    VinTaco Well-Known Member

    Joined:
    Feb 14, 2014
    Member:
    #123059
    Messages:
    386
    Gender:
    Male
    Burnaby bc
    Vehicle:
    2016 Black Tacoma TRD OR
    Does anyone know why the truck would come with 2 different types of plugs from the factory..?? Is there supposed to be an advantage somewhere..??

    photo 2.jpg
     
  17. Jun 22, 2014 at 7:02 AM
    #1337
    VinTaco

    VinTaco Well-Known Member

    Joined:
    Feb 14, 2014
    Member:
    #123059
    Messages:
    386
    Gender:
    Male
    Burnaby bc
    Vehicle:
    2016 Black Tacoma TRD OR
    Well its a good thing you took them out after just 7,000 mi. usually people don't take them out until at least 30,000 right.?? Are the the iridium plugs or the regular ones.??

    2012-09-19_08-51-42_528[1].jpg
     
  18. Jun 22, 2014 at 7:02 PM
    #1338
    KenLyns

    KenLyns 8.75" Third Member

    Joined:
    May 23, 2010
    Member:
    #37674
    Messages:
    29,363
    Gender:
    Male
    Belly of the Beast
    Vehicle:
    4x4 TRD Off-Road Full-Auto
    LED Headlights, Volant CAI, 32" Duratracs
    Last edited: Jun 22, 2014
  19. Jun 23, 2014 at 11:46 AM
    #1339
    ReidStylez

    ReidStylez Well-Known Member

    Joined:
    Aug 28, 2012
    Member:
    #85749
    Messages:
    221
    Gender:
    Male
    First Name:
    Reid
    Kansas City
    Vehicle:
    11 PreRunner SR5
    At 63k miles I finally changed my spark plugs. They didn't look too bad. Some of the plugs had a little oil on the threads, looking at some photos in here it seems normal. Took about 45 minutes and that included a quick run to walmart for a magnet on a stick for the driver side.
     
  20. Jun 25, 2014 at 12:57 PM
    #1340
    Old Tex

    Old Tex Well-Known Member

    Joined:
    May 6, 2014
    Member:
    #129235
    Messages:
    75
    Gender:
    Male
    South central Texas
    Vehicle:
    12 four door, 4X4
    Howdy,
    great write up!!!! I just did mine for the first time and it took me 1hour and 45 minutes. My Taco is a 12 and has 60750 miles. The original plugs were still in it. Densos on the passenger side and NGK on the drivers side. I went back with stock Densos. I got them from a Toyota dealer and was told that they were pre-gapped. They were from .040 to .043. I set them to .040 and installed them. Chris is correct the drivers side is a pain in the butt. I would like to thank Chris for the great step by step installation write up. Have a goodun!!!!!!!!!!!!!!!!!!:D
     

Products Discussed in

To Top