

-
Welcome to Tacoma World!
You are currently viewing as a guest! To get full-access, you need to register for a FREE account.
As a registered member, you’ll be able to:- Participate in all Tacoma discussion topics
- Communicate privately with other Tacoma owners from around the world
- Post your own photos in our Members Gallery
- Access all special features of the site
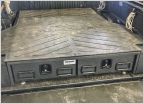 3rd Gen Storage - I need a better way
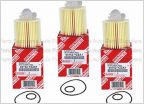 3OEM FULL oil filter sets for $20? Is this real?
 Do I need to change leaf spring?
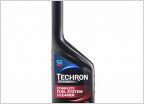 Clean yo body...throttle body
 In-Channel Vent Visors - Which companies offer them? Best ones to get?
 Camper shell clamp
Installed new stitched leather steering wheel cover
Discussion in '3rd Gen. Tacomas (2016-2023)' started by Syrihl, Mar 24, 2019.
Page 4 of 5
Page 4 of 5
Products Discussed in


