1. Welcome to Tacoma World!

    You are currently viewing as a guest! To get full-access, you need to register for a FREE account.

    As a registered member, you’ll be able to:
    • Participate in all Tacoma discussion topics
    • Communicate privately with other Tacoma owners from around the world
    • Post your own photos in our Members Gallery
    • Access all special features of the site

JMAC's Better Than Stock '18 OR

Discussion in '3rd Gen. Builds (2016-2023)' started by JMAC PNW, Jan 21, 2022.

  1. Jan 21, 2022 at 4:17 PM
    #1
    JMAC PNW

    JMAC PNW [OP] Well-Known Member

    Joined:
    May 4, 2018
    Member:
    #252482
    Messages:
    70
    Gender:
    Male
    First Name:
    Jason
    Vehicle:
    2018 DCLB OR
    After lurking on TW some time while building my 2011 DCLB SR5 (purchased used in '18) and now building my 2018 DCLB OR (puchased in '21) I've decided it's good time to start a build thread. My end goal with this truck is to split the fine line between better than stock, ride comfort and stock'ish appearance. I travel the mtns and deserts of the PNW frequently, travel the Western US, and have a goal of getting to AK's North Slope and Mexico in it. I'm also looking for ride comfort with my family and for a Client to hop in and not say to themselves, "can I take this guy serious?". I also need it to occasionally tow trailers.

    Unfortunately the 2nd Gen was not worth my effort because of mileage and previous use. The 2nd Gen is a whole other story, but turned out to be a suitable and nice ride for a local family looking to travel in the region. Being new to Tacomas with the 2nd Gen, I learned that there are irreconcilable differences between Base/SR5/Sport/Limited and the OR/Pro models. That being: 1) locker, 2) brake actuator and lines, and 3) TRAC/MTS. #1 can be remedied, but #'s 2 and 3 cannot for reasonable cost.

    The other upside is that a lot of my 2nd Gen parts fit the 3rd Gen. That made the decision easier.

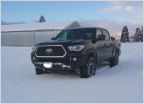
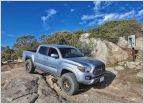
    Here's how it sits today (more or less):
    Beartooth2.jpg

    Started with:
    '18 Toyota Certified used OR, AT, V6, 27k miles, full confirmed dealer maintenance/warranty history, Central OR vehicle (high desert), older couple trade in for a '21, and 100% bone stock. Purchased from the original selling dealer. Picture perfect for a used truck.

    Disclaimers: I plan on owning this truck a very long time. It will never see a Toyota Dealership for maintenance or repairs (except for recall and warranty). Some modifications are reversible, others are not.

    I've already been building on it for almost a year, so I'll save you that painstaking process and post mod installments as I have time. Here's the workplan:
    • TSB Tune - DONE
    • ECT always on device - DONE
    • Install 265/75R16, tire swap - DONE
    • 265/75R16 spare - DONE
    • Remove charcoal filter - DONE
    • Install HPS Intake Tube and Toyota TRD Accelerator - DONE
    • Delete engine cover - DONE
    • Remove engine foam blocks - DONE
    • TechStream working - DONE
    • Turn off shifter LED and adjust brightness - DONE
    • Build cooler/gear platform for DS rear seat - DONE
    • Delete TRD OR decals - DONE
    • Install ScanGauge - DONE
    • Install block heater w/ external plug - DONE
    • Adjust HL and fog lights - DONE
    • Install bed mat - DONE
    • Rear diff breather/snorkel - DONE
    • Install trailer brake controller - DONE
    • Install towing mirrors - DONE
    • Remove blind spot monitoring switch - DONE
    • Install backup camera anytime mod and switch/harness - DONE
    • 120V/400W aux. power anytime mod - DONE
    • 12V accessory switched power anytime - Dash and Console - DONE
    • Install Midland radio w/ switch and always on power - DONE
    • Zip tied all wiring harness electrical tape loom and loom hangers on frame and engine bay (and anywhere else I find them when working on it) - DONE
    • Install 2nd Transmission cooler and check trans level - DONE
    • Grease Front DL U-Joints - DONE
    • Rear seat storage mod - DONE
    • Build and install rubber front fender liners - DONE
    • Delete inside and outside buzzer speakers - DONE
    • Install AAL, Springs, Energy Suspension Bushings and 5100s - TBD
    • Install ECGS bushing, seal and synthetic front diff fluid - TBD
    • CV boot slide, if necessary - TBD
    • Install Softtopper after mods:
      • Paint - DONE
      • Magnets - TBD
      • Weather strip and seal bed - TBD
    • Bed sleeping platform - TBD
    • Paint frame, wheel wells, cross members, LCAs, rear diff, AND skid plates w/ Raptor - TBD @ same time as suspension
    Later….
    • 2Lo Mod? Or front manual hubs?
    • 4Hi disable VSC, w/ TRAC enabled?
    • Anytime rear diff lock?
    • Rear bumper?
    • Front bumper?
    • Headache rack?
    • Change out mudflaps?
    Cancelled projects…
    • Throttle pedal spacer - CANCELLED
    • Y-Pipe - CANCELLED
    • Measure exhaust pipe at muffler (both ends) - CANCELLED
    • Remove TPMS sensors, canister, re-balance. - CANCELLED
    • Fog light anytime mod? - CANCELLED
    Here's the old one (w/ 3RD Gen OR stock tires & 3RD Gen OR springs/shocks):
    03.jpg

    EDIT: 02/07/22 switched picture locations.
     
    Last edited: Feb 28, 2022
  2. Jan 31, 2022 at 7:41 AM
    #2
    JOJO971216

    JOJO971216 Well-Known Member

    Joined:
    Dec 23, 2020
    Member:
    #350531
    Messages:
    85
    Gender:
    Male
    First Name:
    Josiah
    Moorpark, CA
    Vehicle:
    2019 Magnetic Grey Tacoma TRD Off-road short bed
    Amazing, nice work can’t wait to see what is to come.
     
    JMAC PNW[OP] likes this.
  3. Jan 31, 2022 at 7:57 AM
    #3
    saf023

    saf023 Well-Known Member

    Joined:
    Aug 13, 2009
    Member:
    #21124
    Messages:
    1,067
    Gender:
    Male
    East Coast
    Vehicle:
    2nd Gen TRD Sport DCSB 4X4
    I think I'll stick around for awhile if you don't mind. I love my 2nd-Gen but I admit I have more than warmed up to the 3rd-Gen now that there are a couple of options to improve lower end torque. I'm keeping my eyes open for a later year Pro. I too, am not willing to give up city and highway ride comfort for a few hunting and finishing trips. Looking forward to seeing how you tackle the dual personality truck approach.

    Best of luck with all of your research, experiments, and results :thumbsup:
     
    JMAC PNW[QUOTED][OP] likes this.
  4. Feb 7, 2022 at 7:02 PM
    #4
    JMAC PNW

    JMAC PNW [OP] Well-Known Member

    Joined:
    May 4, 2018
    Member:
    #252482
    Messages:
    70
    Gender:
    Male
    First Name:
    Jason
    Vehicle:
    2018 DCLB OR
    Feel free to. You might decide to save the $ and go with an OR instead of a Pro. They're quite similar.
     
    saf023[QUOTED] likes this.
  5. Feb 7, 2022 at 7:11 PM
    #5
    JMAC PNW

    JMAC PNW [OP] Well-Known Member

    Joined:
    May 4, 2018
    Member:
    #252482
    Messages:
    70
    Gender:
    Male
    First Name:
    Jason
    Vehicle:
    2018 DCLB OR
    First build update in retrospect. The first thing I do is keep track of my notes and research in an organized fashion. I'm also building a '78 Ford Tractor, a '97 Ford OBS F-250 Powerstroke, a trail bike and any manner of other projects that I pickup during the year. Last year I refurbished my utility trailer and picked up a new horse trailer while working on the Taco.

    Here's what I do. I use MS One Note to organize notes and mods, pic below. Syncs across multiple devices and i can call it up and update in both the office and the shop.

    Image 1.jpg

    Highly recommend.
     
  6. Feb 7, 2022 at 8:26 PM
    #6
    JMAC PNW

    JMAC PNW [OP] Well-Known Member

    Joined:
    May 4, 2018
    Member:
    #252482
    Messages:
    70
    Gender:
    Male
    First Name:
    Jason
    Vehicle:
    2018 DCLB OR
    The very first project on this truck was to swap my LT 265/75/16 Toyo Open County ATII's from my 2nd Gen. I immediately noticed a drop in performance and mileage, and a corresponding 2nd Gen mileage and performance improvement with the 3rd Gen OR 265/70/16 BFG Wranglers. Driving the tires on both trucks back-to-back was night and day. 3rd Gen mileage dropped from 20-22 mpg hwy to 17-18 mpg hwy on the Toyos, and the 2nd Gen improved about the same. That being said, if I'm driving 45-65 mph on 2 lane highways, fuel economy bounces right back in the 22-23 range holding 5th gear (S mode). We spent five days last year driving 45-50 mph in the Yellowstone region and I averaged 23!

    I did have the tire dealer sipe them - wouldn't do that again. Personally, I wouldn't go any larger than 265/75/16 without a re-gear. The spare is an LT ATIII.

    The reason I choose LT over the P tires is stiffer sidewalls and increased tread depth. The LT tires have a larger lug @31.7" diameter.

    With about 20,000 miles on the tires in both Gens, I'm really impressed. Everywhere I drive requires time on the freeway, then a highway and then back roads. I've driven jeep trails through the middle of the night over sharp basalt with the family chasing comets and meteor showers, to hauling a horse trailer home from Utah in a day last September.

    The other drawback is that they really sling gravel. I'm hoping the ATIII's are better on gravel and with cruise fuel economy...
     
    Last edited: Feb 8, 2022
  7. Feb 28, 2022 at 8:22 PM
    #7
    JMAC PNW

    JMAC PNW [OP] Well-Known Member

    Joined:
    May 4, 2018
    Member:
    #252482
    Messages:
    70
    Gender:
    Male
    First Name:
    Jason
    Vehicle:
    2018 DCLB OR
    Finally posting in my somewhat neglected build thread. Skipping ahead, last weekend after following posts and posting on the TSB Update thread, I realized that it's possible to remove the inside and outside beeper/buzzer speakers. Even after turning all of the annoying chimes off in Techstream there were three buzzers (smart key) that remained:
    1. Engine running, in neutral, park brake on, door open and driver out of vehicle. If the door shut, the outside screeching is/was awful. Sometimes the driver needs to get out to open or close a fence gate...
    2. Turning engine "off" while driver door open. Steering wheel lock alarm tone. Only fix was hitting the door switch button or closing the door.
    3. Engine running, in park, and driver/key out of vehicle. Winter warm up, connecting to trailers, loading stuff in the bed, etc. 3 loud outside beeps each time a door is closed (there are four doors...).
    I followed this thread to permanently disable the speaker on the instrument cluster. Not reversible w/o soldering the speaker back to the board.
    https://www.tacomaworld.com/threads/diy-disable-door-ajar-chime-permanently.491166/

    No ill effects AND the parking sensor chime still works! The only feature that's gone (that's missed) is the turn signal "click". It's worth the sacrifice.

    Then, I also poked around various forums to locate the outside speaker box. It's the grey box behind the DS battery on the radiator frame, see pic below. Removed speaker, taped over the connector and zip tied back to the harness. No more outside speaker either!

    Problem solved all the way around.

    NoiseMakers_2022.jpg
     
  8. Feb 28, 2022 at 8:50 PM
    #8
    JMAC PNW

    JMAC PNW [OP] Well-Known Member

    Joined:
    May 4, 2018
    Member:
    #252482
    Messages:
    70
    Gender:
    Male
    First Name:
    Jason
    Vehicle:
    2018 DCLB OR
    The next early project was to change the stock throttle and shifting behavior. I'm not the first to complain about it. Jumping from 6th to 4th on the freeway was a no-go for me. I also didn't like how the throttle pedal didn't do anything in the first quarter.

    Solution:

    TSB 0062-18
    ECT always on device – from ebay

    1) Installed Techstream on my PC
    2) Bought Tactrix cable (Tactrix)
    3) Found a local dealer to install the TSB. That was harder than it sounds and took a bit of convincing that they didn't have to replicate the issue at elevation (i.e. run the truck hard/full throttle at elevation).
    4) Verified calibration IDs were updated in adjacent parking lot. Reset ECM and TCM learned values (dealer didn't do that).
    5) Installed ECT device.

    This is the thread to follow: https://www.tacomaworld.com/threads/ecu-tsb-update.562550/

    Have over 15,000 mi on the “tune”. Night and day difference in driveability. Transmission is butter smooth and performs great hauling a 3,000+ lb trailer. Holds 5th gear as a downshift from 6th on the freeway really well/like it should. Usually driven in “S” mode. With ECT on all the time, throttle pedal application is proportional to power output.
     
    This site contains affiliate links for which the site may be compensated.
    #8
  9. Mar 4, 2022 at 4:52 PM
    #9
    JMAC PNW

    JMAC PNW [OP] Well-Known Member

    Joined:
    May 4, 2018
    Member:
    #252482
    Messages:
    70
    Gender:
    Male
    First Name:
    Jason
    Vehicle:
    2018 DCLB OR
    After moving on from the tune, I installed ScanGauge and performed intake mods. ScanGauge (SG) was simple, just swapped directly from 2nd Gen to 3rd Gen attached via the OBDii. I like it on the steering column, other people like it on the dash/radio bezel, to each their own.

    IMG_0760.jpg

    The intake project was interesting with some perceived performance gain and visually uncluttering the engine bay. This is the 3rd charcoal filter delete for me (Rav4/both Tacomas). Clearly, this "filter" requires your intake air to flow through a layer of charcoal rocks. See below. I'm assuming (not quantitative at all) that this filter has to reduce airflow area by 50% or more.

    IMG_20210304_111528684.jpg
    Filter cross section.

    IMG_20210304_111712961.jpg
    Filter cross section/carbon layer.

    After I pulled the airbox, I pulled the factory intake tube/resonator, removed the engine cover and the factory intake box to fender adapter. Then, I removed the foam blocks from the engine (showing wear at ~35k miles) and trashed them. I don't see how they serve any other purpose other than maybe? reducing noise.
    IMG_0713.jpg

    The factory intake tube/resonator, engine cover and the factory intake box to fender adapter went on a shelf. Then, installed TRD Accelerator, HPS intake tube, factory air box minus the charcoal filter and a standard Denso or WIX filter. The result is a simpler engine compartment and a more free flowing intake with a good filter. At 3,000+ RPMs the intake has a good raspy sound. My 10 yo son liked it!

    EngineComp3.jpg
    Simpler engine compartment.

    IMG_20210310_125743306.jpg
    Accelerator vs. Stock
     

Products Discussed in

To Top