1. Welcome to Tacoma World!

    You are currently viewing as a guest! To get full-access, you need to register for a FREE account.

    As a registered member, you’ll be able to:
    • Participate in all Tacoma discussion topics
    • Communicate privately with other Tacoma owners from around the world
    • Post your own photos in our Members Gallery
    • Access all special features of the site

JVC KD-R900 Pics and H.U. installation steps

Discussion in 'Audio & Video' started by Nosce te ipsum, Jul 11, 2010.

  1. Jul 11, 2010 at 3:32 PM
    #1
    Nosce te ipsum

    Nosce te ipsum [OP] New Member

    Joined:
    Apr 16, 2010
    Member:
    #35438
    Messages:
    4
    Gender:
    Male
    Las Vegas,NV
    Vehicle:
    04 TRD Offroad SR5
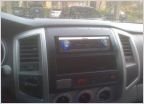
    I just recently installed a new JVC KD-R900 Head Unit for my '04 Tacoma that looks and sounds awesome! With that being said, I figured on posting a how-to tutorial on installing a single din aftermarket head unit for the 1st Gen Tacomas. This is to provide general assistance for anyone who might need help with this section.


    KD-R900 Day.jpg

    KD -R900 Night.jpg


    1. Disconnect negative lead on battery. It's not completely necessary but it's good to do as a safety precaution.

    2. Remove climate control knobs. These are easily removed by firmly pulling them straight off.


    3. Remove the plastic plate surrounding the climate control knobs. This can easily be done by gently prying it off with a flat head screw driver.

    4. Remove upper black plastic molding. This houses both the A/C unit and factory radio. There should be 2 screws with one on the right hand side as well as one in the upper left hand corner. Once this is done, you can pull back the molding by grabing the A/C vents and pulling backwards. As a reminder, be sure to keep any screw or piece of harware that is removed to resecure pieces after installation is complete.

    5. Remove the plastic molding at the bottom. This piece houses the two 120 V plugs and the ash tray and is either tan or gray depending on the color of the interior. There are two circular plastic anchors on either side that should be removed before pulling the molding off. It doesn't need to be completely removed, however the more this piece comes off the more space is available to pull back the black plastic molding from step 4.

    6. Remove factory radio. There will be 4 screws with 2 being on either side of the factory radio to easily remove. Once this is done, make sure to disconnect the wiring harness and antenna from the back of the radio.

    7. Connect aftermarket wiring harnesses to the stock wiring harnesses. I suggest on using aftermarket harnesses opposed to cutting the factory harnesses. For 1st gen Tacomas there will be 2 of them to connect. The one I used specifically was the Metra 70-1761 which saved me a lot of head ache.

    8. Splice aftermarket harnesses to the new head unit harness. To save time, I suggest on splicing the harnesses before anything, although it's not necessary.

    9. Take the brackets off the stock radio and secure them to the new head unit. I would check to make sure your new head unit will be compatible with the old factory radio brackets, otherwise it might require purchasing an install kit which would include aftermarket brackets. On the new unit I had installed, the two brackets were able to screw on with no problem.

    10. Secure plastic pocket to the brackets underneath the new head unit. Although it is optional to do this step, the plastic pocket will look much more asthetically pleasing than an empty gap underneath the new head unit. I personally used the Metra 88-00-8000. There is also the Scosche TA2154B/TA2154 pocket as well, although I think the Metra looks a little better and is more durable.

    11. Secure the new H.U./pocket in the location where the factory radio had been mounted. Use the 4 screws from before to mount the new unit/pocket. Make sure to connect the harness as well as antenna to the back of the new unit. Reconnect negative lead to the battery if you had chosen to disconnect it ealier in order to turn on and test new unit for proper functionality.

    12. Resucure plastic moldings, climate control plate, and A/C knobs by reversing steps 2-5. Start with resecuring the bottom molding first and then moving on to the black plastic molding above. The plate surrounding the climate controls should then be snapped on and then the climate control knobs put back into place. Be sure to secure all the necessary screws from before back into place to make sure the moldings are properly secured.

    Conclusion: Although the installation for an aftermarket head unit is fairly simple for the 1st gen Tacomas, the process itself may not go all to plan as anticipated. As with my installation I had just a little bit of trouble getting the pocket to fit at first but after readjusting the screws I finally got it to fit in place pretty well. I layed out the steps according to my experience with the installation which again is a pretty general outline of the list of instructions. If you are having any trouble do not hesitate to post a comment as I will try to help out the best I can with any issues that you may have with this section. Have fun and enjoy your new stereo as I do with mine!
     

Products Discussed in

To Top